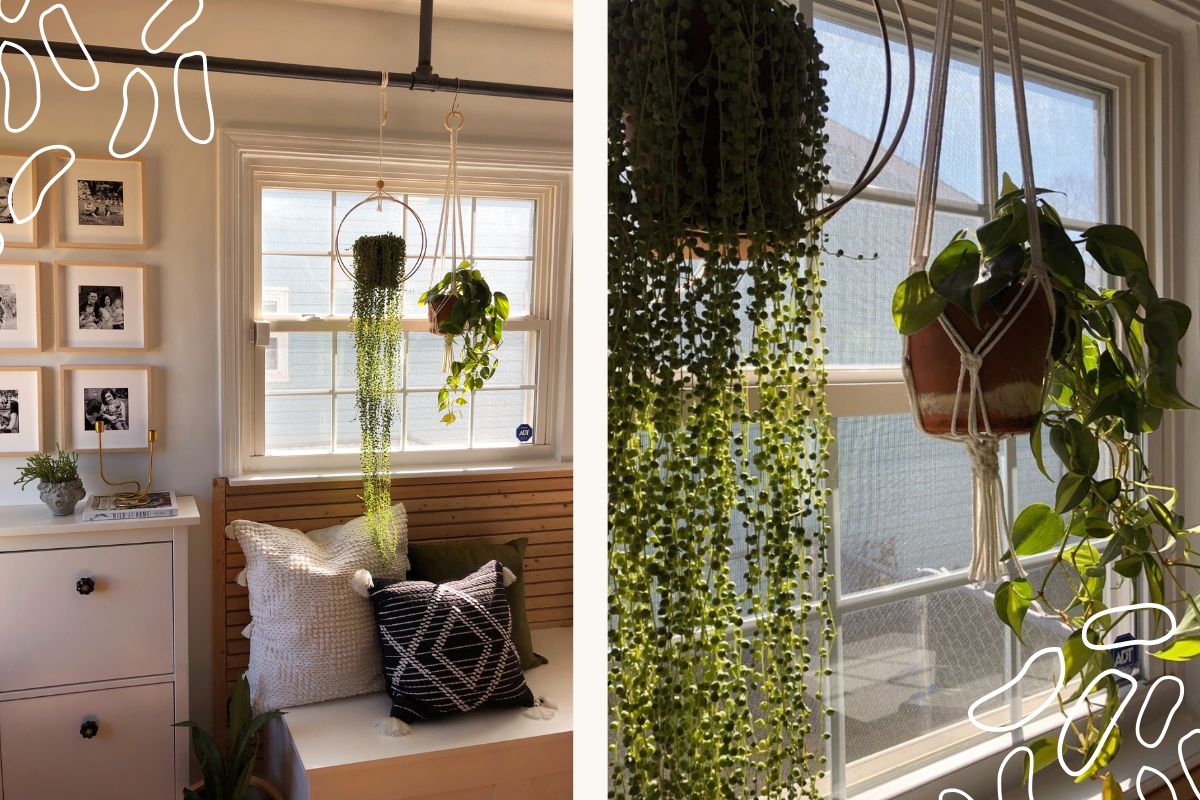
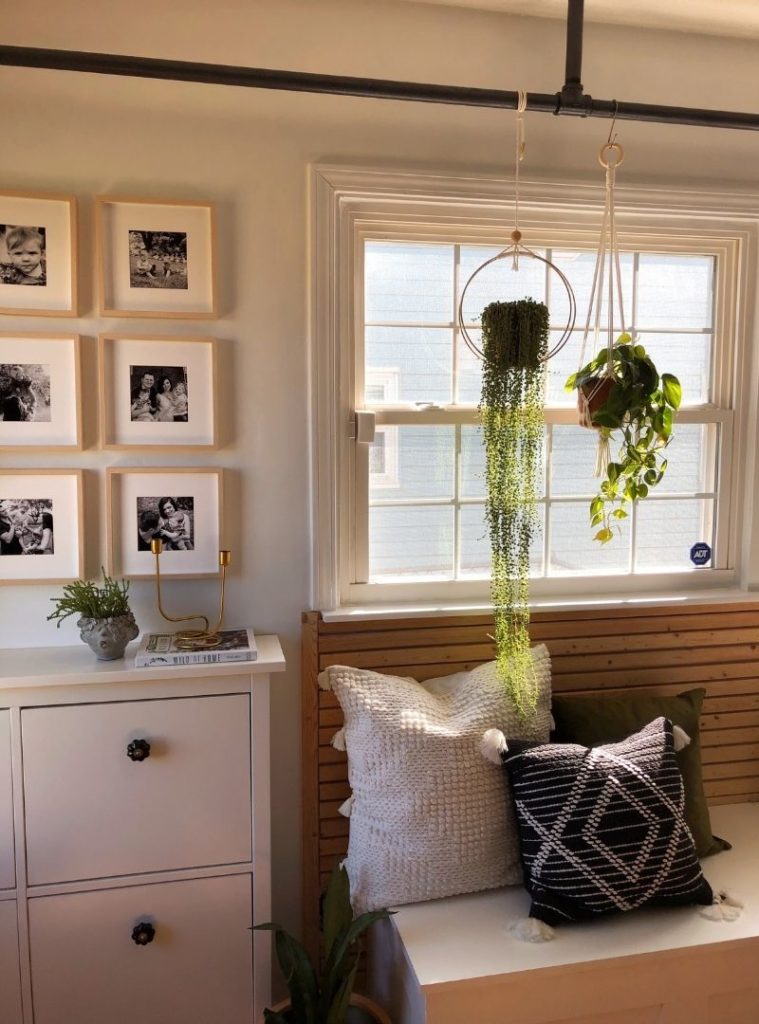
You know a trend is here to stay when it becomes familiar even to the fashion-blind. Like jeans… or macramé! Popular in the 70s, macramé has made a comeback in home accessories loved by millennials and crafters of all ages. Today, we’ll walk through a simple macramé plant hanger DIY that will beautify your space and elevate your plant displays (literally and aesthetically) to new heights.
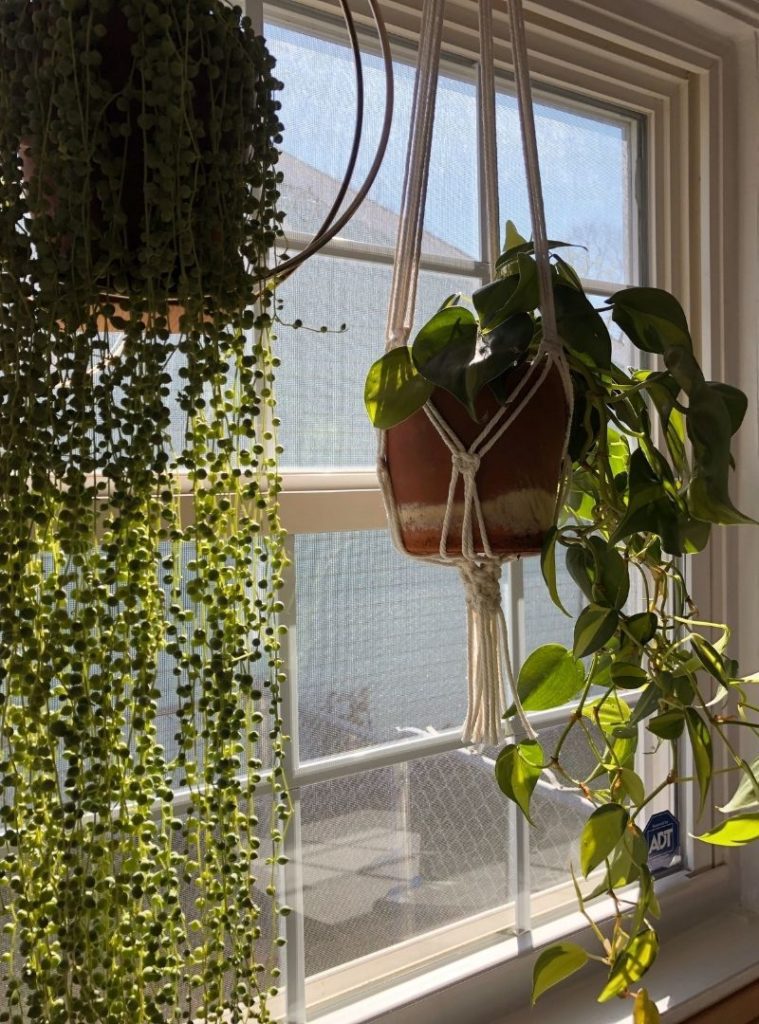
Not only does macramé add a cozy element to any room, but it allows you to fit more plants into your space. As an added bonus, you don’t have to worry about getting macramé wet when watering your plants; the natural fiber will just absorb the moisture and release it into the air.
Plant hangers are THE perfect project for macramé beginners. You’ll be pleasantly surprised by how easy, inexpensive, and beautiful this project is. If you’re new to macrame, this simple hanging planter will open your eyes to the many ways macrame can compliment your plant collection (did anyone say disco ball diy for air plants? 😂 LOL yes – we did that too).
So pull out your craft scissors, measure your favorite potted plant, and let’s begin!
how to make a simple macramé plant hanger
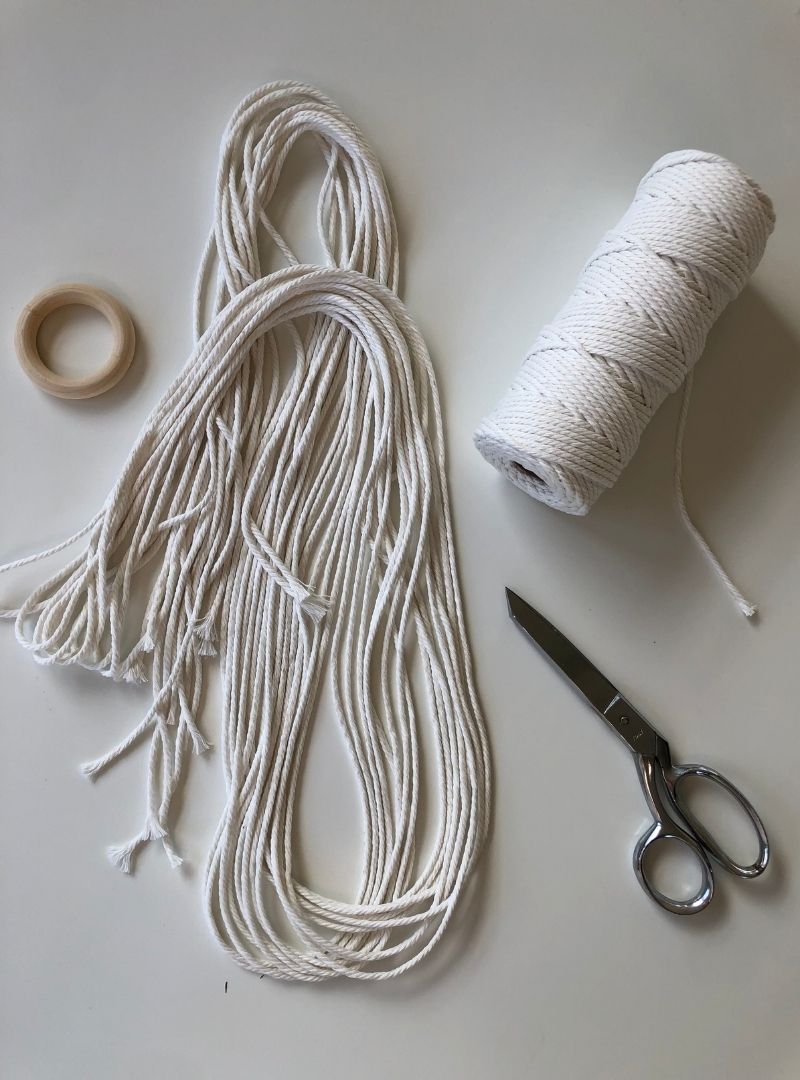
macramé supplies you’ll need
- macramé cord
- Small Wooden Rings
- Scissors
- Tape or bar to secure the cords while you work
basic macramé knots
Macramé is all about the knots. Once you know the basics, you can combine them in beautiful spiraling chains and tapestries. Before you go buy out the craft store, let’s get a handle on the basics! Here are some basic knots that you’ll need to get started on your own unique macramé plant hangers.
lark’s head knot
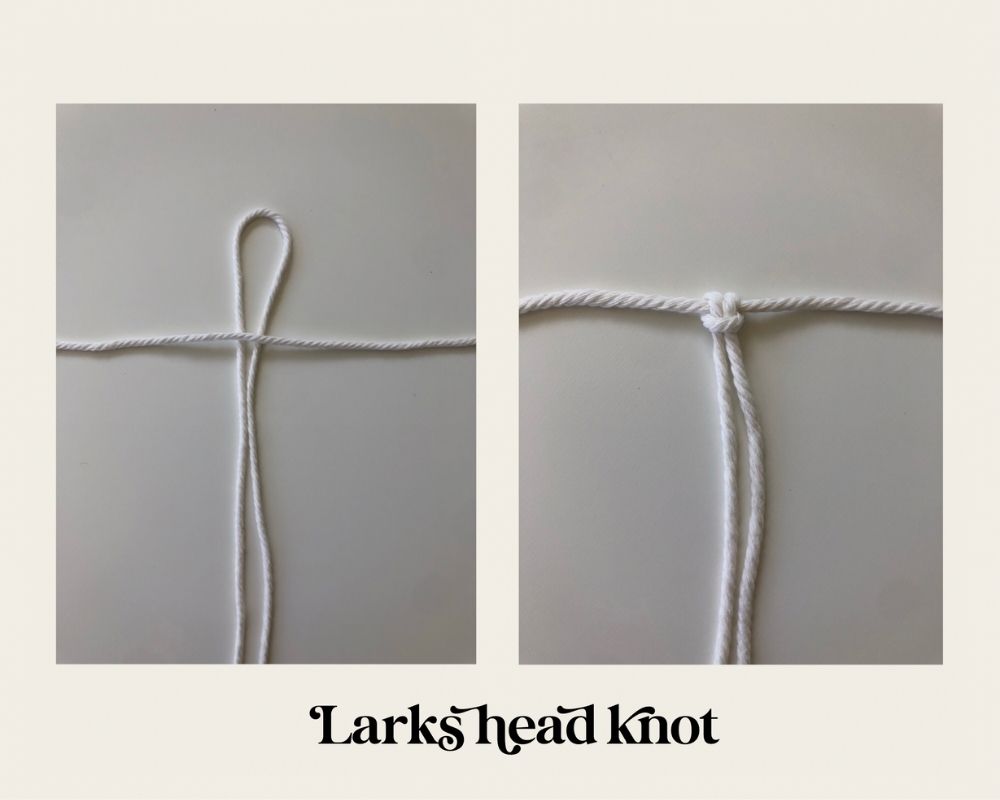
To make a lark’s head knot, take a string and fold it in half. Keeping it folded, wrap it around your project and push the loose ends through the folded end of the string and pull. This is one of the easiest macramé knots you can make.
gathering knot
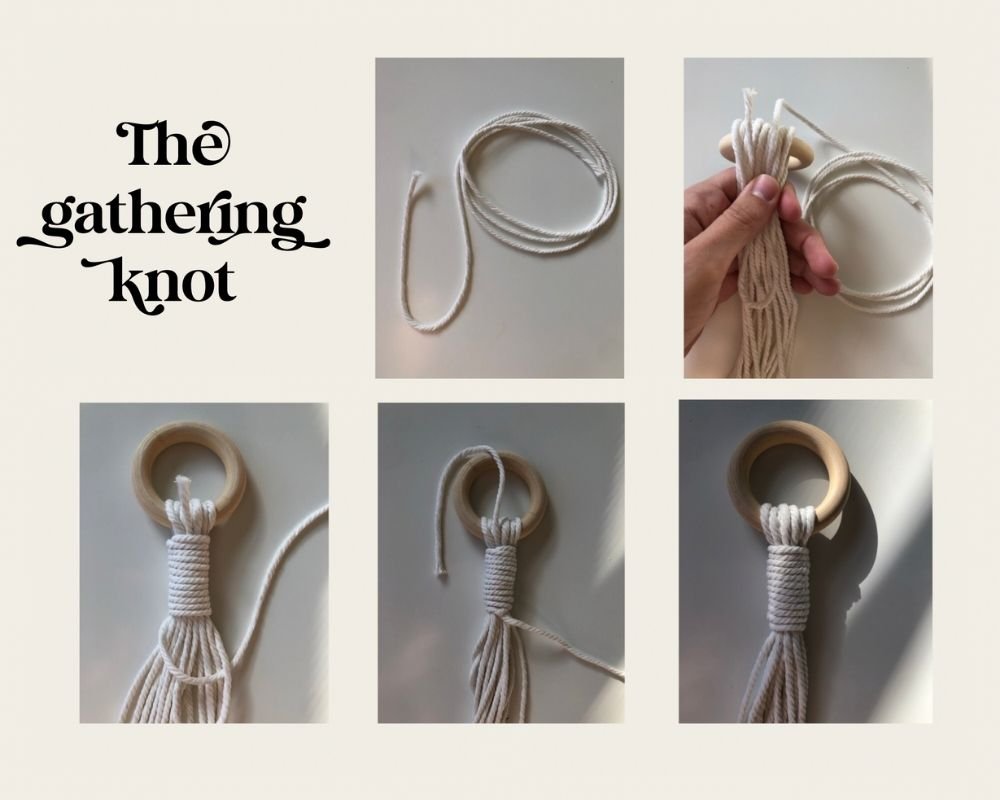
A gathering knot is often used to start or finish a hanging macramé piece – in this case, your plant hanger! It’s an easy way to tie a bunch of strings together for a clean finish. And trust me, it looks more difficult than it is 😉
- Take a longer string and create a u-shape with it at one end. The u-shape should be slightly longer than you visually want the gathering knot to be wrapped around your cords.
- Pinching the u-shaped end of the string to hold its shape, hold it to the group of cords you are tying together. It’s easiest if you have all the strings gathered in your hand (keeping that u-shape intact).
- Take the opposite end of the string and begin wrapping it around all the cords. Start wrapping at the top, leaving a small amount of string from the u-end showing, and work downward towards the folded end of the U.
- When you are finished wrapping, take the remaining cord in your hand and thread it through the loop that is now sticking out of the bottom of the wrapped section of strings.
- Grab the piece of string that you left sticking out at the top in one hand, and the string that was threaded through the loop at the bottom in the other. Gently pull both strings until the loop at the bottom disappears. The knot should now be tied underneath the wrapped strings. You can trim or hide any excess string sticking out.
square knot
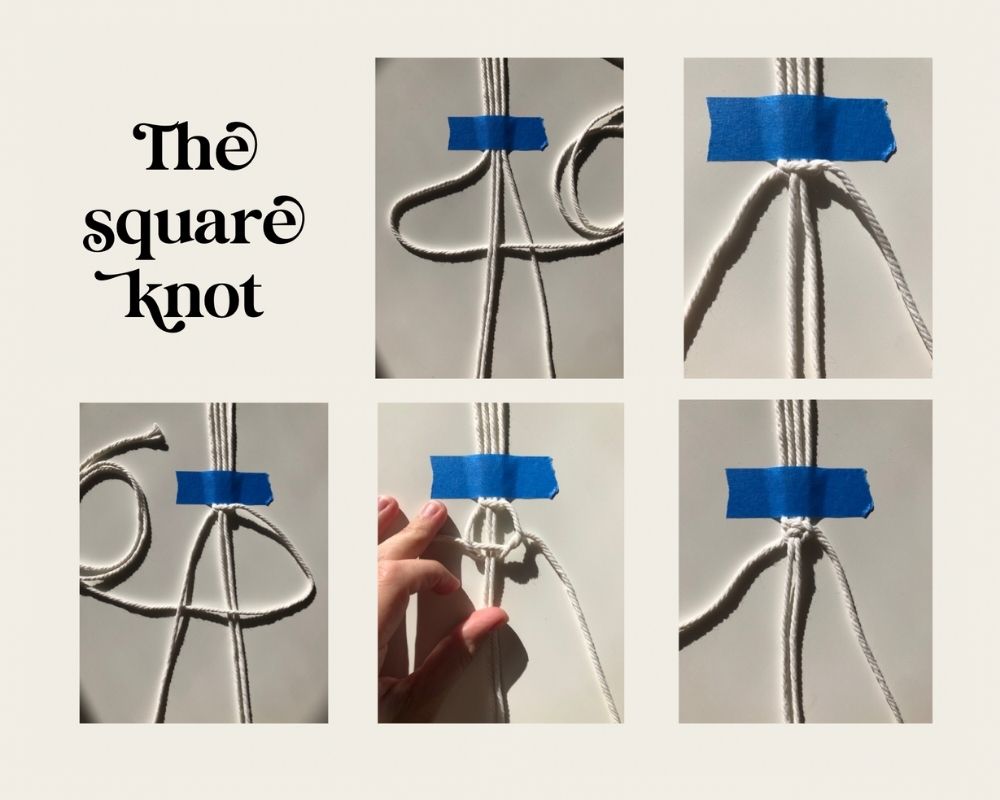
Scouts and sailors have an advantage on this one. To create a square knot, you will need 4 strings. The knot is made in two parts.
Part I
- For the first part, lay your 4 cords out so that you have a left cord, two middle cords and a right cord.
- Weave the left cord over the middle cords and under the right cord.
- Weave the right cord under the middle cords and through the left loop.
- Pull it tight without letting your cords twist. This is the end of the first step and completes what is also known as the half square knot. Congratulations!
Part II
- For the second part, you’ll follow the same steps in reverse and opposite order 🙃
- Weave the right cord over the middle cords and under the left cord.
- Weave the left cord under the middle cords and through the right loop.
- Pull the ends gently again without letting the cords twist. This completes the square knot! By itself, this is also known as the right half square knot.
spiral knot
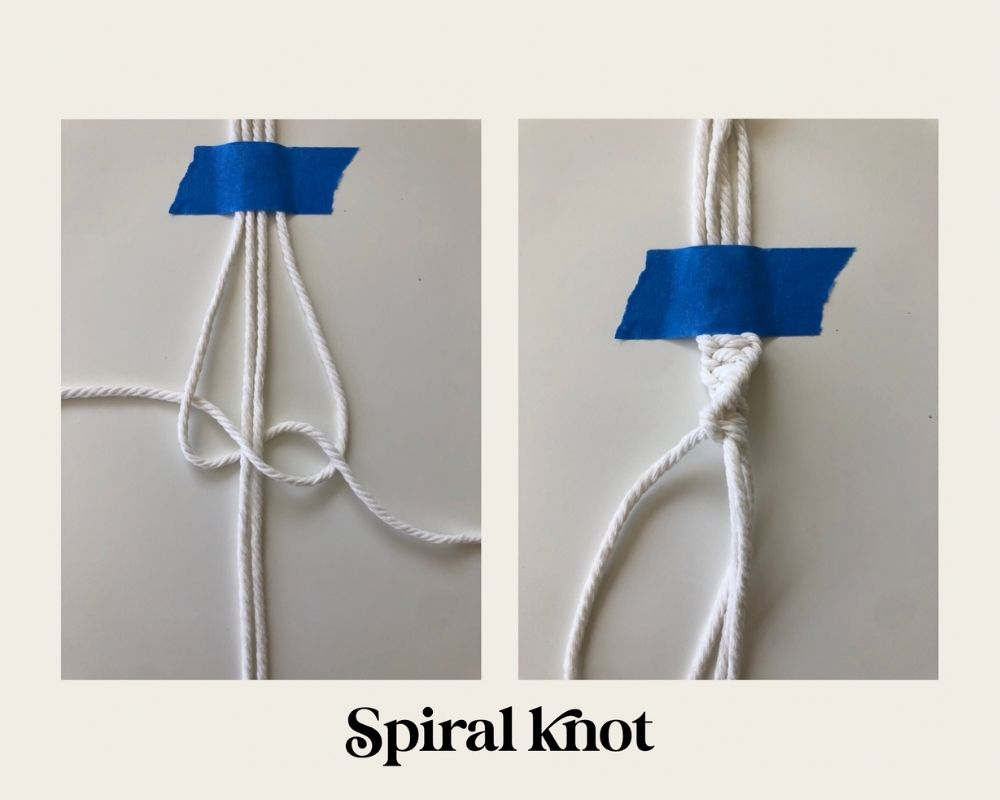
Now that you know how to do the square knot, you already know how to do the spiral knot! It is just a repeat of the half square knot (part I of the square knot) over and over. The knots will begin to spiral on their own like a double helix 🧬 Like the half square knot, you need four cords to do complete this knot.
DIY macramé plant hanger, step-by-step
Are you ready to put your knots to the ultimate test of holding your plant baby?! Now that you’ve learned some basic macramé knots, putting them together will be a breeze. The hanger looks more difficult than it actually is.
This macramé plant hanger tutorial uses the gathering knot, square knot and the larks head knot. Let’s begin!
measuring macramé cord
Before you start knotting, it’s helpful to know a couple of things about measuring macramé cord so you can freestyle if you want to! This tutorial will guide you through making a 24” macramé plant hanger. However, the general rule of thumb here is that your starting cord length will be 4x your finished project length. If you’re doubling over your cords (this gives a sturdier hanger), you’ll need 8x the amount of cord.
Measure the height of your potted plant, and then add the length of the hanger that will suspend the pot. You want to give your plant space to spread out, so doubling the length of pot+plant and adding the lengths is a good place to start. Here’s a formula to make this easy:
macramé cord length = [(pot height+plant height) x 3] x 4
You can use this formula to change the size of pretty much any macramé project out there.
step 1: cut macramé cords to length
This tutorial will guide you through making a 24” macramé plant hanger with doubled cord. I am using eight cords that are roughly 72″ in length.
This will give me 16 cords that are roughly 32 inches in length. There will likely be excess cord when we are finished because we won’t be using an intricate knot pattern on this project, but it’s definitely better to have a bit too much than not enough! This is also why I only did 3x my project length instead of 4. The more knots you make, the more cord you use up while working.
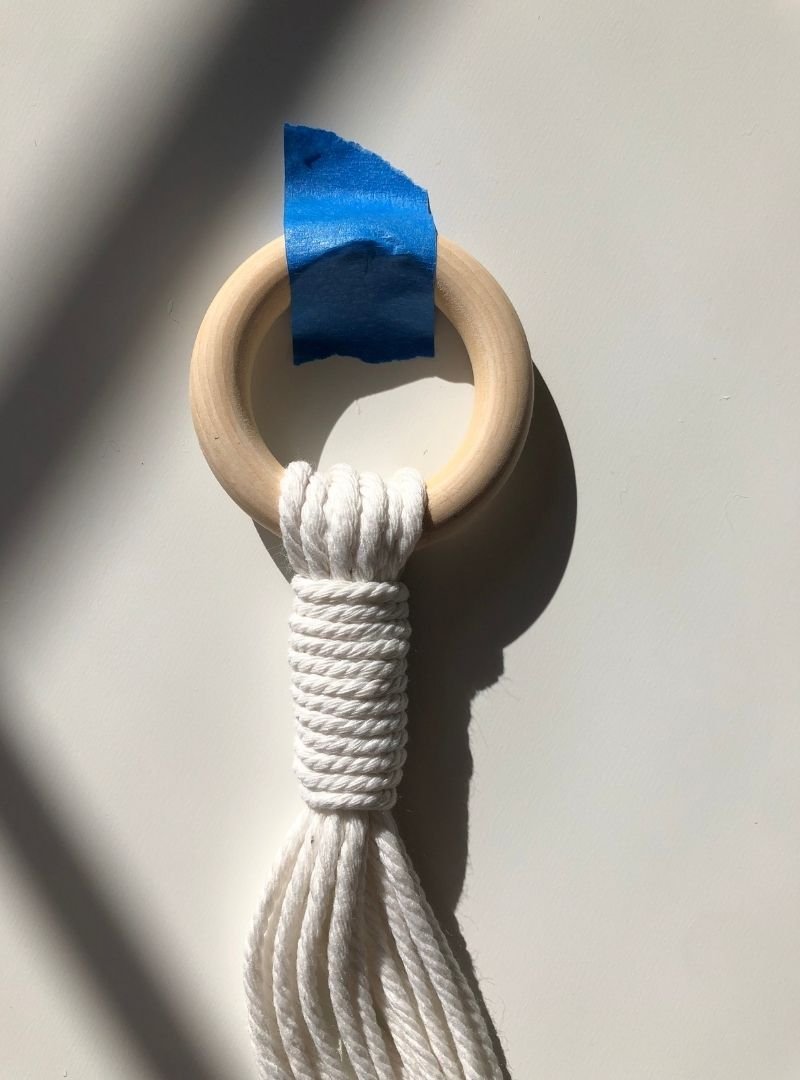
step 3: attach your macramé cord to the wooden ring
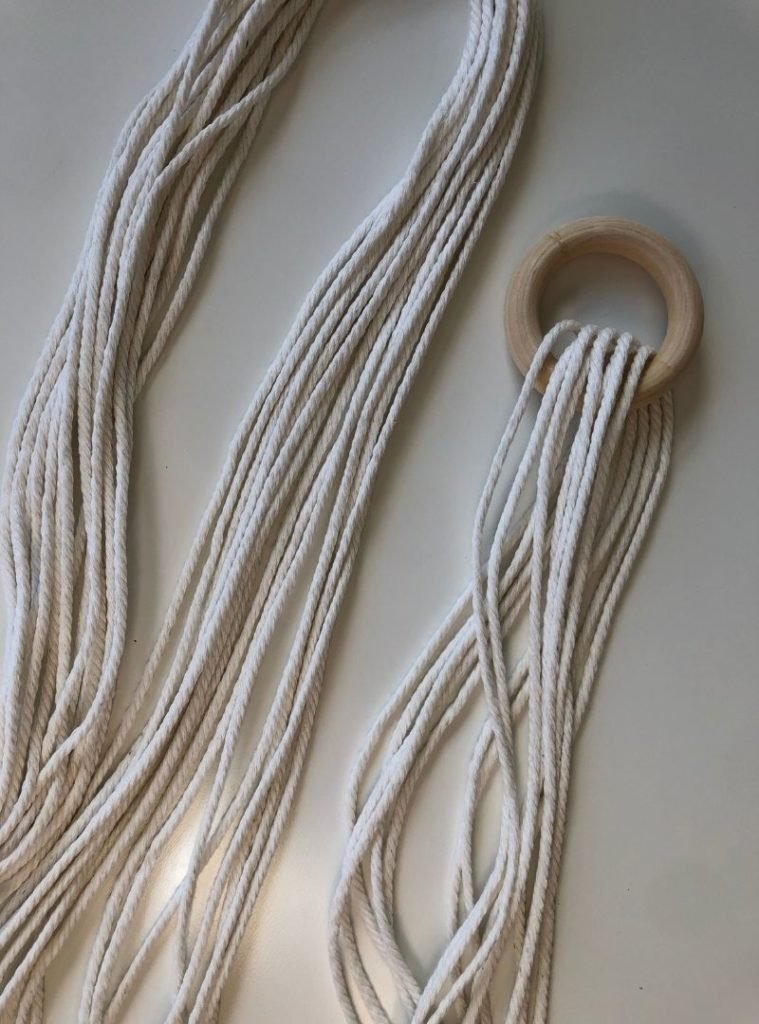
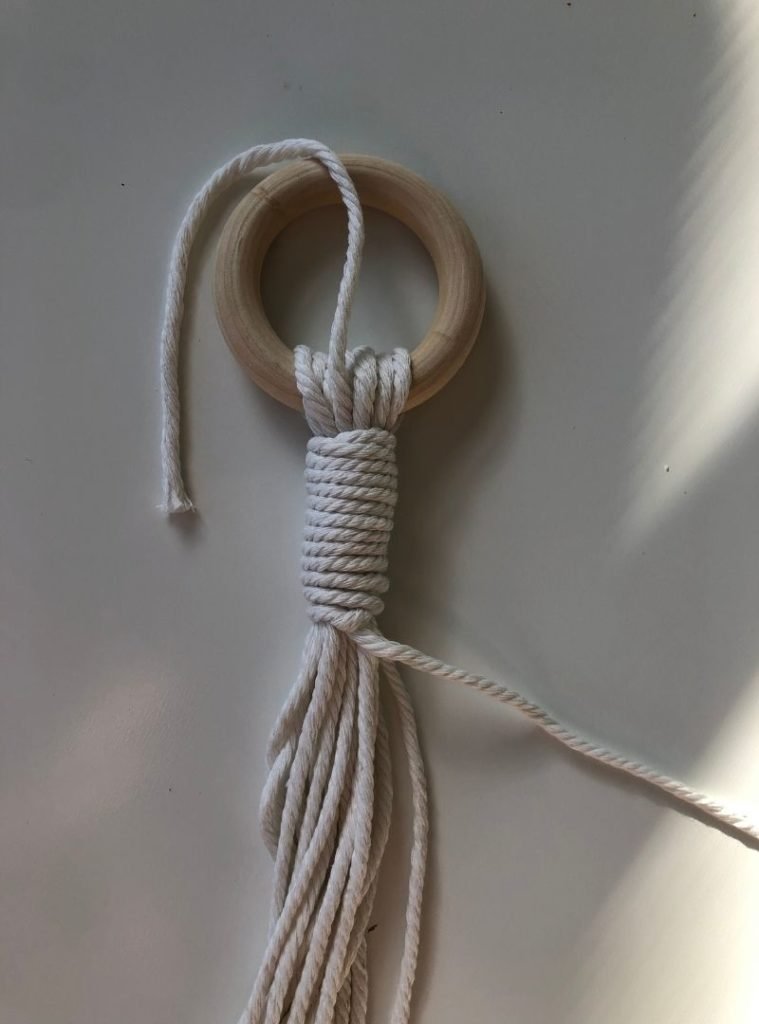
Once you’ve determined your cord length and cut your pieces you will need to attach the string to your wooden ring.
Drape your cord through the ring so that it is folded in half. This should leave you with 16 cords hanging down.
Next use an 18′ string to create a gathering knot around all of them, just below the ring, to secure the cords.
step 4: secure the hanger to your work space
Whether you tape the hanger to a table or hook it onto something else, you will need to secure the plant hanger while you are working. I prefer to do this hanging because it helps keep cords in line with each other, but for the sake of photographing this tutorial, I’m working on a flat surface for most of the steps (you’re welcome!). 😄
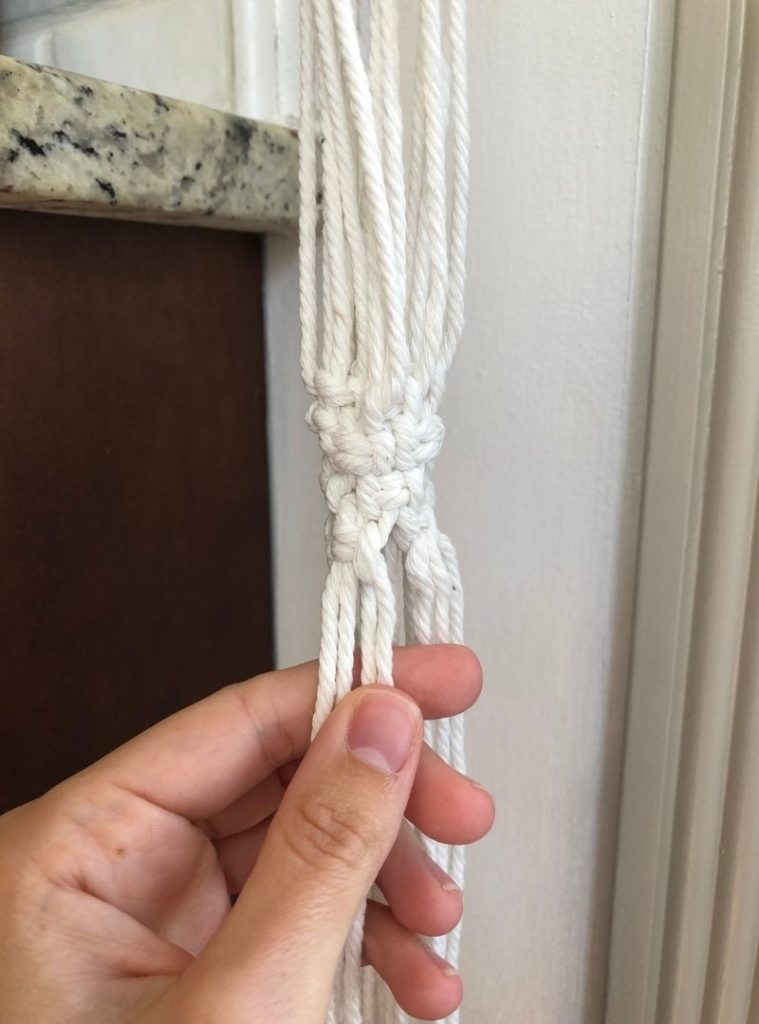
step 5: group your cords and start knotting
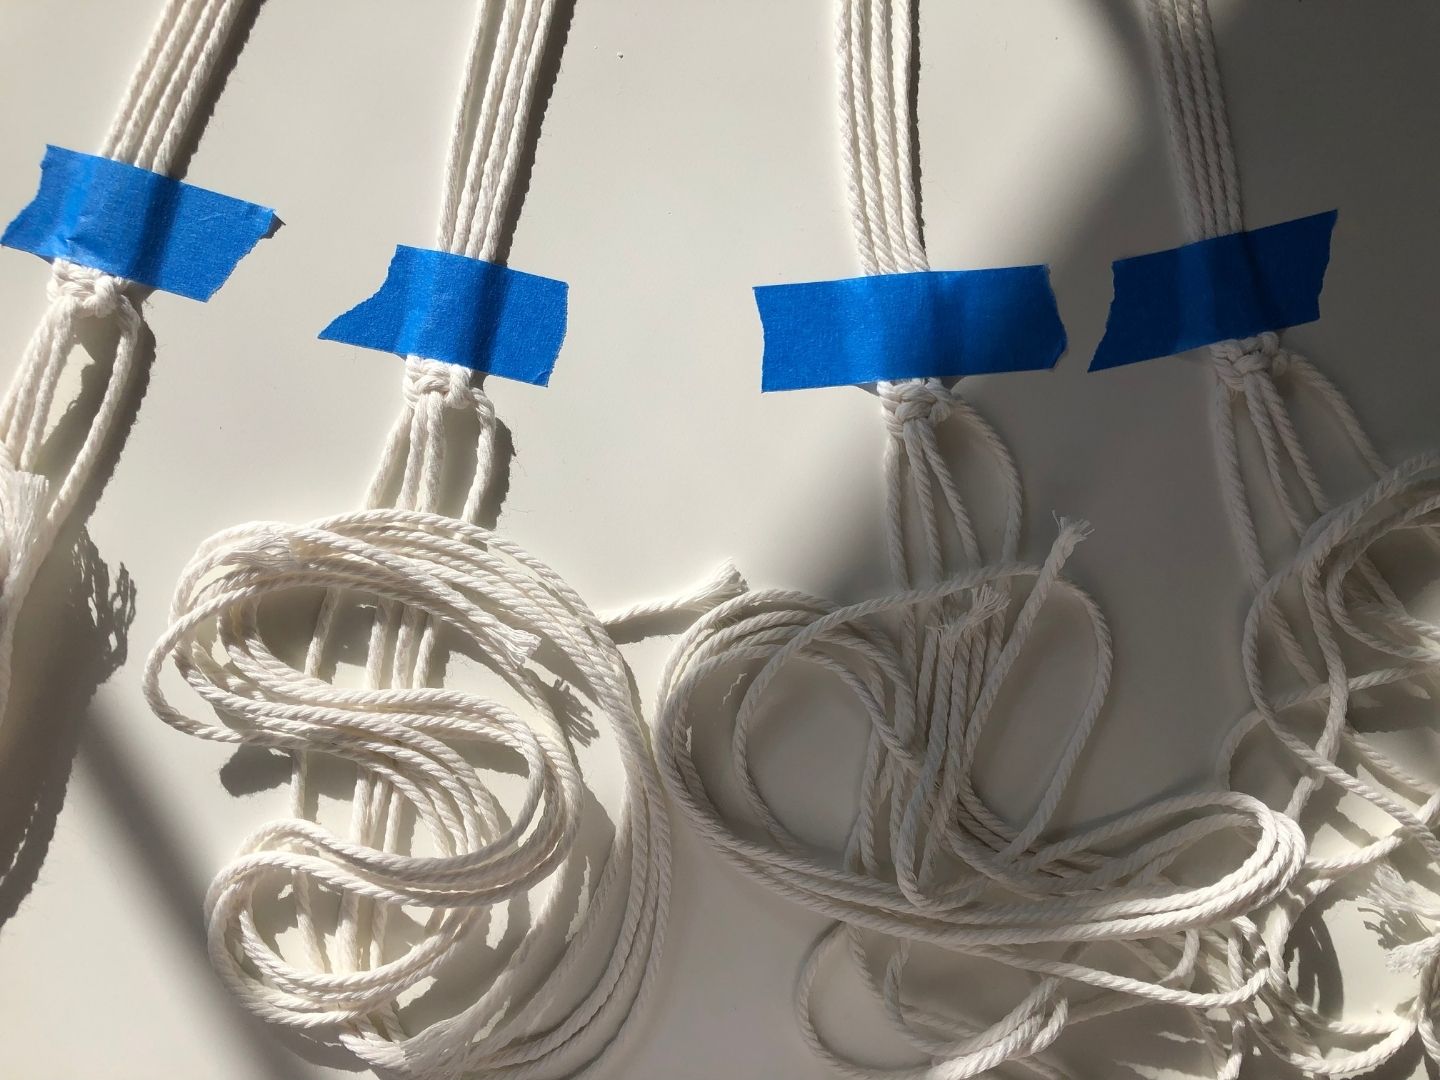
Once your hanger is secured, separate the 16 cords into four groups of four. These cord pairings will be your first knots.
The first knots should be about 16-18 inches below the wooden ring at the top of the plant hanger. You can use a piece of tape to mark where the knot needs to be to keep the knots level in each section.
For this style of plant hanger, we will be using the square knot to complete the next few steps.
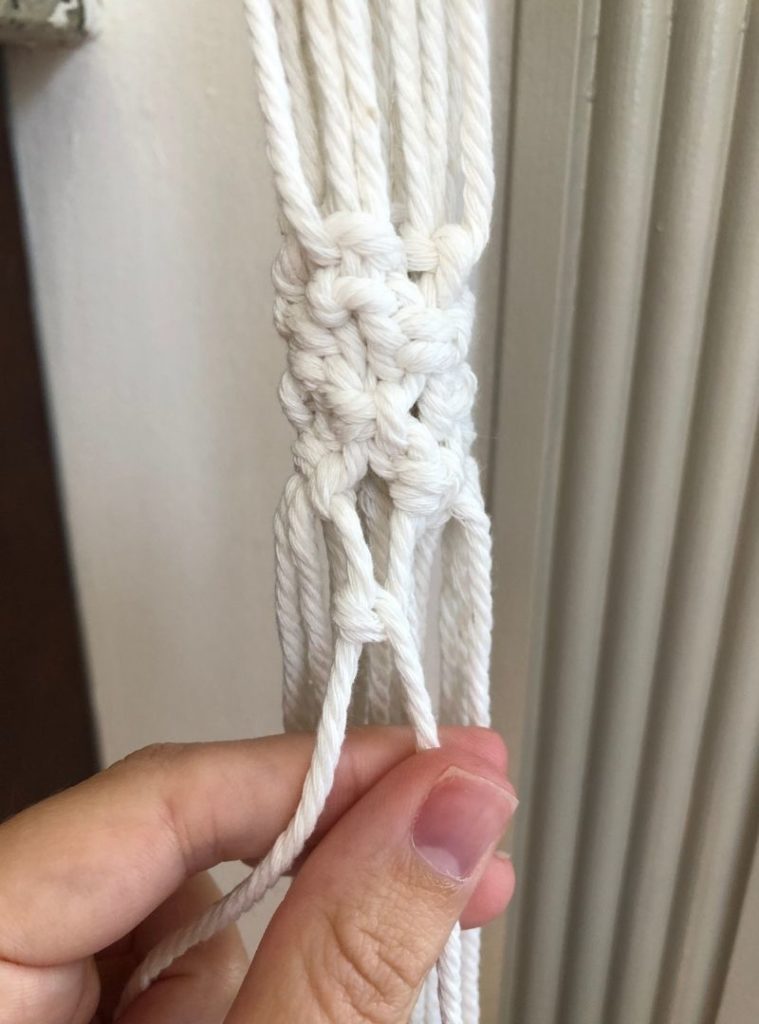
step 6: regroup and repeat
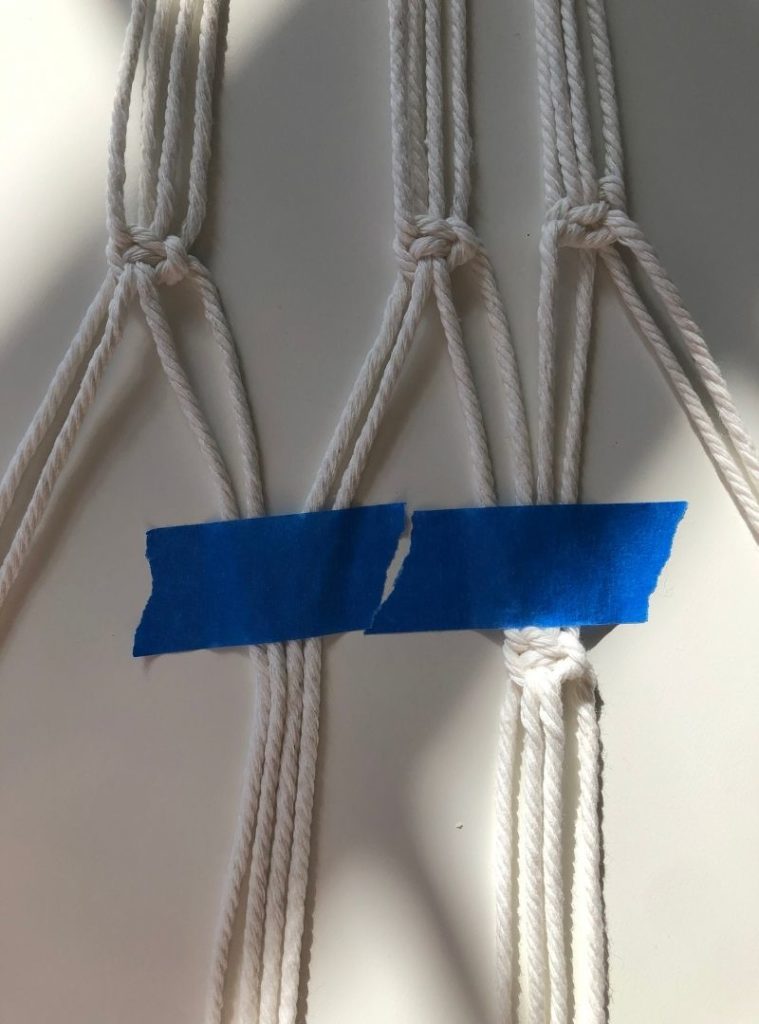
Once you have made the first four square knots, regroup the cords by taking two cords from one knot and two cords from another. This should leave you with four new groups of four. Make sure to group the cords so that when the planter is hanging, it forms a little net where the pot can sit.
This second row of square knots should be roughly 2-2.5 inches below your first knots.
step 7: knot off the bottom of your hanging planter
Repeating steps 4 and 5 again, you will regroup your cords into four new groups of four. Make a third row of square knots approximately 3 inches below your second row from step 5. This is the start of knotting off the bottom of your hanging planter.
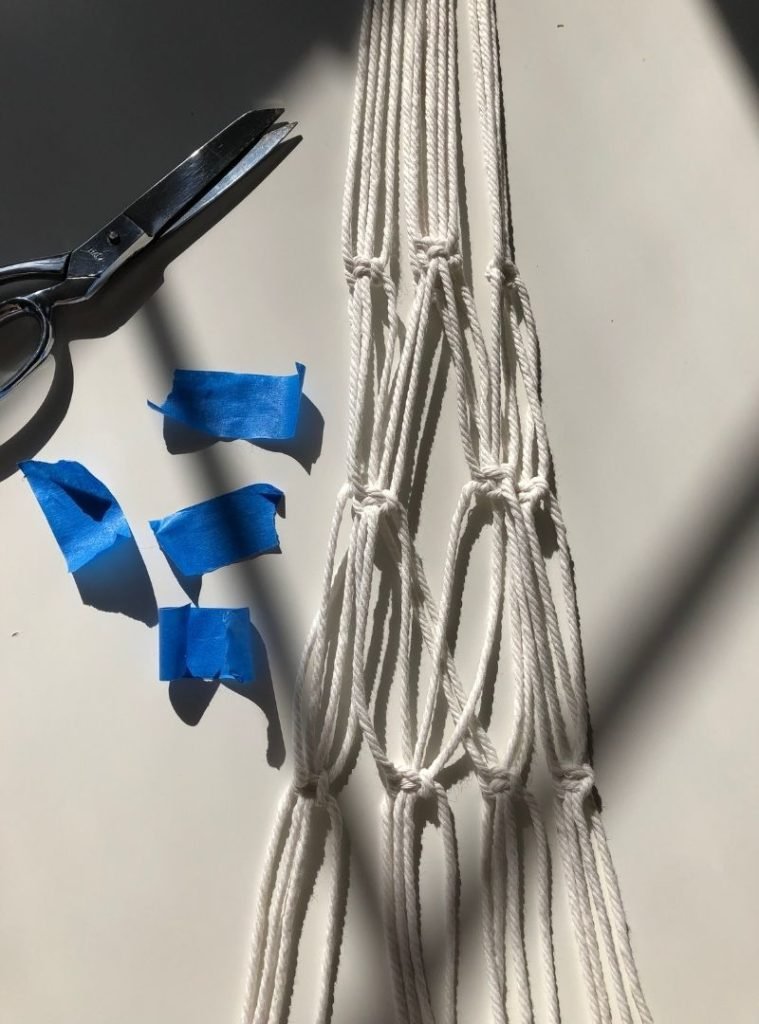
Next, create three additional rows of square knots after your third group. These will all be back to back instead of spaced out, like your first three rows. With each row of square knots touching, a tight circle/cluster of knots will form, which will serve as the bottom of your hanging planter. This step is easiest to do while your planter is hanging so that you can make sure you are grouping the correct cords to complete the circle.
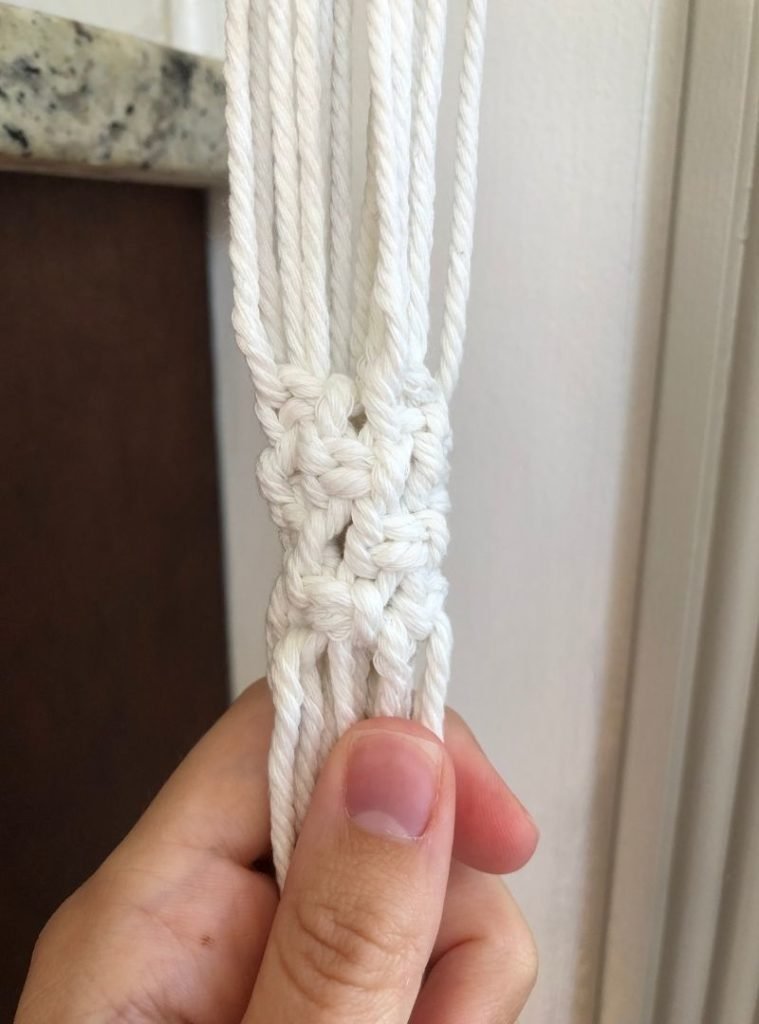
When the base of the planter is complete, you will have 4 rows of knots all touching. You can now take the two cords between each of the final knots and do a half stitch knot just to close the circle up more. No, we didn’t go over that knot – but you already know how to make a half stitch! A half stitch knot is simply the first step in tying your shoes.
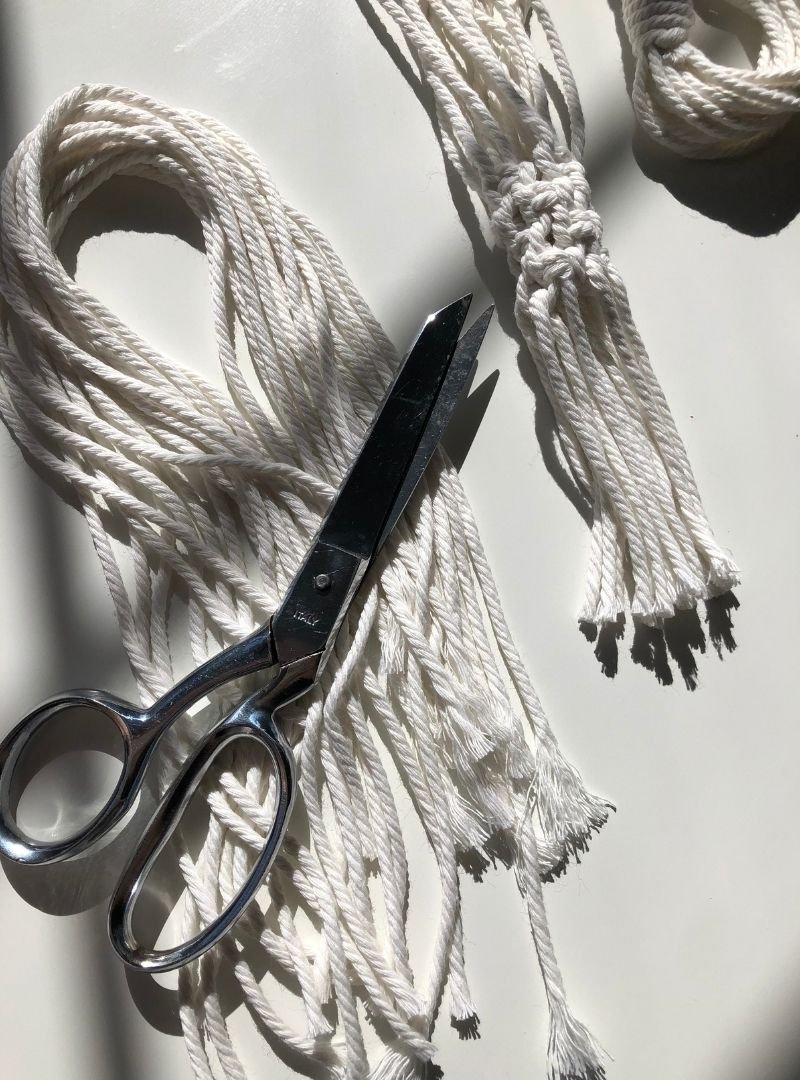
Leave about 3-4 inches of cord (or however much length you prefer) as a fringe under your cluster of square knots and cut any excess string off.
step 8: (optional) add a decorative fringe
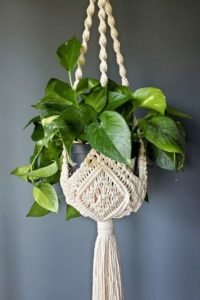
For a fun finish to this gorgeous, woven plant hanger, try adding a fringe around the base of the project (at the base of where the pot will sit). It will look something like this:
For this step, you will be using the super simple lark’s head knot with a dubbed cord.
Take 72-, 10- or 12-inch cords (decide which length you like and make them all the same), and tie them onto the section of cord between your first and second row of square knots. Nine cords will go on each section.
Once all of the cords are attached, you have a couple of options for trimming. You can either leave them all the same length, or cut them in a V-shape on each side for a pretty angular detail. You can also choose to leave the rope cords twisted as they are or comb them out for a different look. So many choices, I know! Choose whichever option compliments the texture of your plant.
step 9: hang your macramé plant hanger DIY project
Place a potted plant in your new macramé plant holder and hang it to display! Continue reading below to find out how to securely hang your diy plant holder.
tips for hanging a macramé plant hanger
The sky (or maybe your ceiling, LOL) is the limit when it comes to hanging your macramé creation. There are just so many ways you can display these plant hangers. Pretty much all of them do require that the hook or attachment you’re using to hang your planter from are firmly anchored though – otherwise it’ll sag from your wall or fall from the ceiling. Here is what you need to hang your macrame plant creation:
When choosing your mounting hardware, keep in mind that potted plants can be very heavy, especially after a thorough soak. The best way to make sure that your plant hanger is secured is to use drywall anchors when installing the hooks your planters will hang from. Here are a few other tips for setting your plants up for success in their macramé hammock:
- select the correct hook. The hardware store sells a variety of hooks. Some support more weight than others so you need to be sure that your hook is able to support 50+ lbs.
- use the correct anchor. In addition to selecting the correct hook, you also need to make sure that your dry wall anchor is made to support the correct weight on its own as well. Please note that you cannot combine the weight limit of the hook and the anchor for an increased total weight limit. Each piece should be able to hold enough weight on its own.
- use the correct size drill bit. Read the instructions on your hook before you start. It will tell you what size drill bit that you need to properly install the drywall anchor.
- wear safety gear. Drilling into a ceiling can make a bit of a drywall mess. It is also easy to get the drywall dust into your eyes and/or airways standing under where you work. Wear safety glasses as well as a mask to prevent irritation or injury.
where to find macramé plant hanger patterns
Once you have the basic knots down, following macrame patterns is a breeze.
Here are some of our favorite macrame patterns for anyone with a love of both craft and plants:
This plant hanger features a detailed diamond-weave. It’s a couple of levels more difficult than the pattern in this article, so make sure you have your knots down before giving it a go!
- Level: intermediate-advanced (it includes a visual knot guide, so ambitious beginners are welcome to try!)
- Measurements: fits pots 6-7 inches in diameter

Explore the roots of macrame with this digitized vintage pattern guide straight out of the 1970s. Part cultural-artifact and part instructional guide, this pattern guide features all levels of macrame projects, including several plant hangers. Plus, it makes a great coffee table book.
- Level: beginner-advanced
- Measurements: several patterns included

Get everything you need to get crafting right away in this beginner-friendly plant hanger DIY kit. It’s designed to hang on a wall and is well-suited to trailing and vining plants like the string of pearls pictured. English ivy, pothos or burro’s tail would also look awesome with this design.
- Level: beginner-intermediate
- Measurements: fits a variety of small to medium pots (27.5” long x 12” wide)
closing thoughts
Once you have a better understanding of macramé knots, you’ll get so good that you’ll easily be able to replicate many simple plant hanger patterns without a tutorial at all. You can get creative with wooden beads and colored macramé cord too!
More How To Guides
- How To Get Rid Of Scale On Plants
- DIY Terrarium Table: How To Make A Table With Plants Inside
- How to Use Leca for Plants: Step-by-Step Guide with Pictures
- How To Use Grow Lights For Indoor Plants
- How To Propagate Peperomia Plants 2 Ways
- DIY Propagation Box With Grow Light
- How To Make Pothos Fuller (In 5 Minutes)
- How to Make a Moss Pole for Your Climbing Plants
- How to Make Potting Soil for Indoor Plants, Plus My Secret Ingredient
- How to Propagate a Split-Leaf Philodendron: Easy Step-by-Step Guide

Marquis *wants* to know how to keep happy and healthy plants, but had a hard time finding information that wasn't written by just another copywriter. After nearly losing one too many plants, it was time to take matters into her own hands. A team of plant scientists and nursery hands was brought together and The Indoor Nursery was born.