Ceiling hangings and wall mounts have been popular ways to support climbing houseplants, but a more movable option is gaining traction: to construct your own moss pole. This DIY indoor plant care project is a great way to get your climbing plants to stand upright and fill vertical space in your room.
In this post, I go over two ways to make a moss pole. The first way I tried myself, which I give detailed instructions below. The second method is the one I’m recommending and you can jump ahead to the instructions here.
Why use a moss pole?
Moss poles provide a central irrigation system to the plant, as well as physical support for vertical growth. Porous and absorbent, moss is an avascular plant, meaning it doesn’t have an internal water distribution system. Living moss is adapted to absorbing rainwater and water vapor from the air, and many mosses can tolerate long periods of time without water.
The absorbent nature of moss has made it a great growing medium or additive to quick-draining soils. In moss poles, dead moss is used to absorb water from the soil or Leca that it’s planted in to slowly distribute moisture vertically to the plant attached to the pole.
Climbing plants have small root hairs along their vines and stems to attach themselves to bark, lichen, and moss on trees in the wild for moisture and structure, both of which your indoor plants will receive from a moss pole.
Read more: An expert explains how to use moss poles for houseplants
What kind of moss for a moss pole?
Sphagnum is a type of moss harvested from wetlands, and this is the best moss to use for moss poles. It’s a widely available product that’s used for craft purposes as well as indoor planting.
When Sphagnum moss dies and dries out, it leaves a fibrous and substantial material that can be used as a sponge to absorb and deliver water for climbing plants.
How do moss poles keep plants hydrated?
Your moss pole will be planted in a pot, and whether the growing medium is potting soil or Leca, the moss will wick water from the pot and absorb it upwards. This wicking process, known as capillary action, draws moisture upwards through the absorbent cavities of the Sphagnum as the water adheres to the fibrous material and surface tension raises the water molecules upwards. This encourages vertical growth in climbing plants by giving them access to water along the height of the pole.
What are the best plants for growing on a moss pole?
Moss poles are made for climbing plants, which have small aerial roots on their vines or stems that cling onto vertical surfaces as the plant grows. Ivy, philodendron, and pothos are popular vines that do well on moss poles.
A monstera plant is also a good candidate for a moss pole, although these will need a sturdier, taller moss pole than smaller plants to support the large leaves that the Swiss cheese plant is known for.
Moss poles provide a textured surface for the plants to attach to and grow up. Wood, metal, and plastic poles and stakes have too smooth of a texture for the plants to hold onto alone.
The moss adds footing for the plants with the benefit of an ever-present water source along the height of the structure, which they absorb by their aerial roots. Having a constant water source along the pole will help the plants grow thick stems and big leaves, which they’re best able to do when they have a sturdy support.
How to make a moss pole for your climbing houseplants
A DIY moss pole is easy to assemble and requires only a few materials that will last for several years. The resulting pole is a mesh tube that is filled with Sphagnum moss, and can be reinforced with a sturdy central pole to support larger and heavier plants.
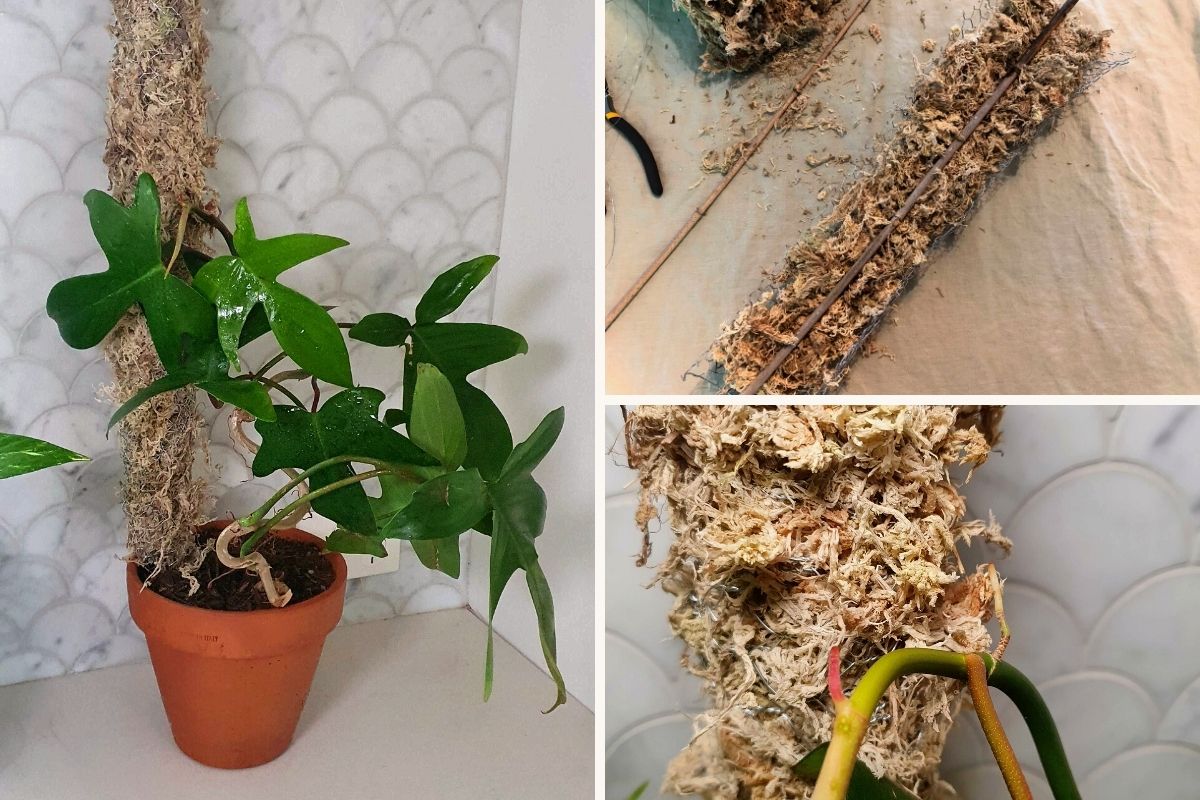
2 MONTH UPDATE
So I’ve been using these moss poles from the instructions given below for a couple of months now and I’m here to tell you: this is not the way.
The moss ended up being bone dry and misting it daily wasn’t my thing (and it didn’t work anyway). Since I’m currently in the process of moving across the globe, I don’t have the set up to try a different method.
I do, however, recommend this method by Erika Lodes, which makes a self-watering moss pole:
What you need for a self-watering moss pole
If you are placing your moss pole in Leca, then this method may be suitable:
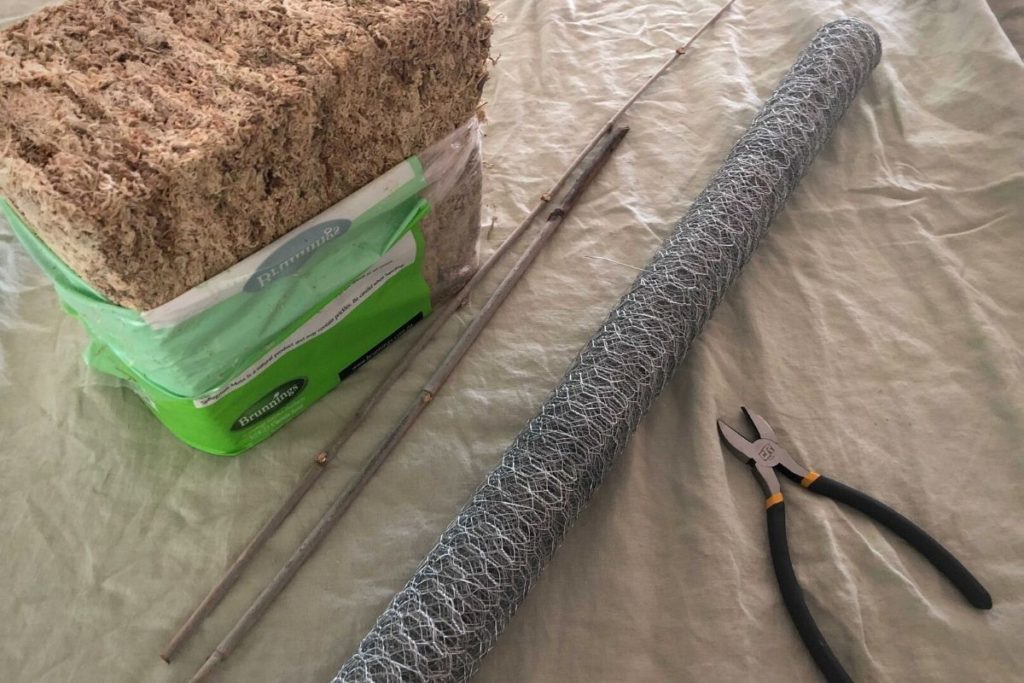
To make a moss pole for your climbing houseplants, you will need:
- Welded wire mesh (galvanized or vinyl coated, 1/4 inch or 1/2 inch)
- Wire cutters (I used diagonal cutting pliers and long nose pliers for this job)
- Gloves
- Sphagnum moss
- Garden twist-tie wire or zip-ties
- PVC pipe, a stick, or pole of the necessary length (optional)
Step 1: Cut the mesh
Measure the amount of mesh you need for the tube size of your choice. A width of 6 to 8 inches will give you a pole with a diameter of 3 to 4 inches. Wearing gloves will protect your hands if the wire is sharp as you cut the wire to your desired height. Many rolls are sold in 2 to 4 feet width (or more), which can give you moss poles of that same number of feet in height. Cut along the squares to stay even.
Step 2: Add the sphagnum moss (and a central pole, if you need one)
If the wire needs to be shaped, leave it open half-way to fill it with moist Sphagnum moss. The damp moss will help you be sure the pole gets packed to capacity for a dense filling. This will also make water available to your plants as soon as you transfer them to the pole. The smaller mesh grid size will keep stray pieces of moss from falling out.

When you’re planting a heavy or tall houseplant, like a monstera or pounds of vines, you can add a central wooden pole, bamboo stake, or PVC pipe to the moss pole that can serve as a rigid internal structure for extra support. Lay it on a layer of moss and cover it up with more moss. Whether you have an internal pole or a moss-only tube, the next step is to suture the mesh closed.
Step 3: Tie off the mesh

When the tube is filled, bring the open edges together to close them. Tie along the squares to keep it even, using a garden twist wire or zip-ties. Close them at 1 to 2 inch intervals to be sure no moss can poke out, now or in the future. Watch for any sharp edges on the cut mesh wire as you tie. Once you’re finished, you can clip the extra material from the zip-ties, or fold down the twist wire to be flush with the pole.
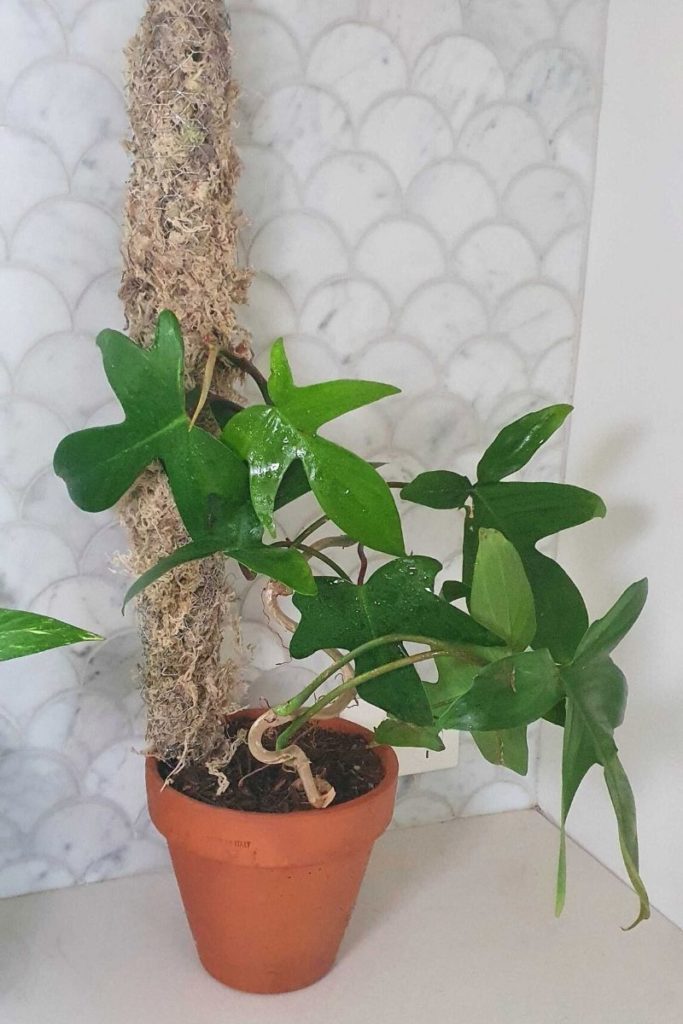
Step 4: Adhere the plant to the pole
Remove the vine or other climbing plant from its pot and old support, then tie it to the mesh pole, with the roots reaching the bottom of the pole. The plant’s roots don’t need to be tied down or hang below the bottom edge, since the pole will be planted in your growing medium. Tying vines and stems to the mesh will train plants to grow upwards and provide them with stability.
Step 5: Pot the moss pole
When the plant is fully attached to the pole, install the pole in the pot as you would a plant: surround the base with growing medium, covering the plant roots, until the pot is full and the pole is standing firmly on its own.
How to keep a moss pole moist?
There are a few ways you can ensure your moss pole stays moist enough to keep your plants well-hydrated. First, the wicking process that the Sphagnum is chosen for will move water from the soil or Leca in the pot upwards through the moss pole. You can also moisten the moss with a spray bottle to keep the pole moist between waterings. Another option is to pour a little water onto the top of the moss pole and let it drain downwards.
How often should a moss pole be changed?
Your moss pole should last for several years without needing to be changed or refreshed, although after those several years, the moss may begin to break down. You can keep an eye on the condition over the years, and when the time comes, you’ll be experienced in DIY moss pole construction and ready to make a new one.
More How To Guides
- How To Get Rid Of Scale On Plants
- DIY Terrarium Table: How To Make A Table With Plants Inside
- How to Use Leca for Plants: Step-by-Step Guide with Pictures
- How To Use Grow Lights For Indoor Plants
- How To Propagate Peperomia Plants 2 Ways
- DIY Propagation Box With Grow Light
- How To Make Pothos Fuller (In 5 Minutes)
- How to Make a Moss Pole for Your Climbing Plants
- How to Make Potting Soil for Indoor Plants, Plus My Secret Ingredient
- How to Propagate a Split-Leaf Philodendron: Easy Step-by-Step Guide

Marquis *wants* to know how to keep happy and healthy plants, but had a hard time finding information that wasn't written by just another copywriter. After nearly losing one too many plants, it was time to take matters into her own hands. A team of plant scientists and nursery hands was brought together and The Indoor Nursery was born.