There comes a point in every indoor gardener’s life when you start dreaming of what leafy paradise would be possible with a greenhouse. All of the models at the home center seem like they’re made for people with backyards though! Ugh.
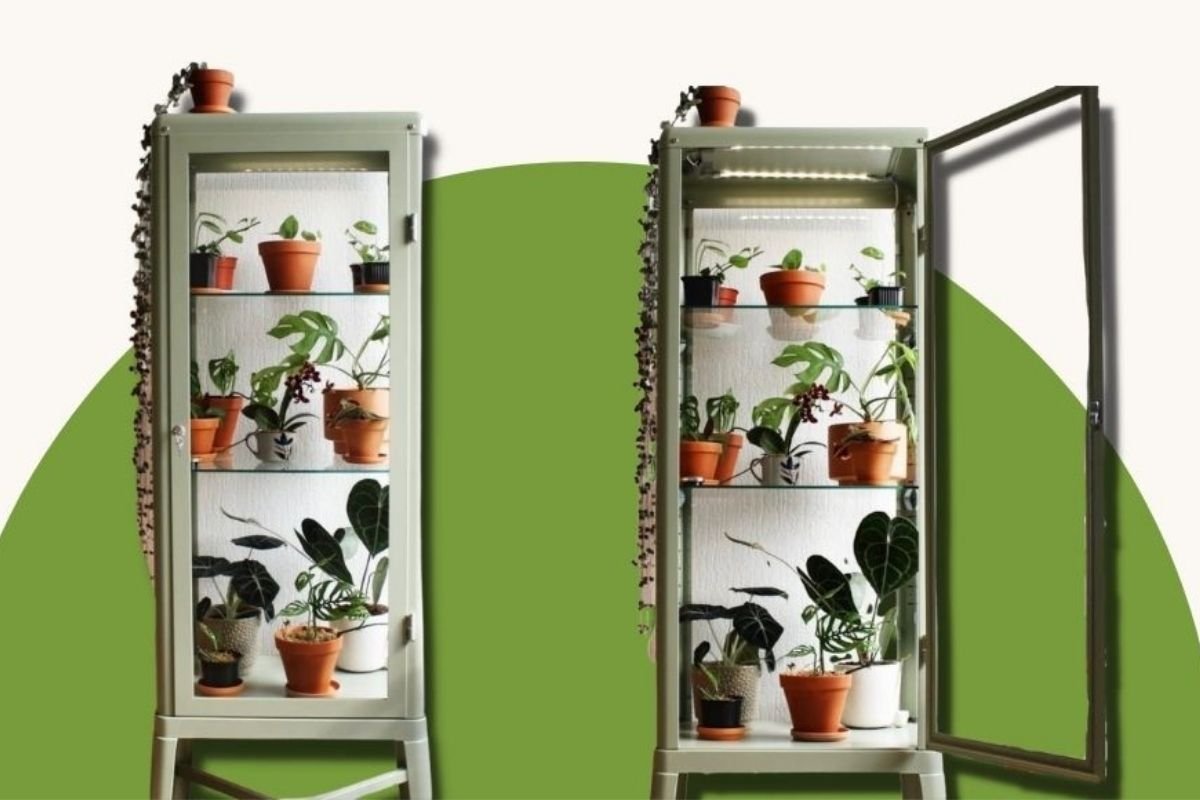
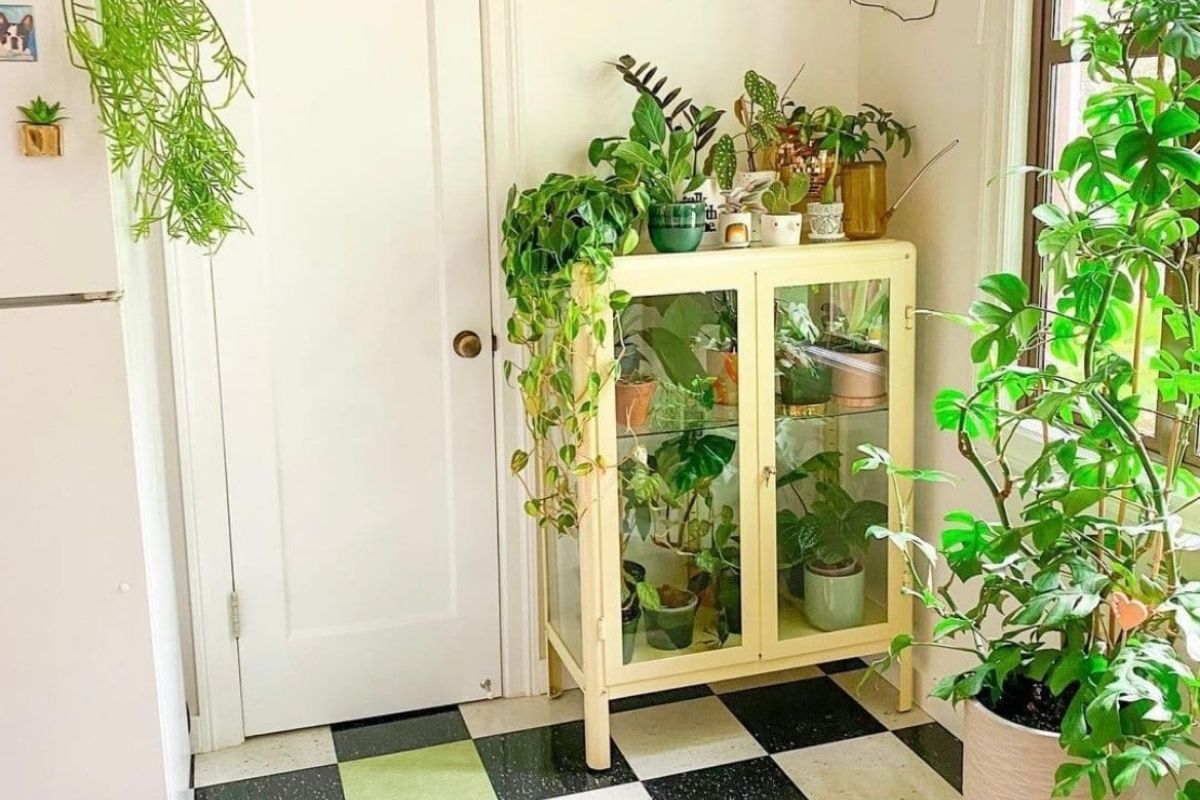
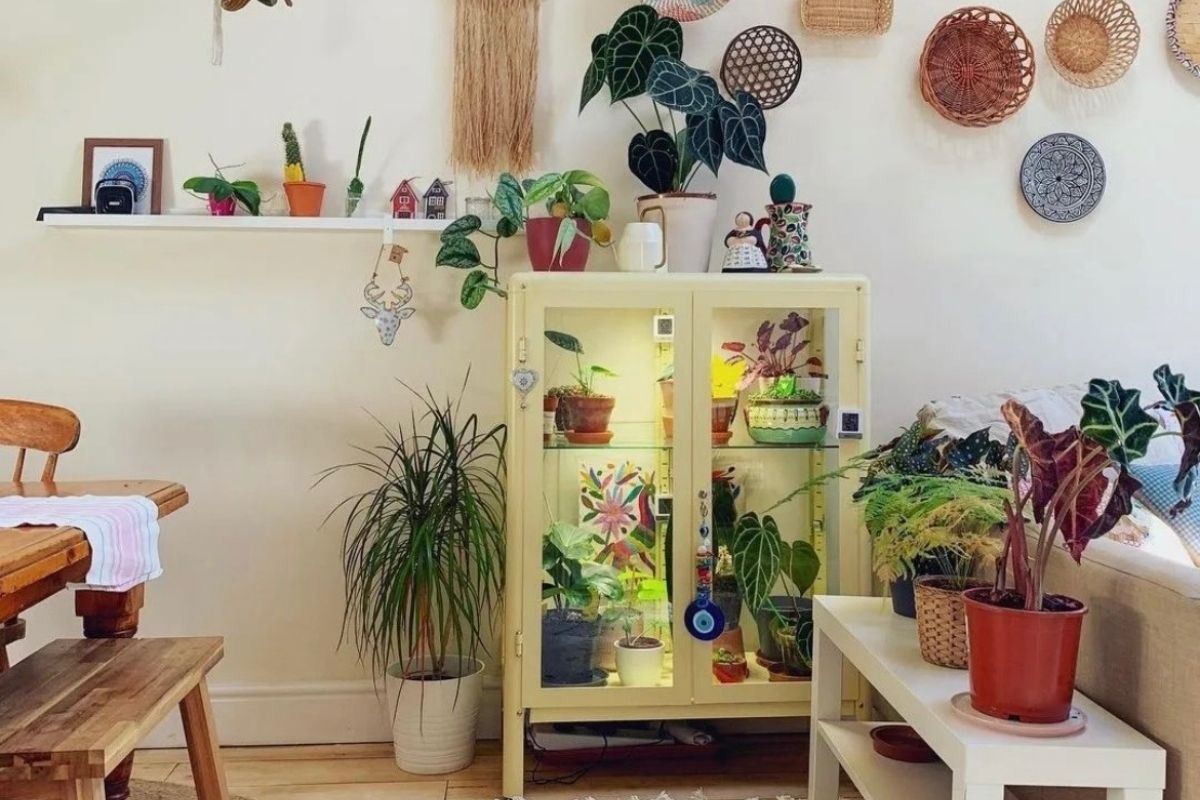
Enter…this brilliant IKEA greenhouse cabinet hack that transforms any available space in your home into a miniature, glass-enclosed humidity haven for your plants.
Whether you’ve run out of usable surfaces for your plant collection, own a finicky tropical plant that’s begging for natural light and more humidity, or you’d like to start growing herbs or veggies indoors in a climate controlled environment – this guide is for you!
In this guide, we’ll explore the hot (and humid!) IKEA cabinet hack trend that transforms the popular Milsbo, Fabrikör, and Detolf display cabinets into functional indoor greenhouses that fit wherever you have space.
What is the IKEA greenhouse cabinet trend?
The plant shelf DIY trend has EXPLODED since we were all locked in our homes hoarding toilet paper. Do you remember that? 😅 The IKEA greenhouse hack trend is one relic from those dark times that I’m happy to say has stayed.
Custom-designed greenhouse cabinets are basically the boutique houseplant grower’s version of indoor grow tents. Indoor gardeners started posting DIY hacks that transformed regular IKEA cabinets and shelves into greenhouses in 2019.
In 2020, IG user Robin Schouten started an account @ikeagreenhousecabinet to feature her own indoor greenhouse and other IKEA cabinet setups. Since then, plant hobbyists have taken the cue and started innovating clever IKEA cabinet greenhouse designs nonSTOP!
Why use a plant cabinet?
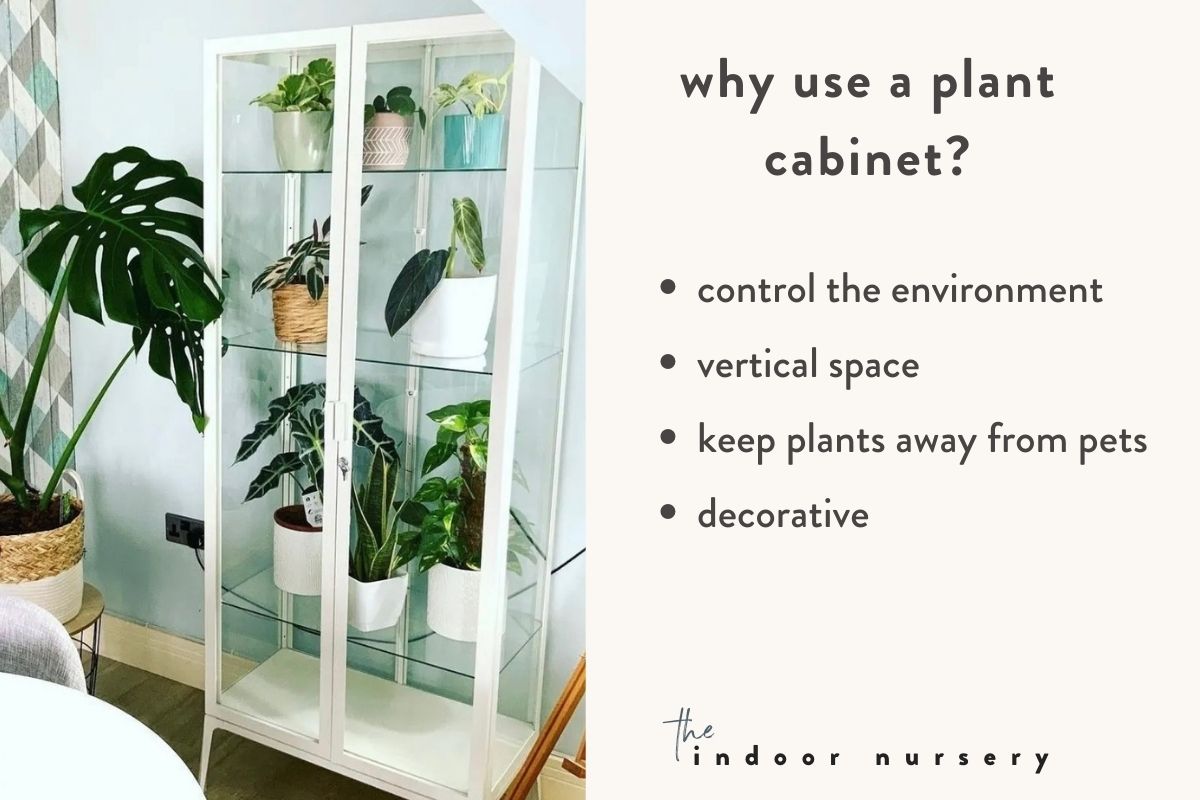
Greenhouses trap moisture within their glass walls and maintain a steady, warm temperature that’s ideal for sun-loving and thirsty plants, just like how tabletop terrariums turn the greenhouse effect into a gorgeous statement piece for displaying succulents and cacti.
As a plant lover, it goes without saying that you want to provide the best conditions for your plants so that they can thrive and beautify your home. If you’re on IG, you also want your leafy friends to be Insta-ready so you can proudly show them off ✨
These are some of the reasons why plant enthusiasts DIY their own greenhouse plant cabinets:
- Control the environment: the number one reason to use a greenhouse is to create a controlled environment through humidity levels and temperature. If you install a grow light in your greenhouse, you’ll have complete control of the growing conditions in your greenhouse.
- Vertical space: When you can’t spread ‘em, stack ‘em! Greenhouse cabinets present a clever and cute way to use vertical space. The taller the cabinet, the better. Because IKEA shelves and cabinets usually come in several sizes, they’re super easy to custom-fit to your available space.
- Keep plants away from pets: Protect your pup and your toxic plants by keeping them behind closed (glass) doors. Even pet-friendly plants can benefit from the safety of a closed space!
- Decorative: Did we mention that IKEA cabinet hacks are a super cute way to integrate your plants into your living room look? Shelves look nice and organized so you and your guests can appreciate your plants as the living art that they are.
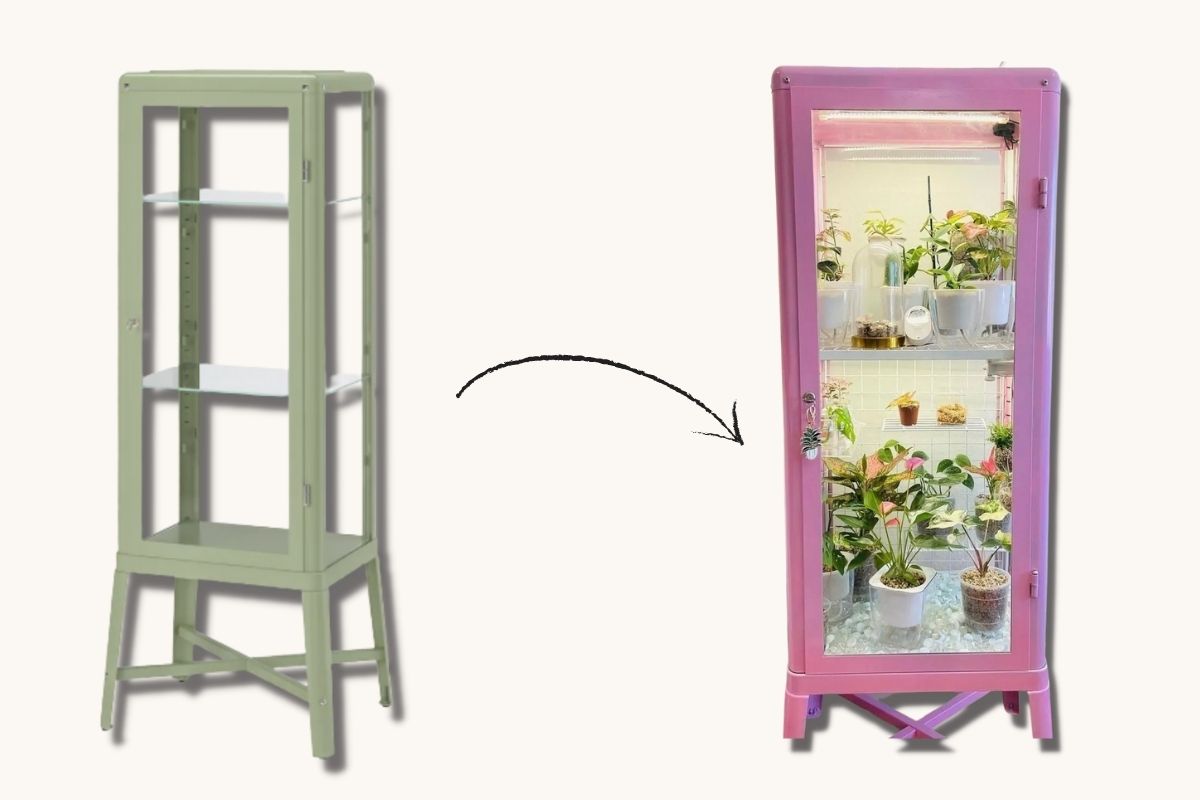
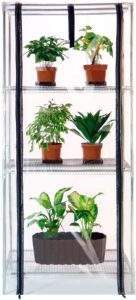
What kinds of cabinets can be used as mini greenhouses?
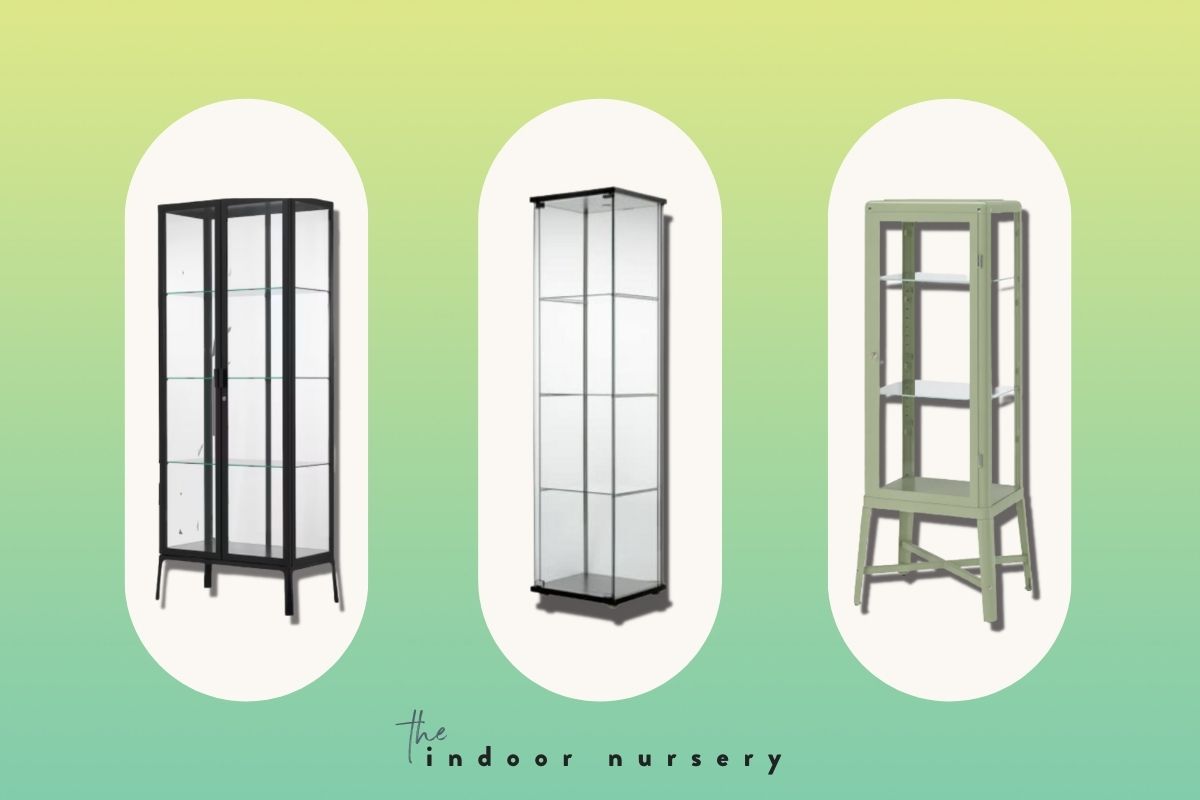
IKEA has tons of viable cabinet options for transforming into your own personal greenhouse. The beauty of this hack is that it’s custom-tailored to your home. Start with measuring the space where you want to place your greenhouse and then subtract a couple of inches so you can easily move the furniture if needed.
The most popular IKEA cabinets for this purpose are metal and glass pieces that resist water stains (though I have seen people convert wood cabinets – it just takes a little bit more prep since the wood has to be treated with sealant to resist water and mold.)
Do you have your measurements ready for your available space? Here are the dimensions of the most popular IKEA cabinets for this greenhouse hack:
- Milsbo cabinet, 28 3/4″ x 68 7/8″
- Milsbo cabinet, 39 3/4 x 39 3/8″
- Fabrikor cabinet, 31 7/8″ x 44 1/2″
- Fabrikor cabinet, 22 1/2″ x 59″
- Klingsbo, 17 3/4 x 70 7/8″
- Detolf, 16 3/4 x 64 1/8″
Which plants can be put in a glass cabinet?
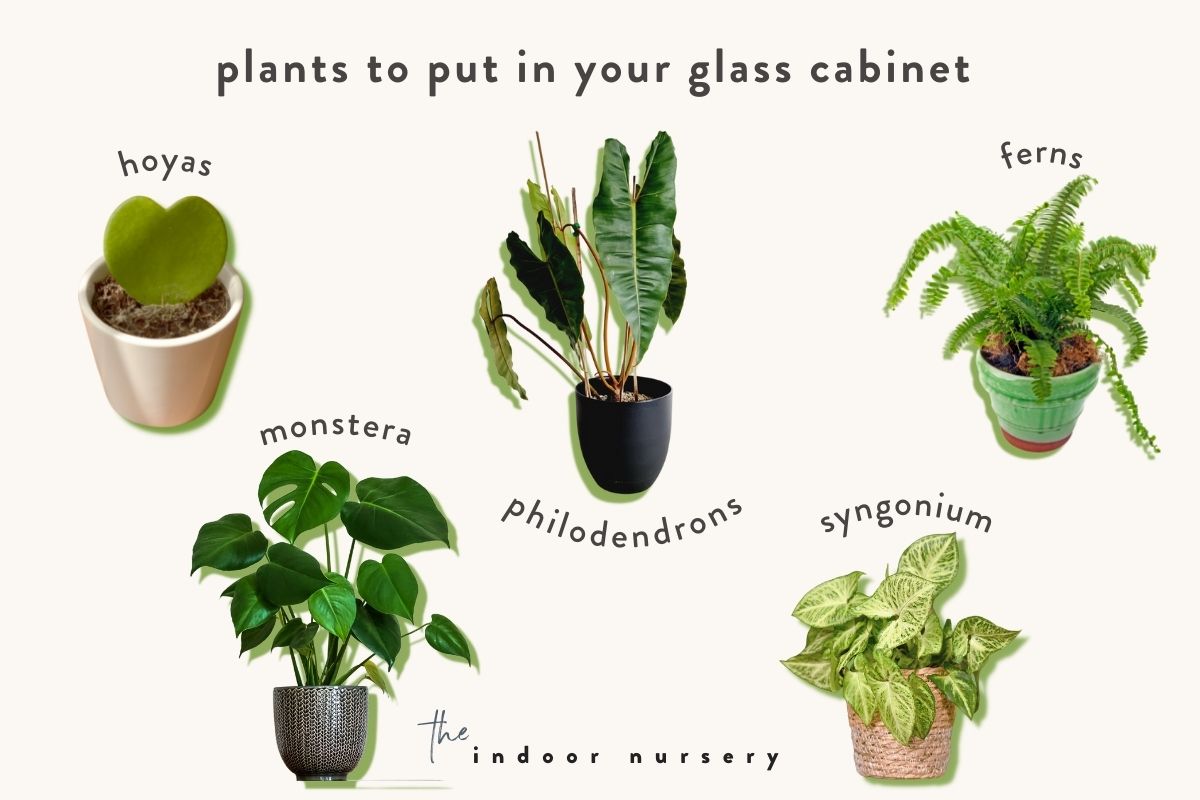
Now for the fun part!! Pick the lucky plants that get to live in the promised land. Humidity-loving plants are definitely good candidates for greenhouse life, including hoyas, philodendrons, ferns, orchids, Syngonium, alocasia, and monsteras. Pretty much any plant that doesn’t need to be in dry conditions would love a spot in your greenhouse cabinet.
Do AVOID placing air plants, succulents, and snake plants in your greenhouse. These plants dislike the humidity level and prefer to dry out more thoroughly than greenhouse growing would allow between waterings.
What do you need to DIY an Ikea greenhouse cabinet?
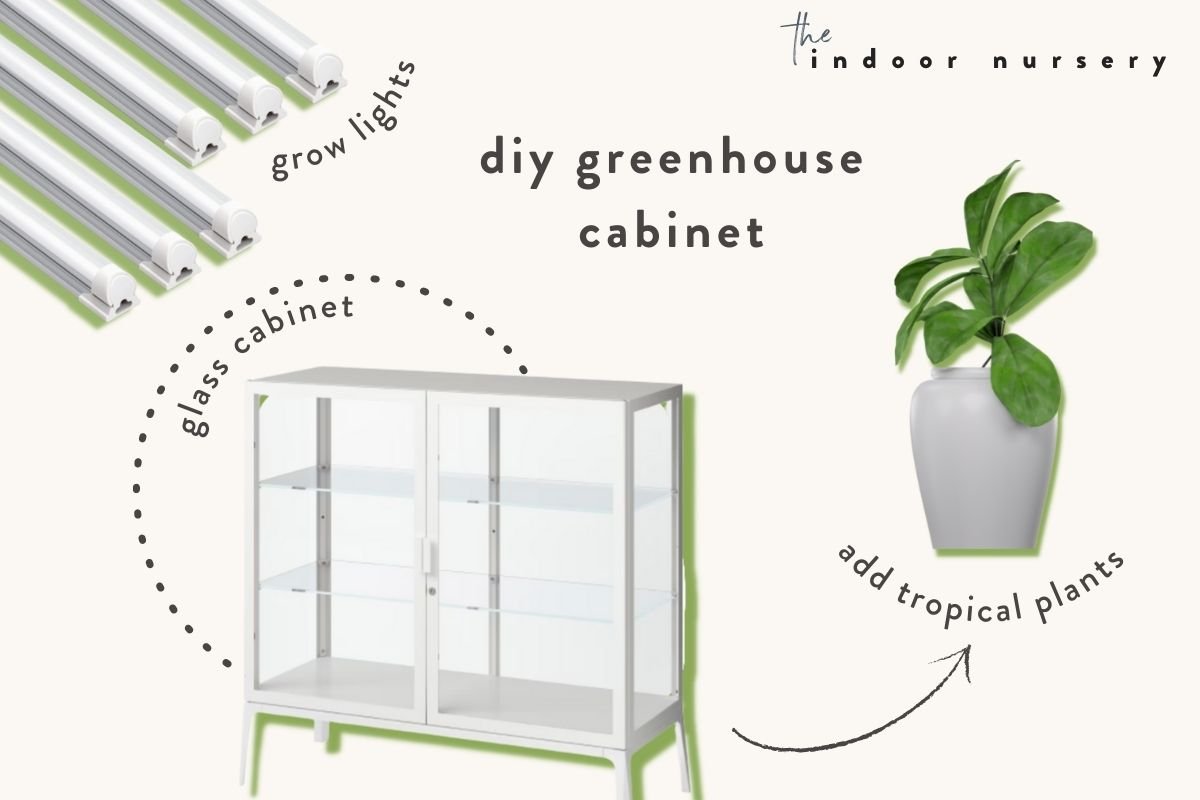
What you need for your greenhouse cabinet totally depends on the type of setup you want and how much money you’re willing to spend. After all, the cabinets by themselves can cost a couple of hundred bucks. Essentially, you’ll need:
- Glass cabinet
- Tropical plants
- Grow lights (like Barrina or grow light strips sized for the cabinet)
Beyond the basics, these are the extra things that you can use to manage the cabinet and make it look good too:
- Mini fan for airflow
- Twist ties to keep the fan and wires in place
- Mirror double-sided mounting tape (Tesa brand or Gorilla) for accessories
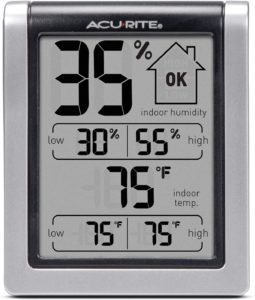
- Humidity and temperature meter
- Wire shelves (optional) with hardware
- Weather-stripping / foam tape to seal the cabinet
- Grow light timer
- Drill
- Cable grommet
- Hook magnets to keep things in place and hang stuff
- Suction cup clips for wire management
- Cable management box to wrangle all the electrical cables

How to convert a glass cabinet into a greenhouse
Before you get to work, consider the airflow situation in your mini greenhouse. If you have a lot of plants in a small-ish space, this is extra important! Airflow might also be a problem (without additional steps) if the shelves in your cabinet sit tightly against the cabinet doors.
In either of these situations, it’s a good idea to drill holes in the shelves before installing them to allow air and moisture to circulate through the cabinet, or consider swapping out the wood or glass shelves for wire shelves.
Once you’ve addressed airflow, this is how to construct your little greenhouse:
- Once you’ve purchased your cabinet, follow the assembly instructions and put it together.
- If your cabinet has adjustable shelves, gather the plants that you’re going to place in the cabinet and divide them into groups based on height – leaving 6-12 inches of space above each row to accommodate grow lights and maintenance.
- Install the shelves according to your plant groupings.
- Install the grow lights above the shelf and make sure they reach all of the plants in your cabinet.
- Add weather-stripping to the cracks by the cabinet doors. Keep in mind that you may have to remove or adjust the weather-stripping once you have all the plants in the cabinet if the humidity is too high. Aim for maintaining a greenhouse humidity of 80%.
Cabinet maintenance
Like caring for non-greenhouse plants, you’ll want to fertilize and water your plants in the greenhouse, and run periodic pest checks as well. One perk to greenhouse gardening? You probably won’t have to water your plants quite as much compared to their “free-roaming” friends.
Give your plants a deep watering once a month and spray with neem oil or insecticidal soap weekly to keep pests away. Unfortunately, greenhouse life isn’t always pest-free!


You will have to keep a closer watch on mold growing in your humid greenhouse too. You may have to adjust the position of the fans to get good airflow. If you choose not to get a fan, make sure to open the cabinet doors to let fresh air in a few times a week to kill mold spores before they grow out of control. If you don’t, it’s not a question of whether mold will strike, but when.
This problem is avoidable with good maintenance though – and a bit of prep in advance. DON’T skip the steps to improve airflow, trust me.
Sometimes the cabinet will fog up with all the water and humidity. It’s all good in the neighborhood as long as your plants look happy and you regularly check for pests and mold. Enjoy living la Vida IKEA hack, and enjoy your new, custom greenhouse!!
FAQ
Which grow lights work best in a greenhouse cabinet?
A lot of plant enthusiasts swear by the Barrina lights since they’re easy to install and work like a dream. They have a thin profile and don’t need much space.
Does it matter what kind of metal is used for the wire back and shelving?
The best kind to use is painted metal or coated metal since these finishes will protect the wire from rusting.
How long should the lights and fan, and humidifier be on?
Typically, fans run 24 hours to avoid mold growth, and lights for at least 12 hours. A humidifier may not be needed depending on the setup. Some say with enough weather stripping humidity levels can be kept pretty high. It is probably best to monitor humidity levels and turn on the humidifier when needed or spray some water into the cabinet.
Are there any issues with a completely sealed cabinet?
A completely sealed cabinet means that air cannot circulate, which ultimately leads to mold and fungus growth. You’ll need at least a little airflow, no matter what your setup. If you do not want to install a fan, then the cabinet should be opened for a couple of minutes every day.
What is a good cleaning solution for the cabinet?
If your greenhouse cabinet needs a deep clean, use rubbing alcohol or a vinegar solution to kill bacteria.
More How To Guides
- How To Get Rid Of Scale On Plants
- DIY Terrarium Table: How To Make A Table With Plants Inside
- How to Use Leca for Plants: Step-by-Step Guide with Pictures
- How To Use Grow Lights For Indoor Plants
- How To Propagate Peperomia Plants 2 Ways
- DIY Propagation Box With Grow Light
- How To Make Pothos Fuller (In 5 Minutes)
- How to Make a Moss Pole for Your Climbing Plants
- How to Make Potting Soil for Indoor Plants, Plus My Secret Ingredient
- How to Propagate a Split-Leaf Philodendron: Easy Step-by-Step Guide

Marquis *wants* to know how to keep happy and healthy plants, but had a hard time finding information that wasn't written by just another copywriter. After nearly losing one too many plants, it was time to take matters into her own hands. A team of plant scientists and nursery hands was brought together and The Indoor Nursery was born.