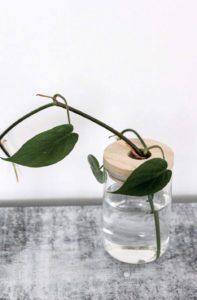
Did you know that most plants are able to be propagated by taking a cutting and placing it in water? It’s actually a lot easier than you’d think. As long as you know a few key guidelines you can create tons of new plants from the ones you already have. It is also fun to display these cuttings in cute propagation stations around your home.
how to make a homemade propagation station
There is no right or wrong way to display your plant cuttings. Creating a diy plant propagation station can be as simple as collecting glass jars to display on a shelf. But you can get as creative as you’d like.
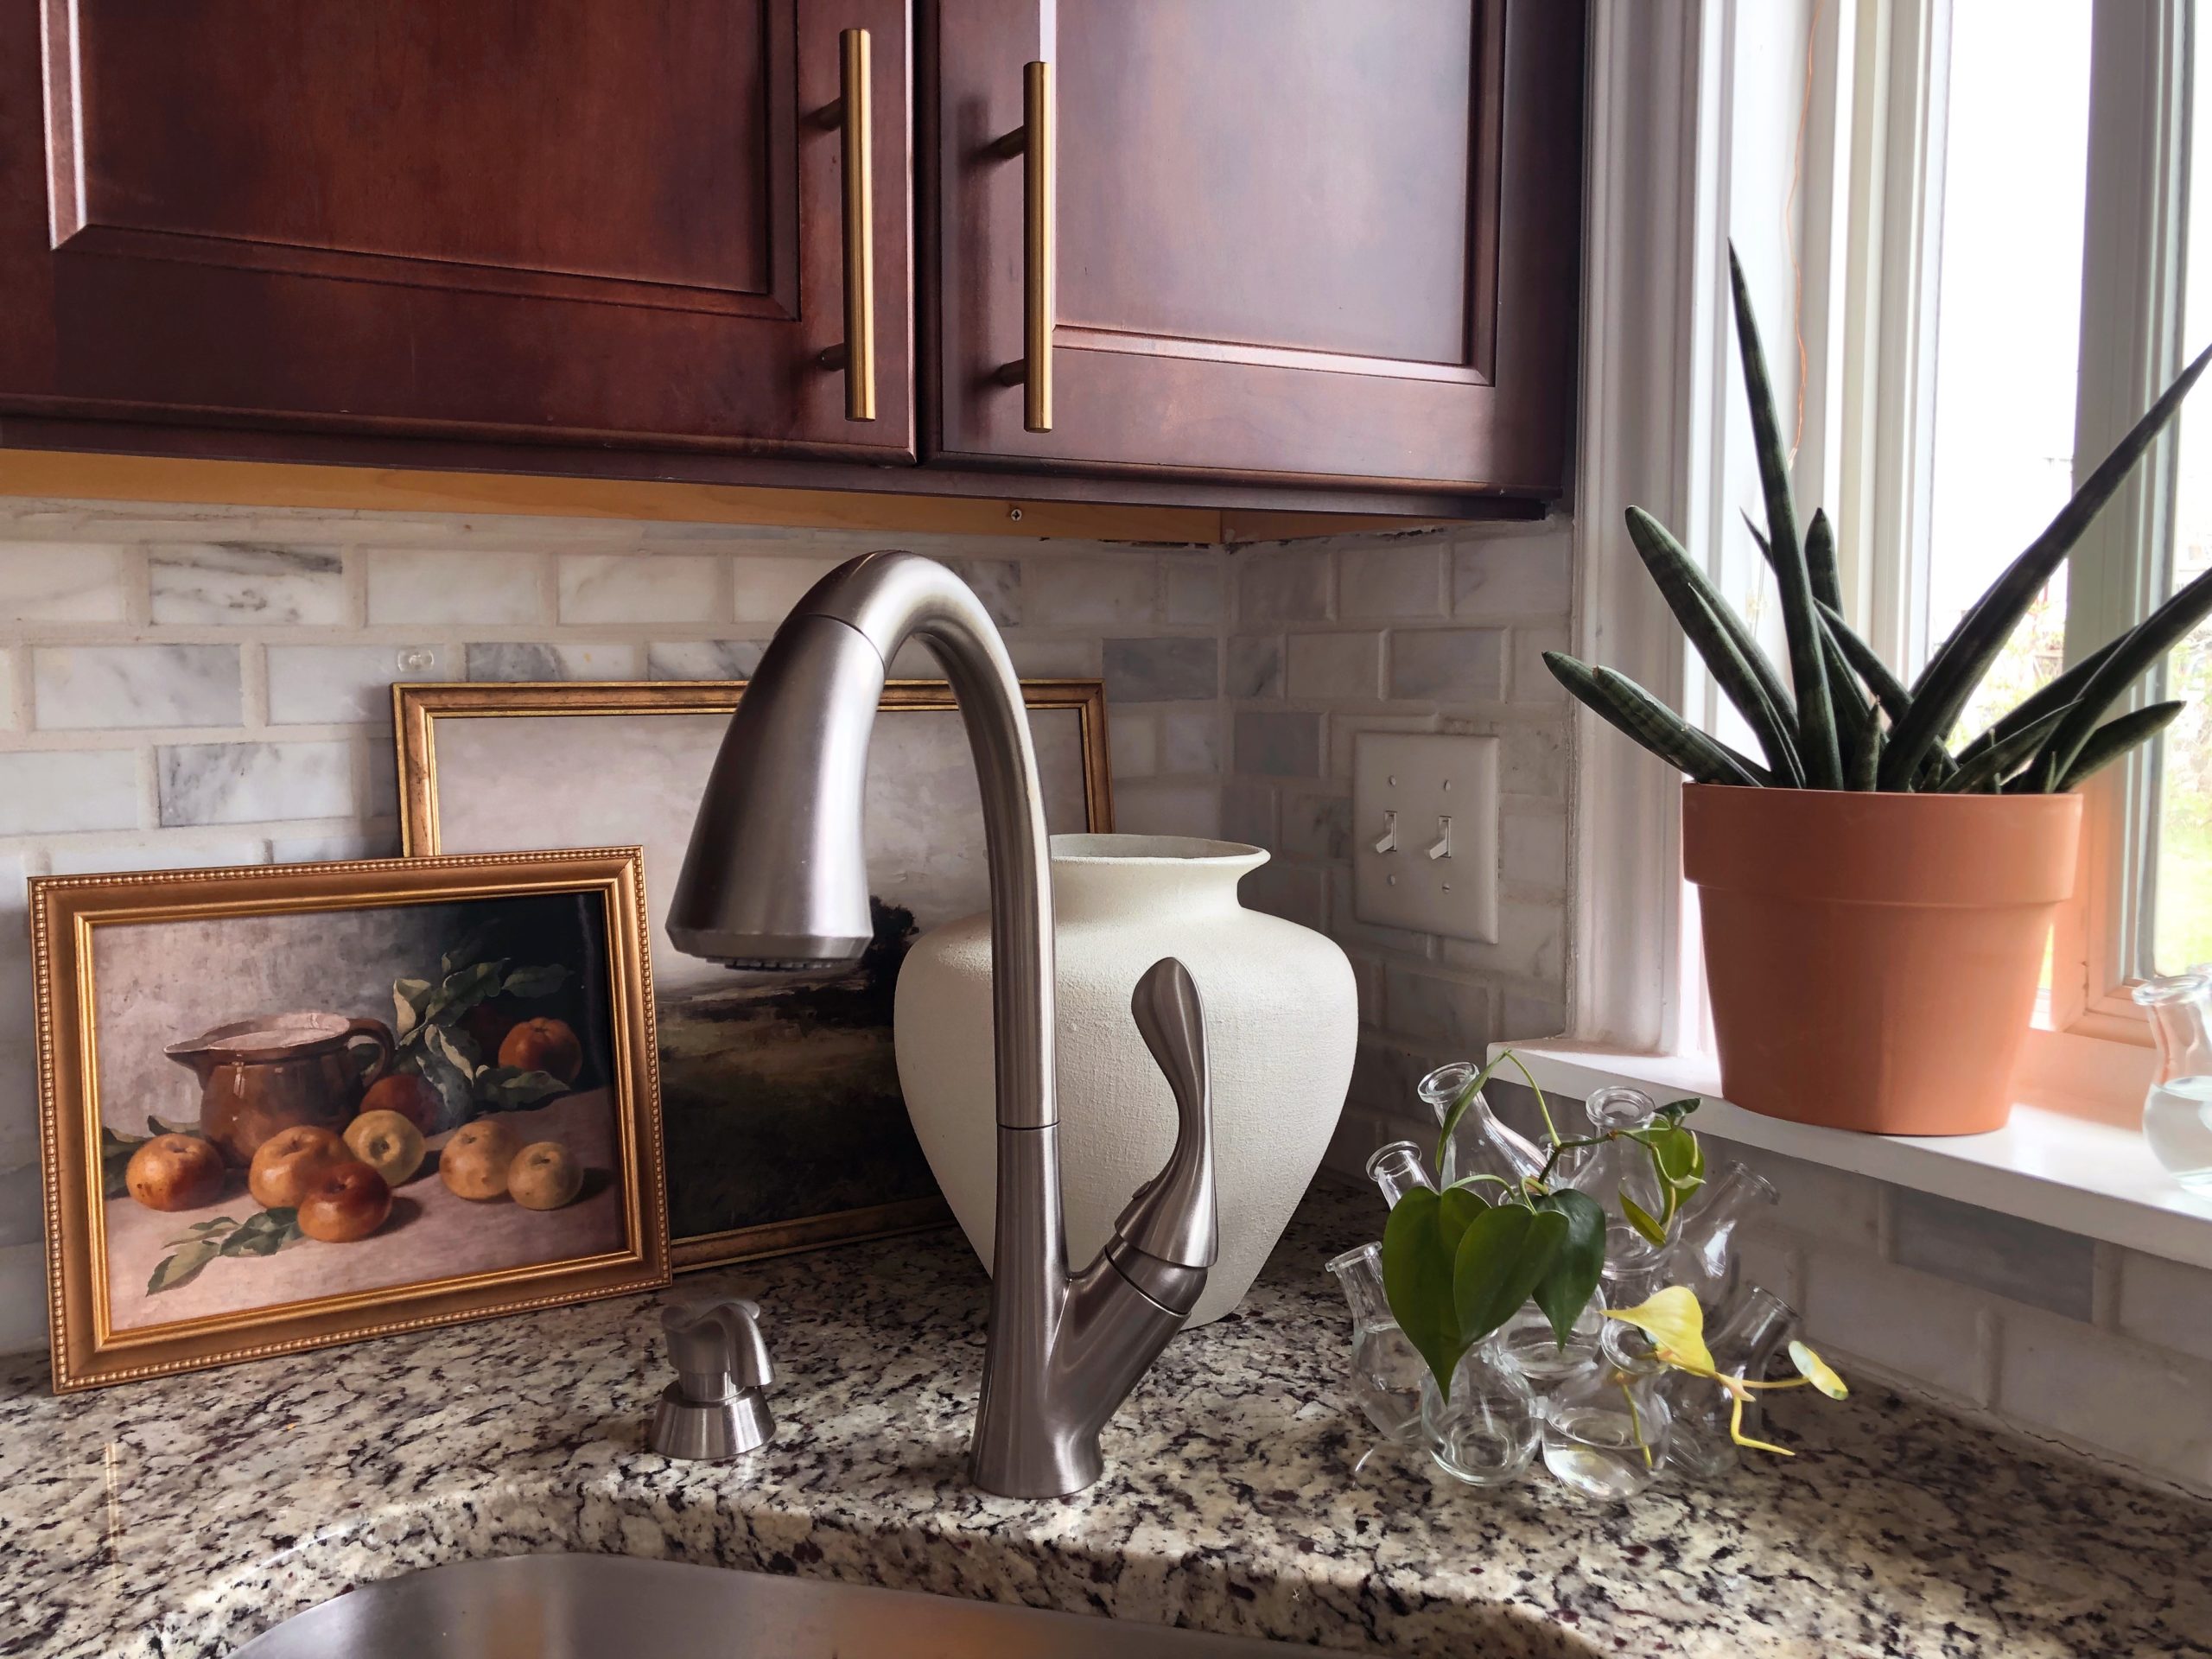
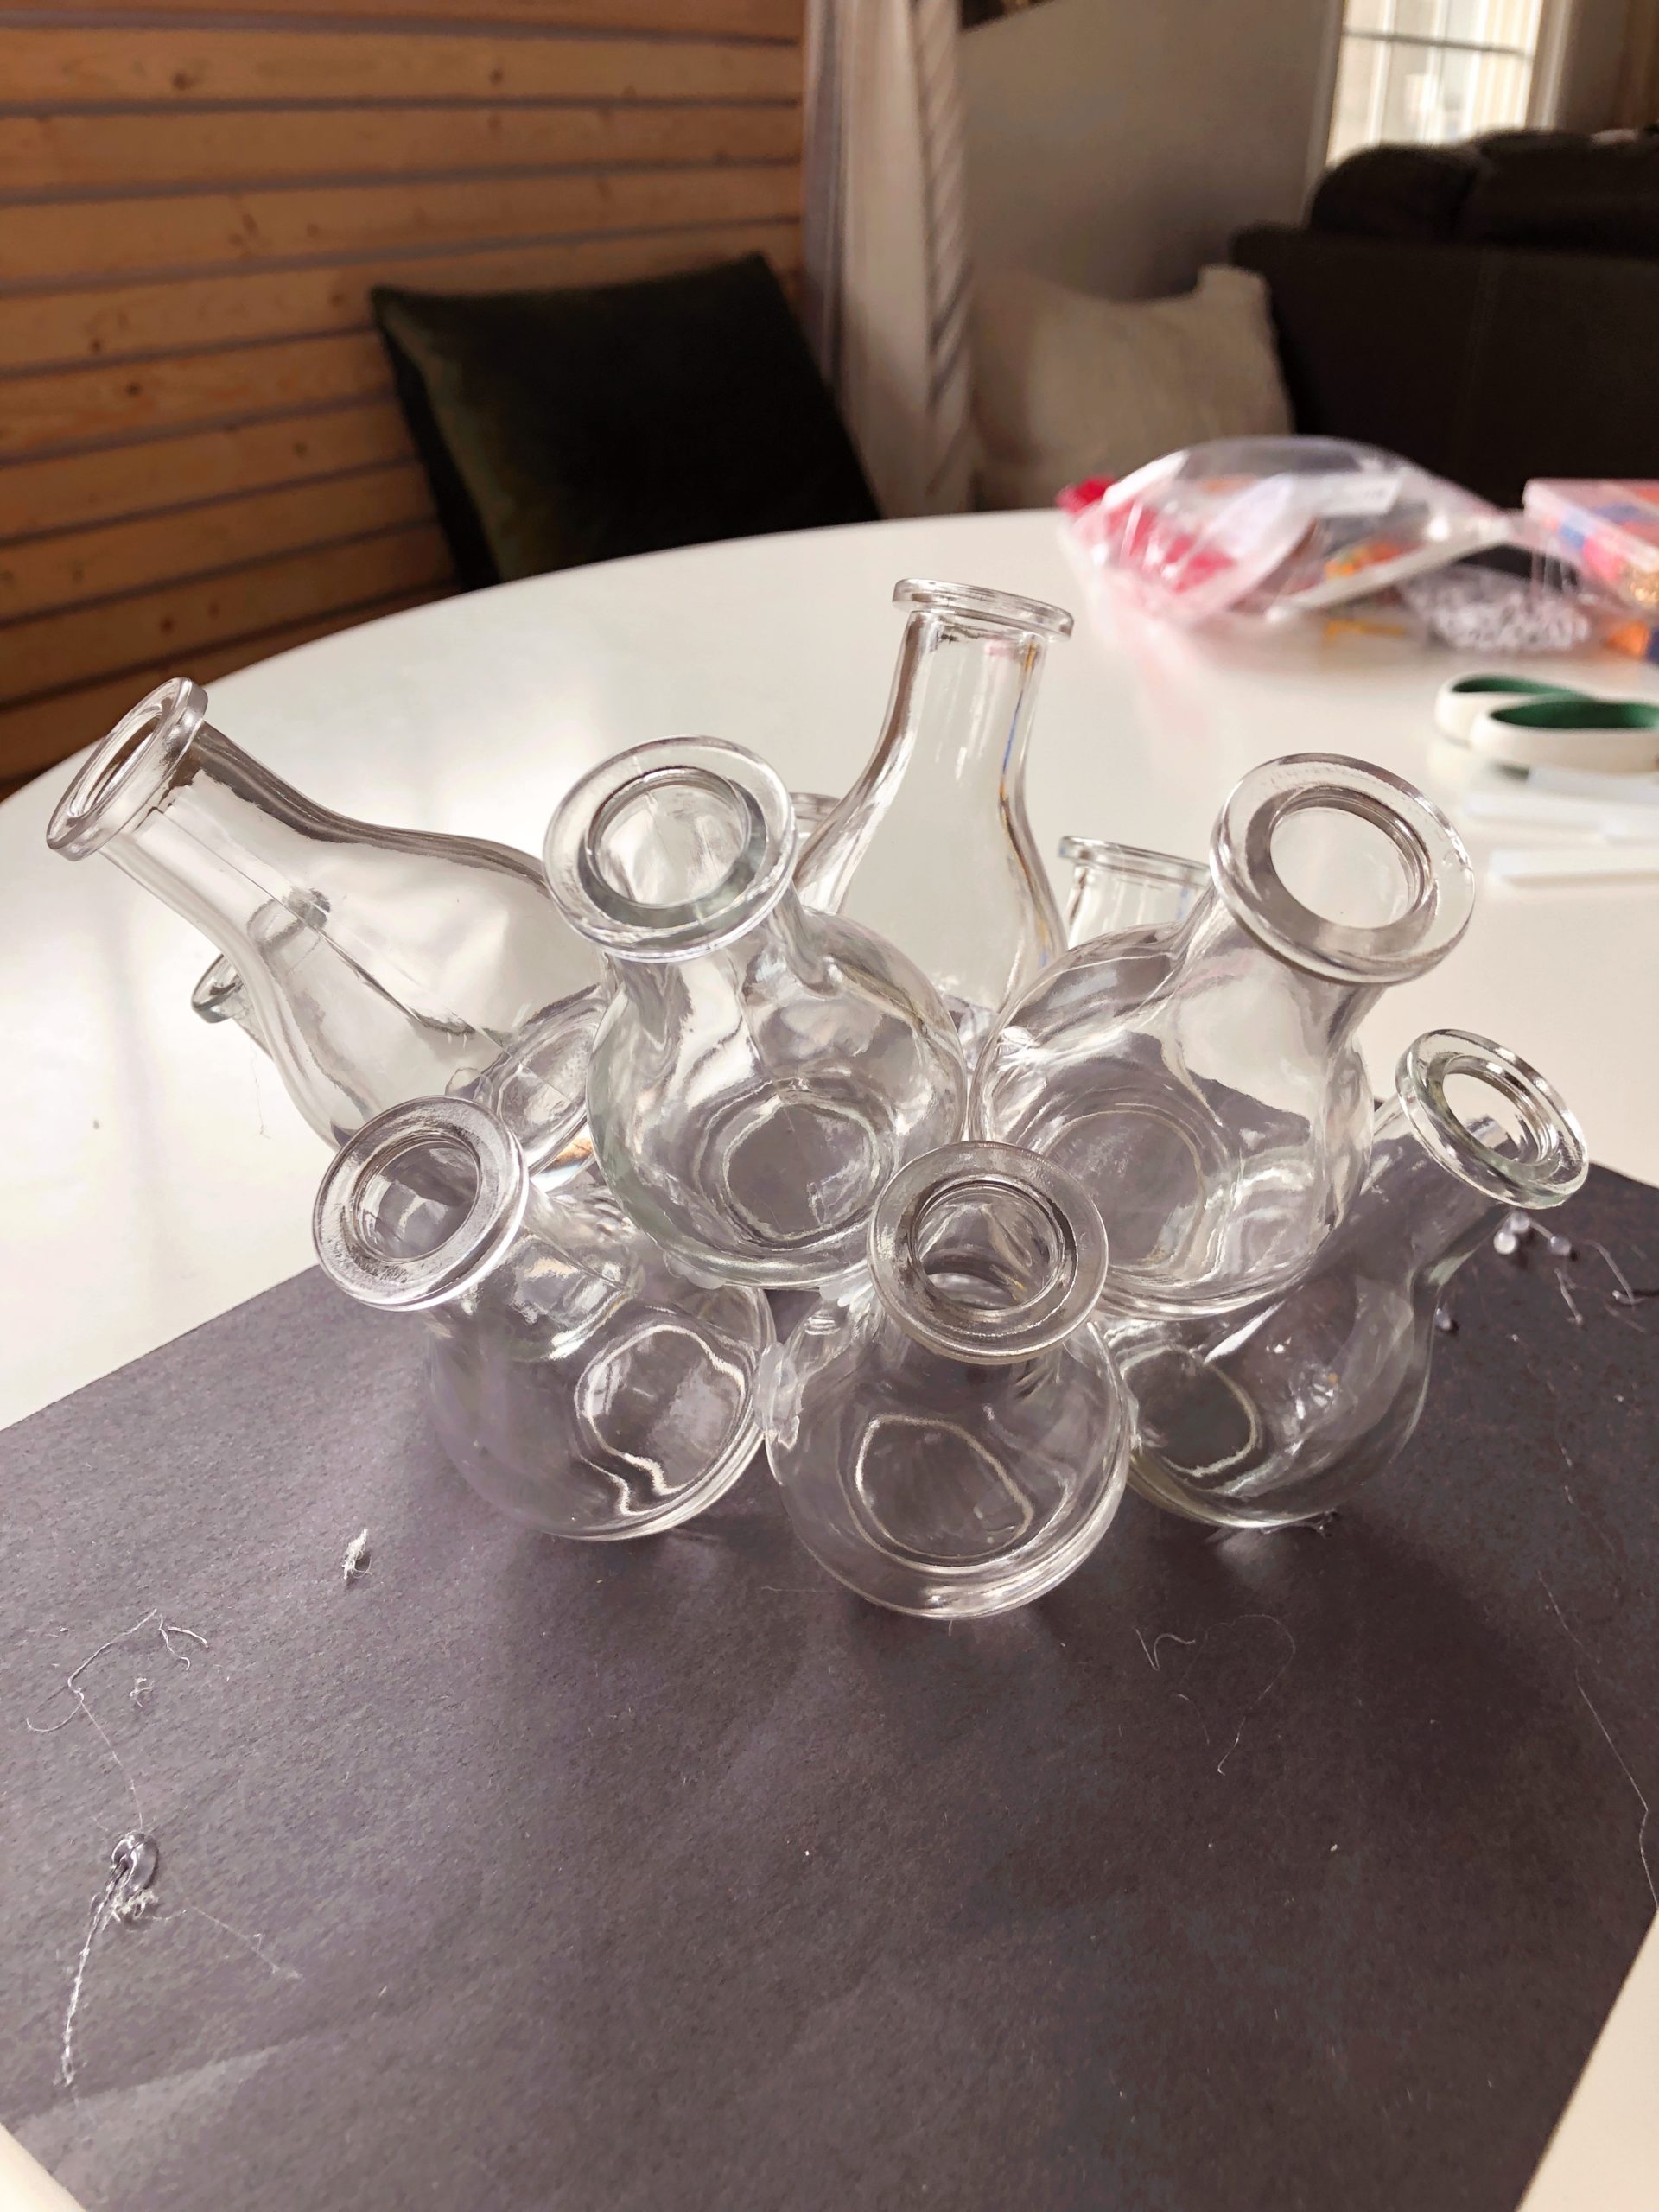
This specific diy plant propagation station is all about aesthetics. I fell in love with these vintage propagation stations (pictured below) and have always hoped I would stumble upon one in a thrift store. But since that hasn’t happened, I decided to try making something similar myself.

propagation station supplies you’ll need
- Bud Vases
- Super Glue
- Water
- Plant Cuttings
diy propagation station, step-by-step
Re-creating the vintage propagation station seemed simple in theory. But it did not happen without a lot of trial and error. These steps are what worked for me to create a similar look to the original vintage propagation station.
Again, this DIY is all about the aesthetic and is not quite as functional as the real one would be. Getting glue to hold the glass jars together with such a small surface area that is actually touching while also holding the weight of water in the jars was no small task. After trying 4 different types of glue I realized that while I can get the jars to hold together, the structure will not support having water/a plant in every single jar. I also learned that a smaller set up holds much better than doing a complete and stacked circle like my inspiration.
It turned out so cute though, it doesn’t even matter! You’re going to want to recreate this for yourself as well. Check out the steps below!
step 1: gather diy propagation station supplies
Collect your supplies (glass vases and glue). I found these glass bud vases at Michaels craft store for a reasonable price. They are the perfect size for this diy. They are also only available for pick up or in store purchases. Shipping is not an option for this item.
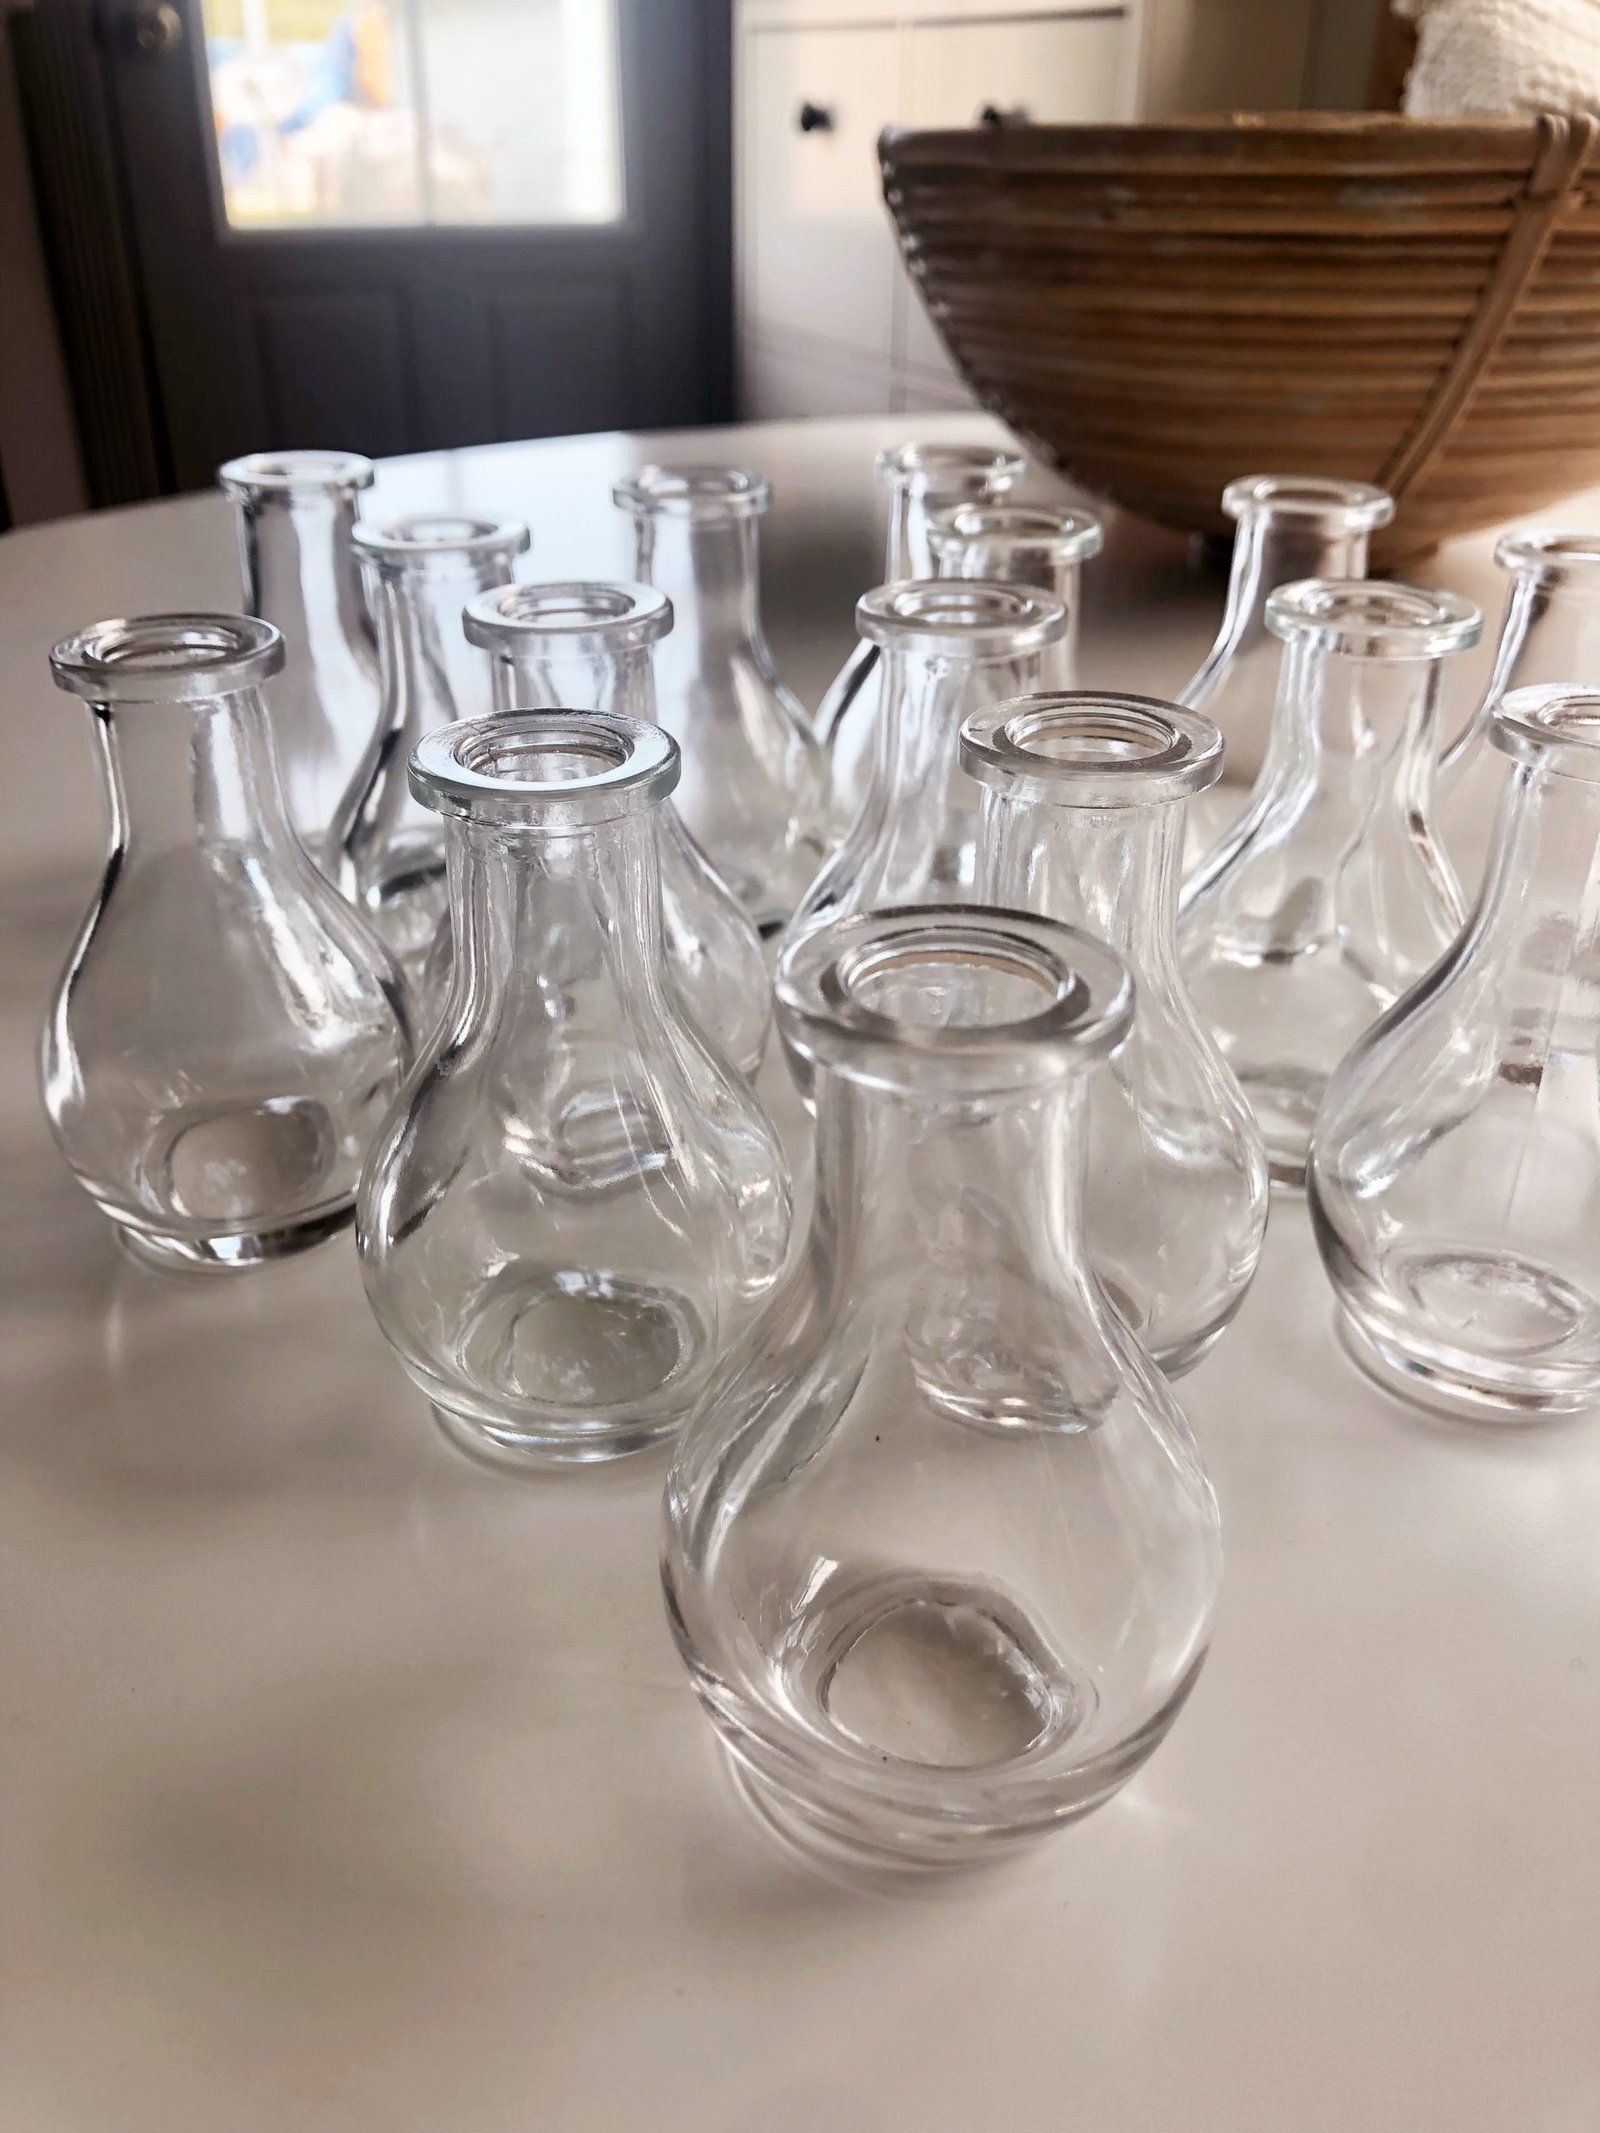
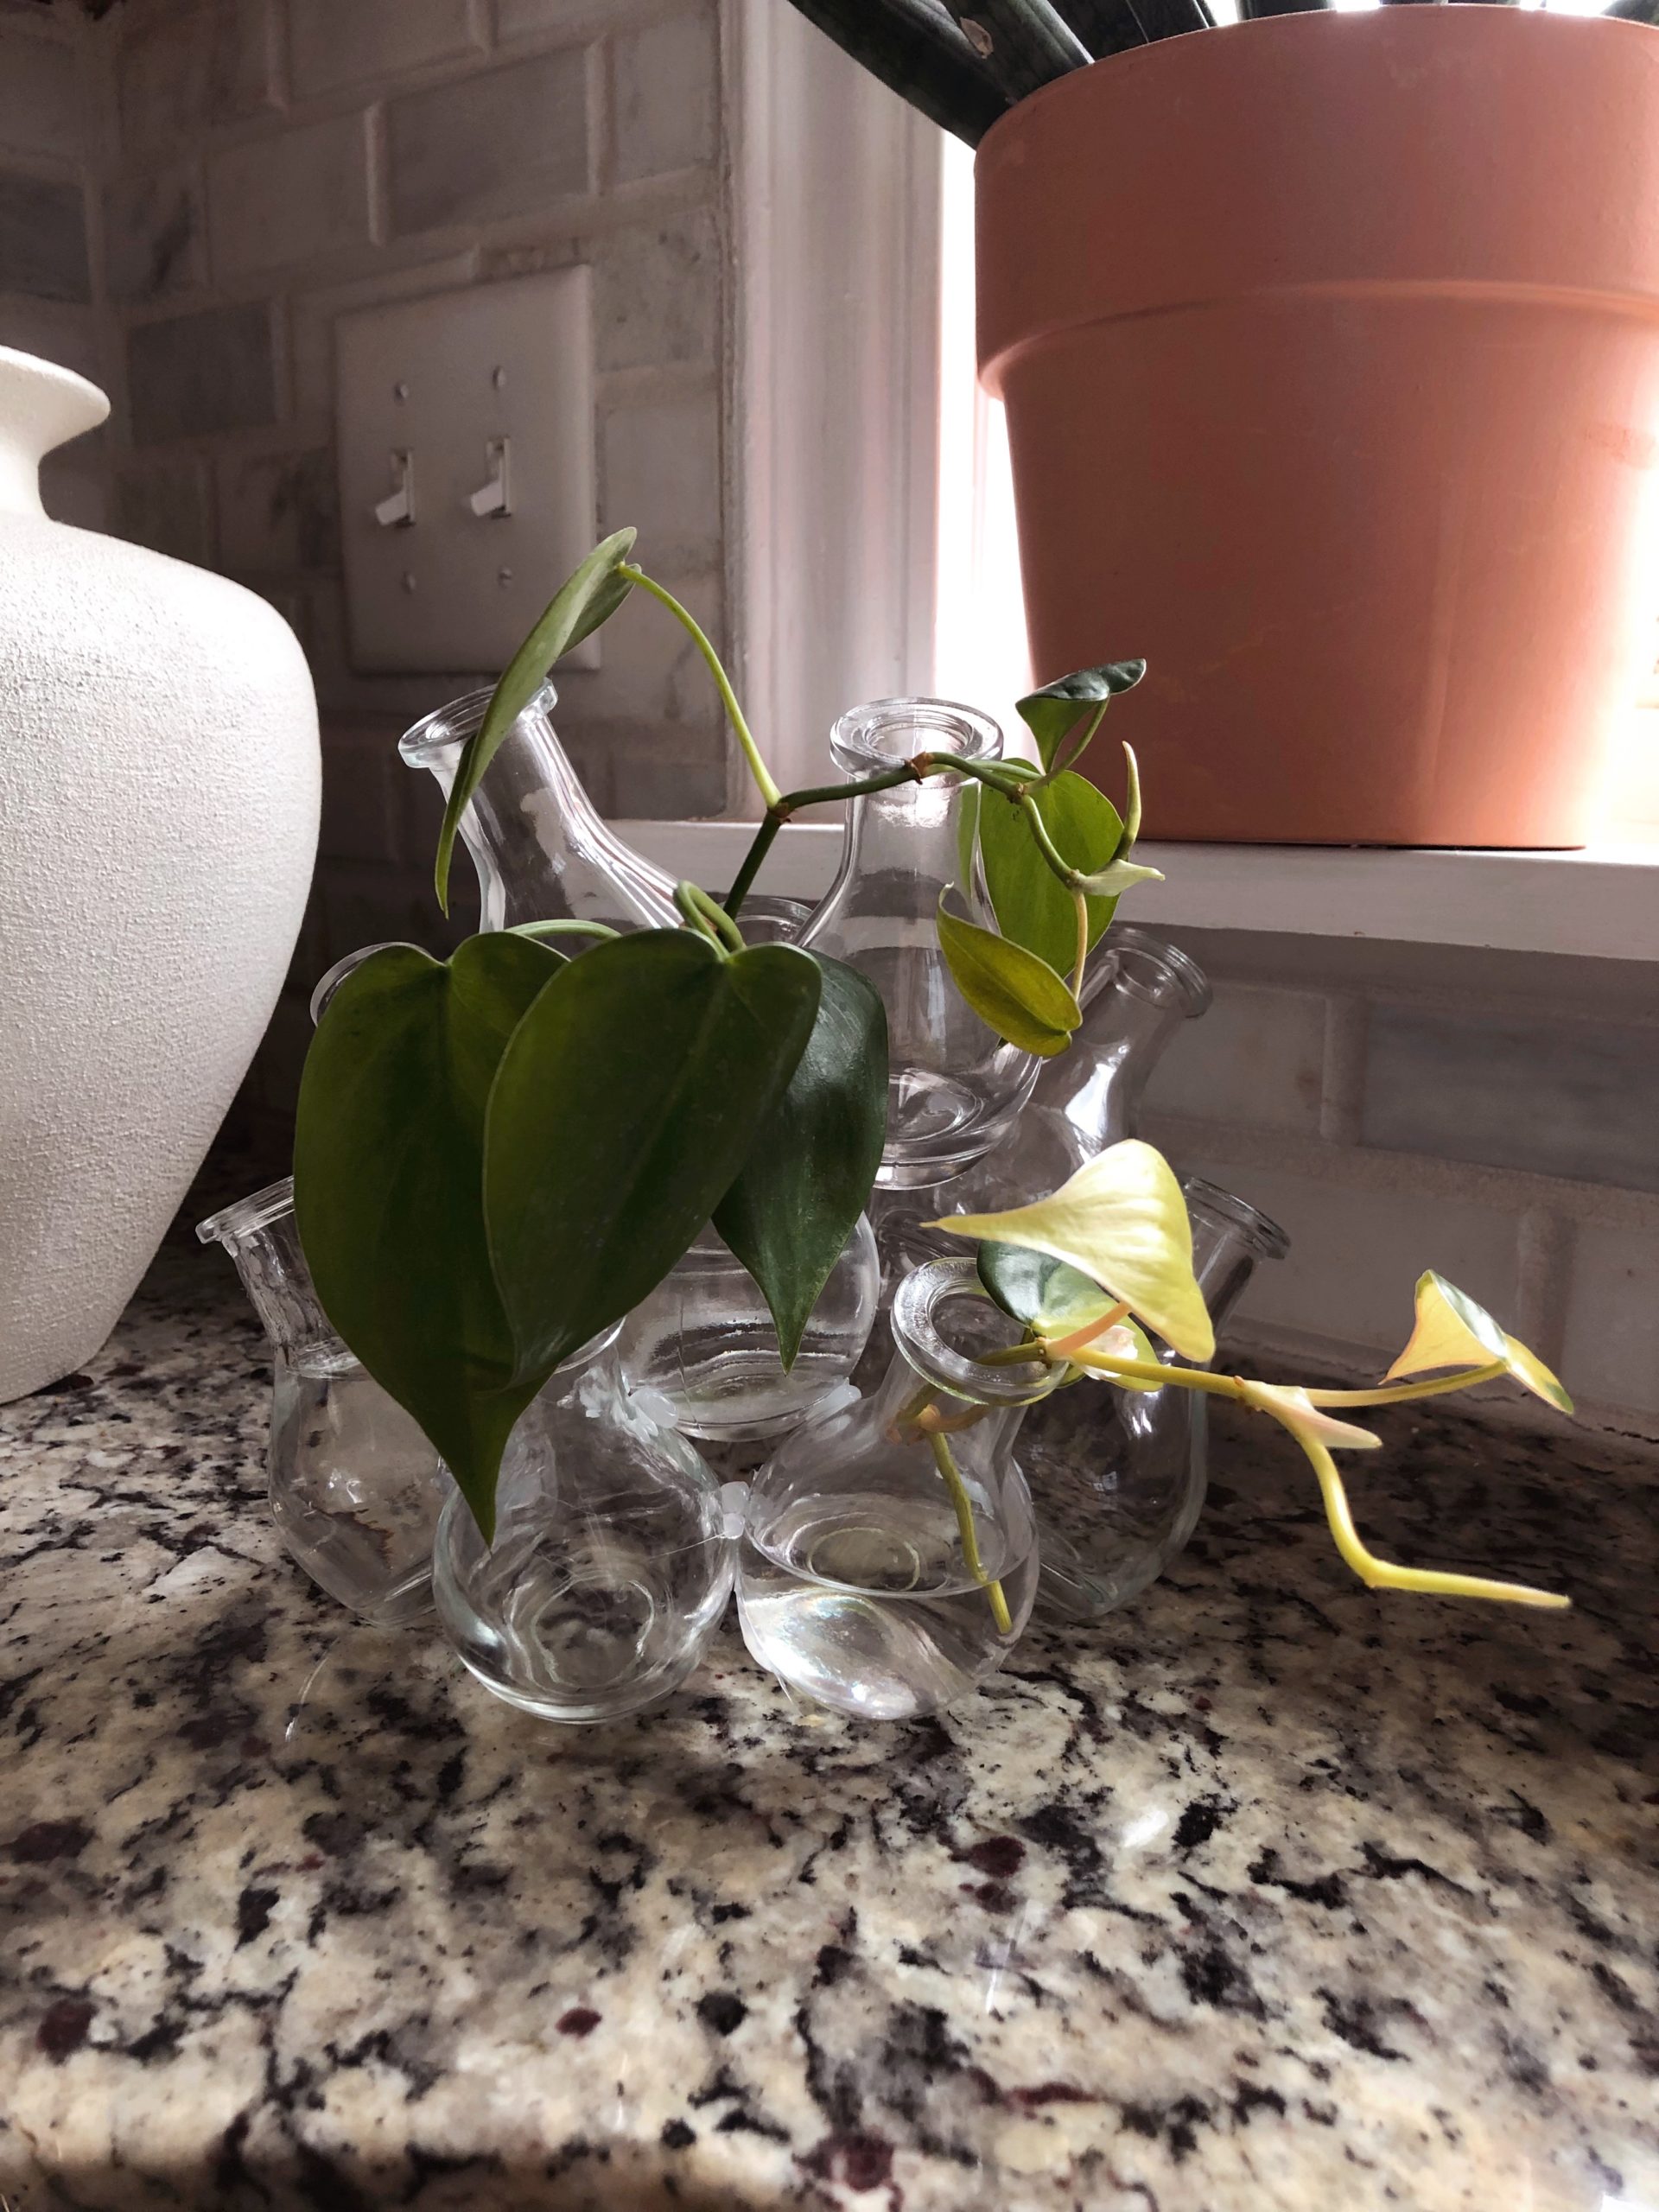
Originally I purchased 18 of them to create an exact replica of my vintage inspiration. However, I ended up creating two smaller propagation stations using 12 for one and 5 for the other. I think the propagation station with 5 glass jars is the most stable and functional.
step 2: glue glass jars together
To glue the glass jars together you will need a thicker glue like this gorilla glue gel.
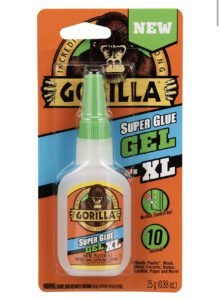
The gel super glue has held the best so far without any issues.
You will need to work at adding one jar at a time. Making sure that each jar is secure before moving to the next. Apply a generous amount of the glue between the jars and hold them firmly in place for a minimum of 30 seconds. The slower you work on this the better. The Jars should be angled slightly outward so that they are leaning. If you find that you need a little extra support while working when you first start, use a rolled up towel around/under the vases.
five jar propagation station
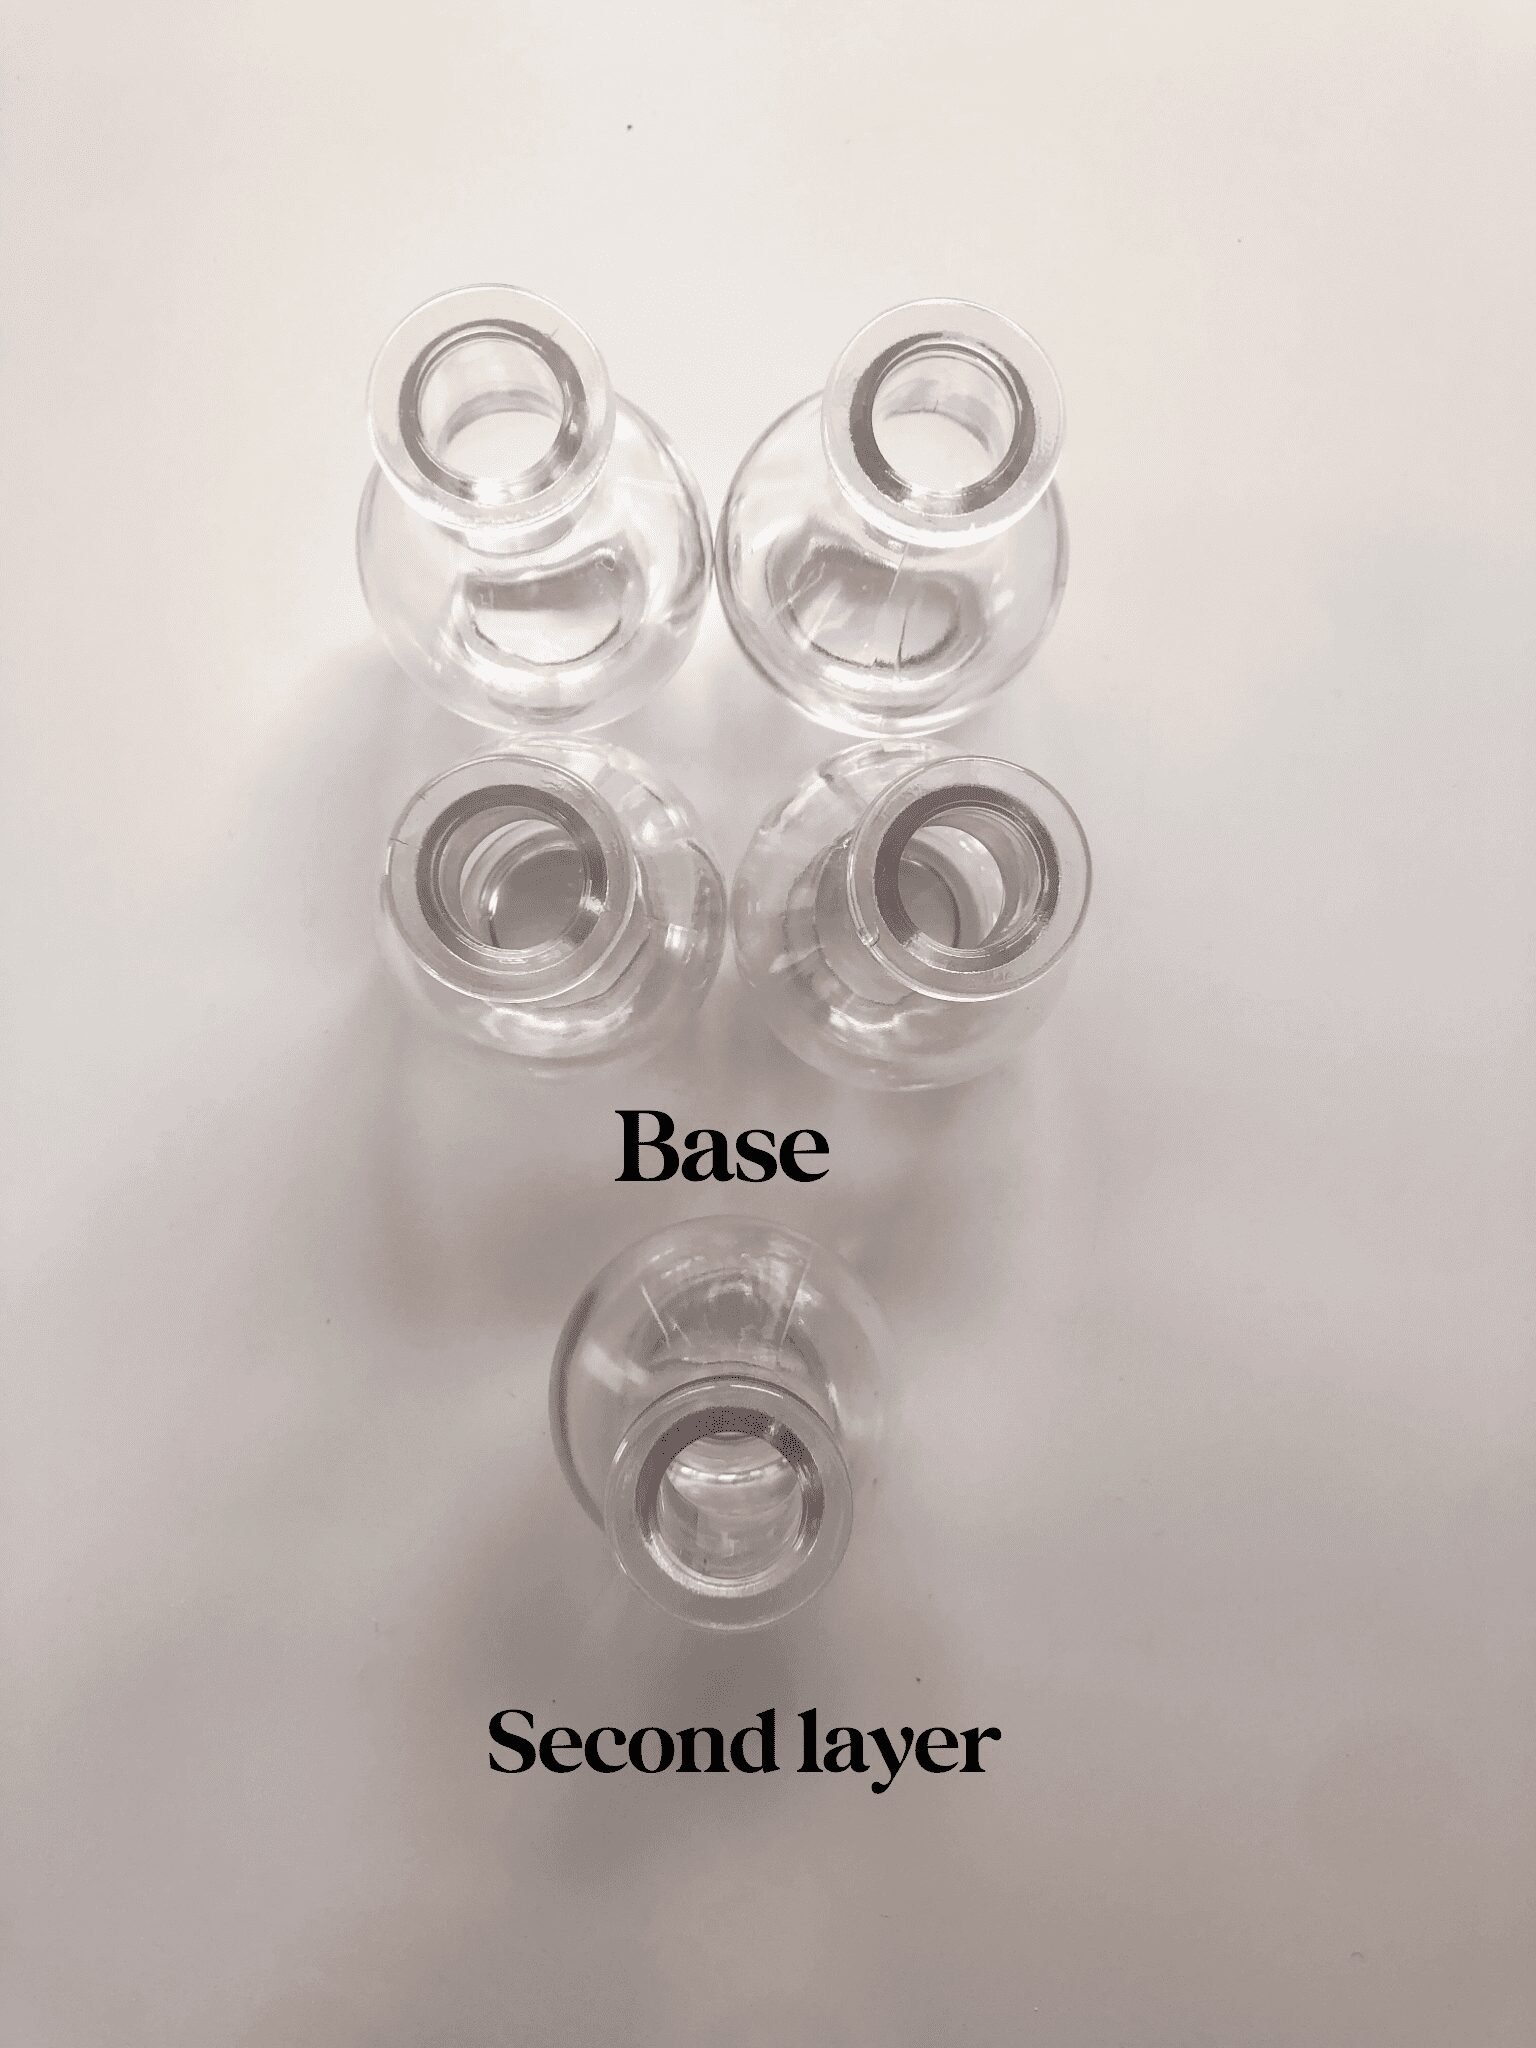
To create the 5 jar propagation station you will glue four jars together in a square as the base and then stack one on top of them in the middle. Again, make sure that the four glass jars that form the base are all slightly tilted out. You can see the formation of each later in the image below.
12 jar propagation station
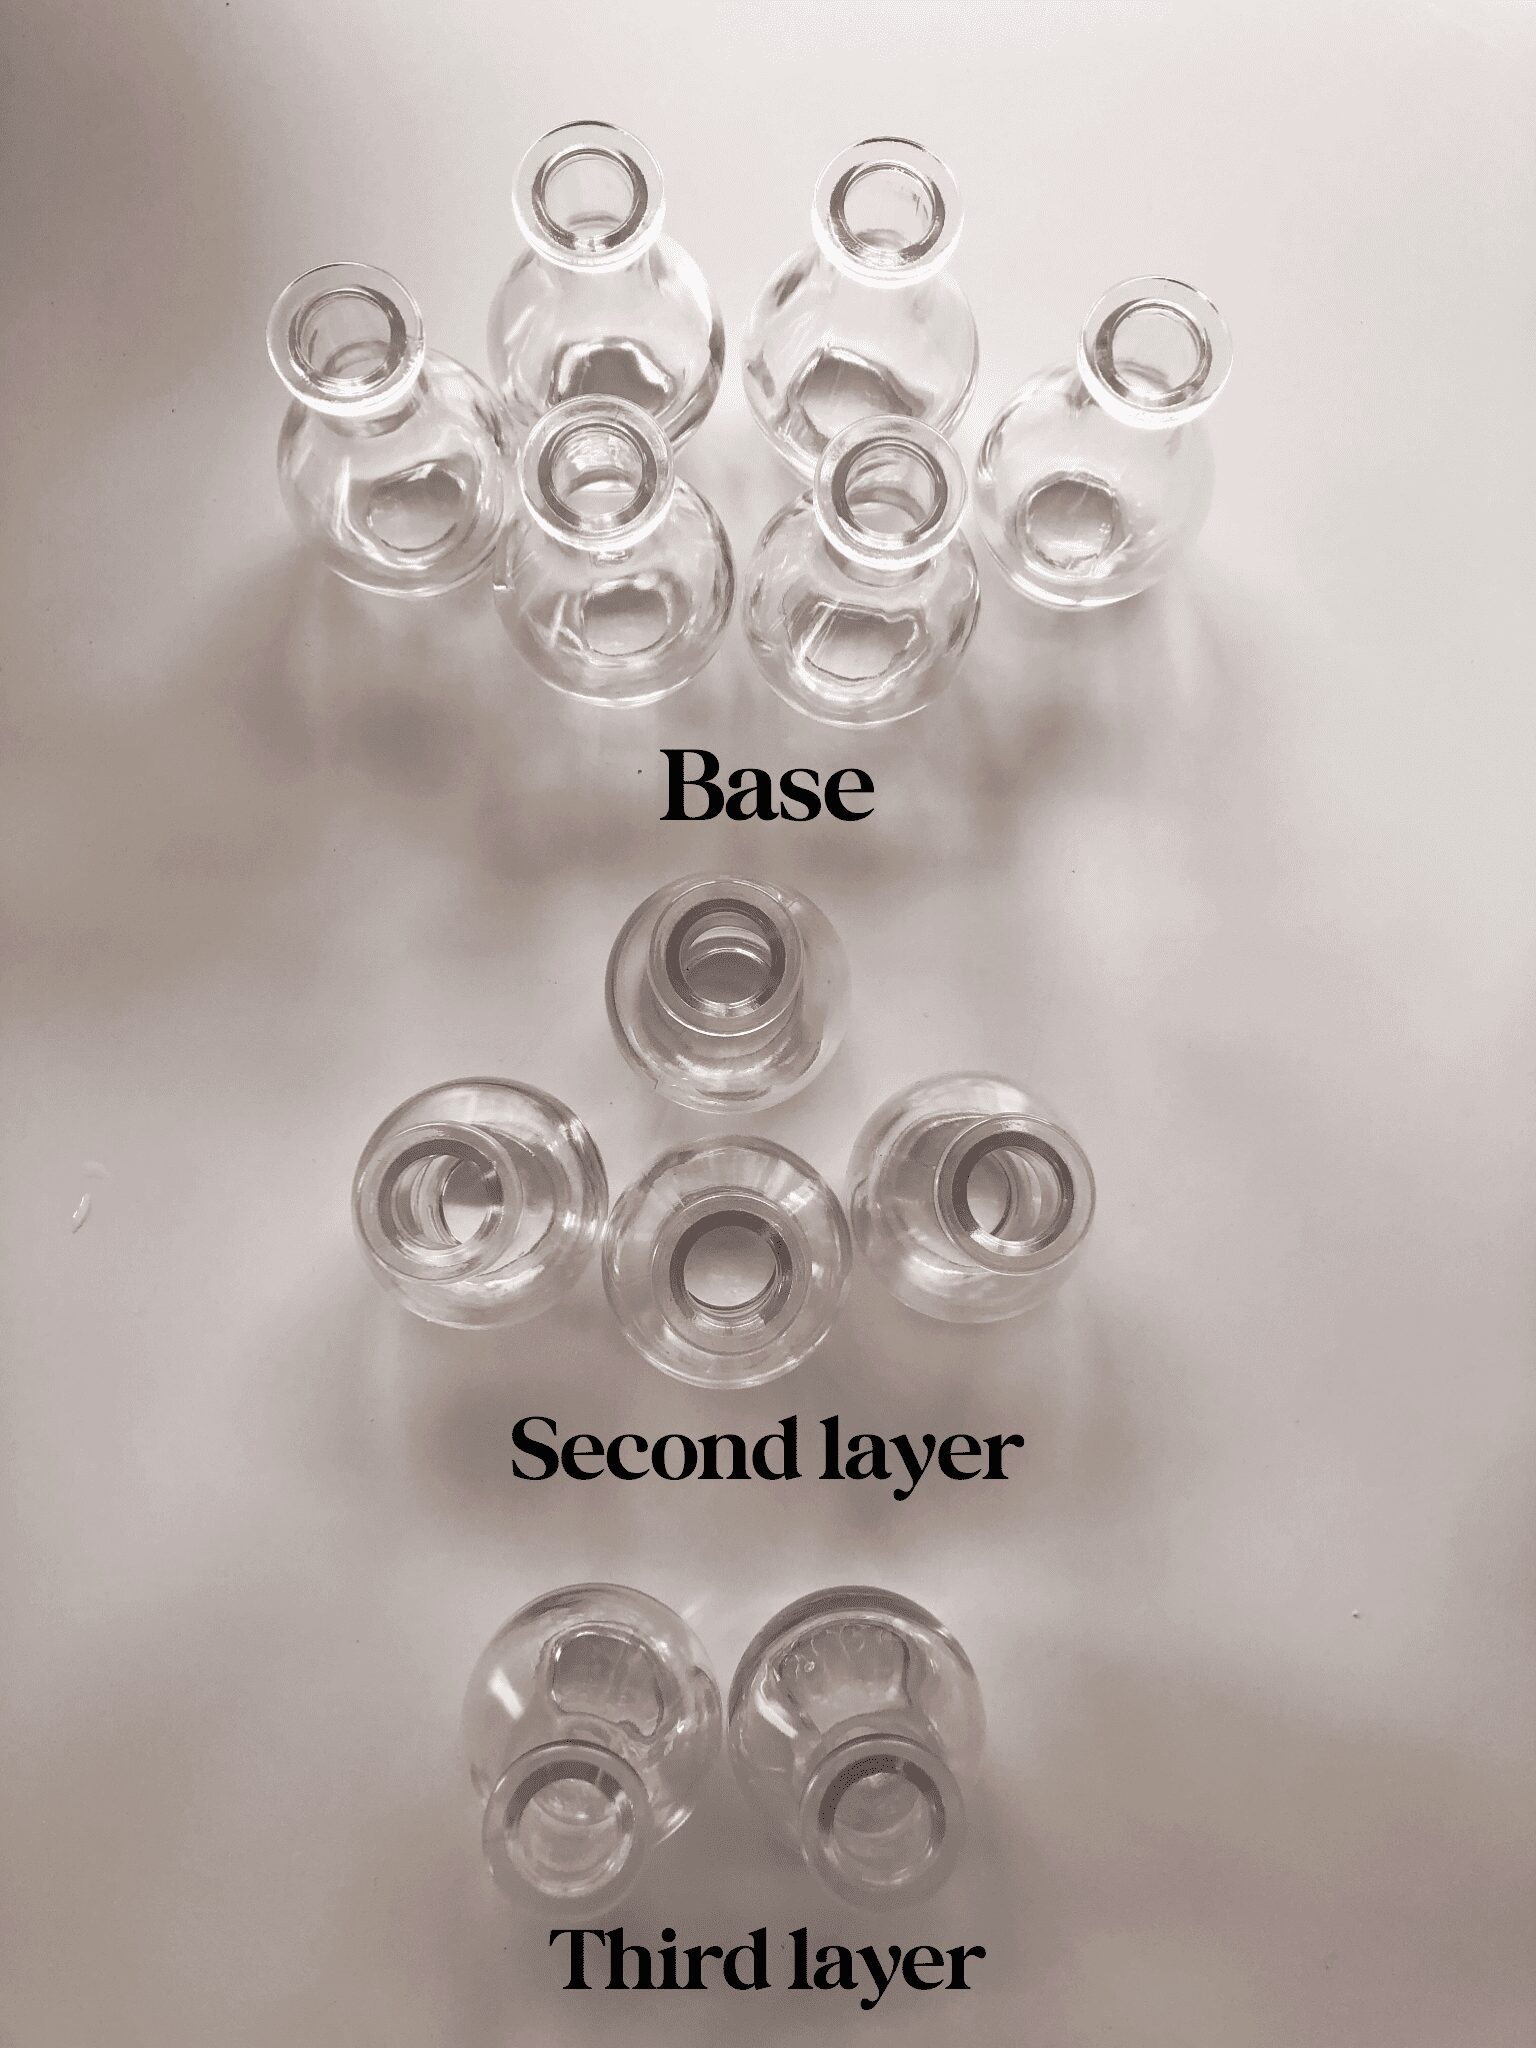
To create the 12 jar propagation station you will build a base of six vases. Four vases in a square and one on the right and left sides of the square. Once your base is built you will stack four more vases on top of those and then another 2 on top of those, similar to a pyramid. The formation of each layer is also shown below. For added stability this propagation station would do well being glued to a solid base for added support.
trial and error
I attempted to use “glass glue” and regular super glue, but they were too thin/runny and did not create enough of a hold between the glass jars. I also tried hot glue and while it held really well, once I put water in the vases, they began to break apart. I think it was mostly the weight of the water in the jars and maybe a bit to do with the temperature change of the glass. I rebuilt everything with the gel super glue and have not not had an issue so far.
step 3: let the glue cure
For best results the glue will need time to dry and fully cure before you attempt to move your propagation station or add any plant cuttings to it. Follow the directions on the glue to be sure you wait the proper amount of time.
step 4: add water and plant cuttings
Once your propagation station has had time to cure you can begin taking cuttings from your existing plants to place in the propagation station. Remember, to keep this functional, do not put water in every single vase and try to evenly disperse where you place plants.
how to display your propagation station
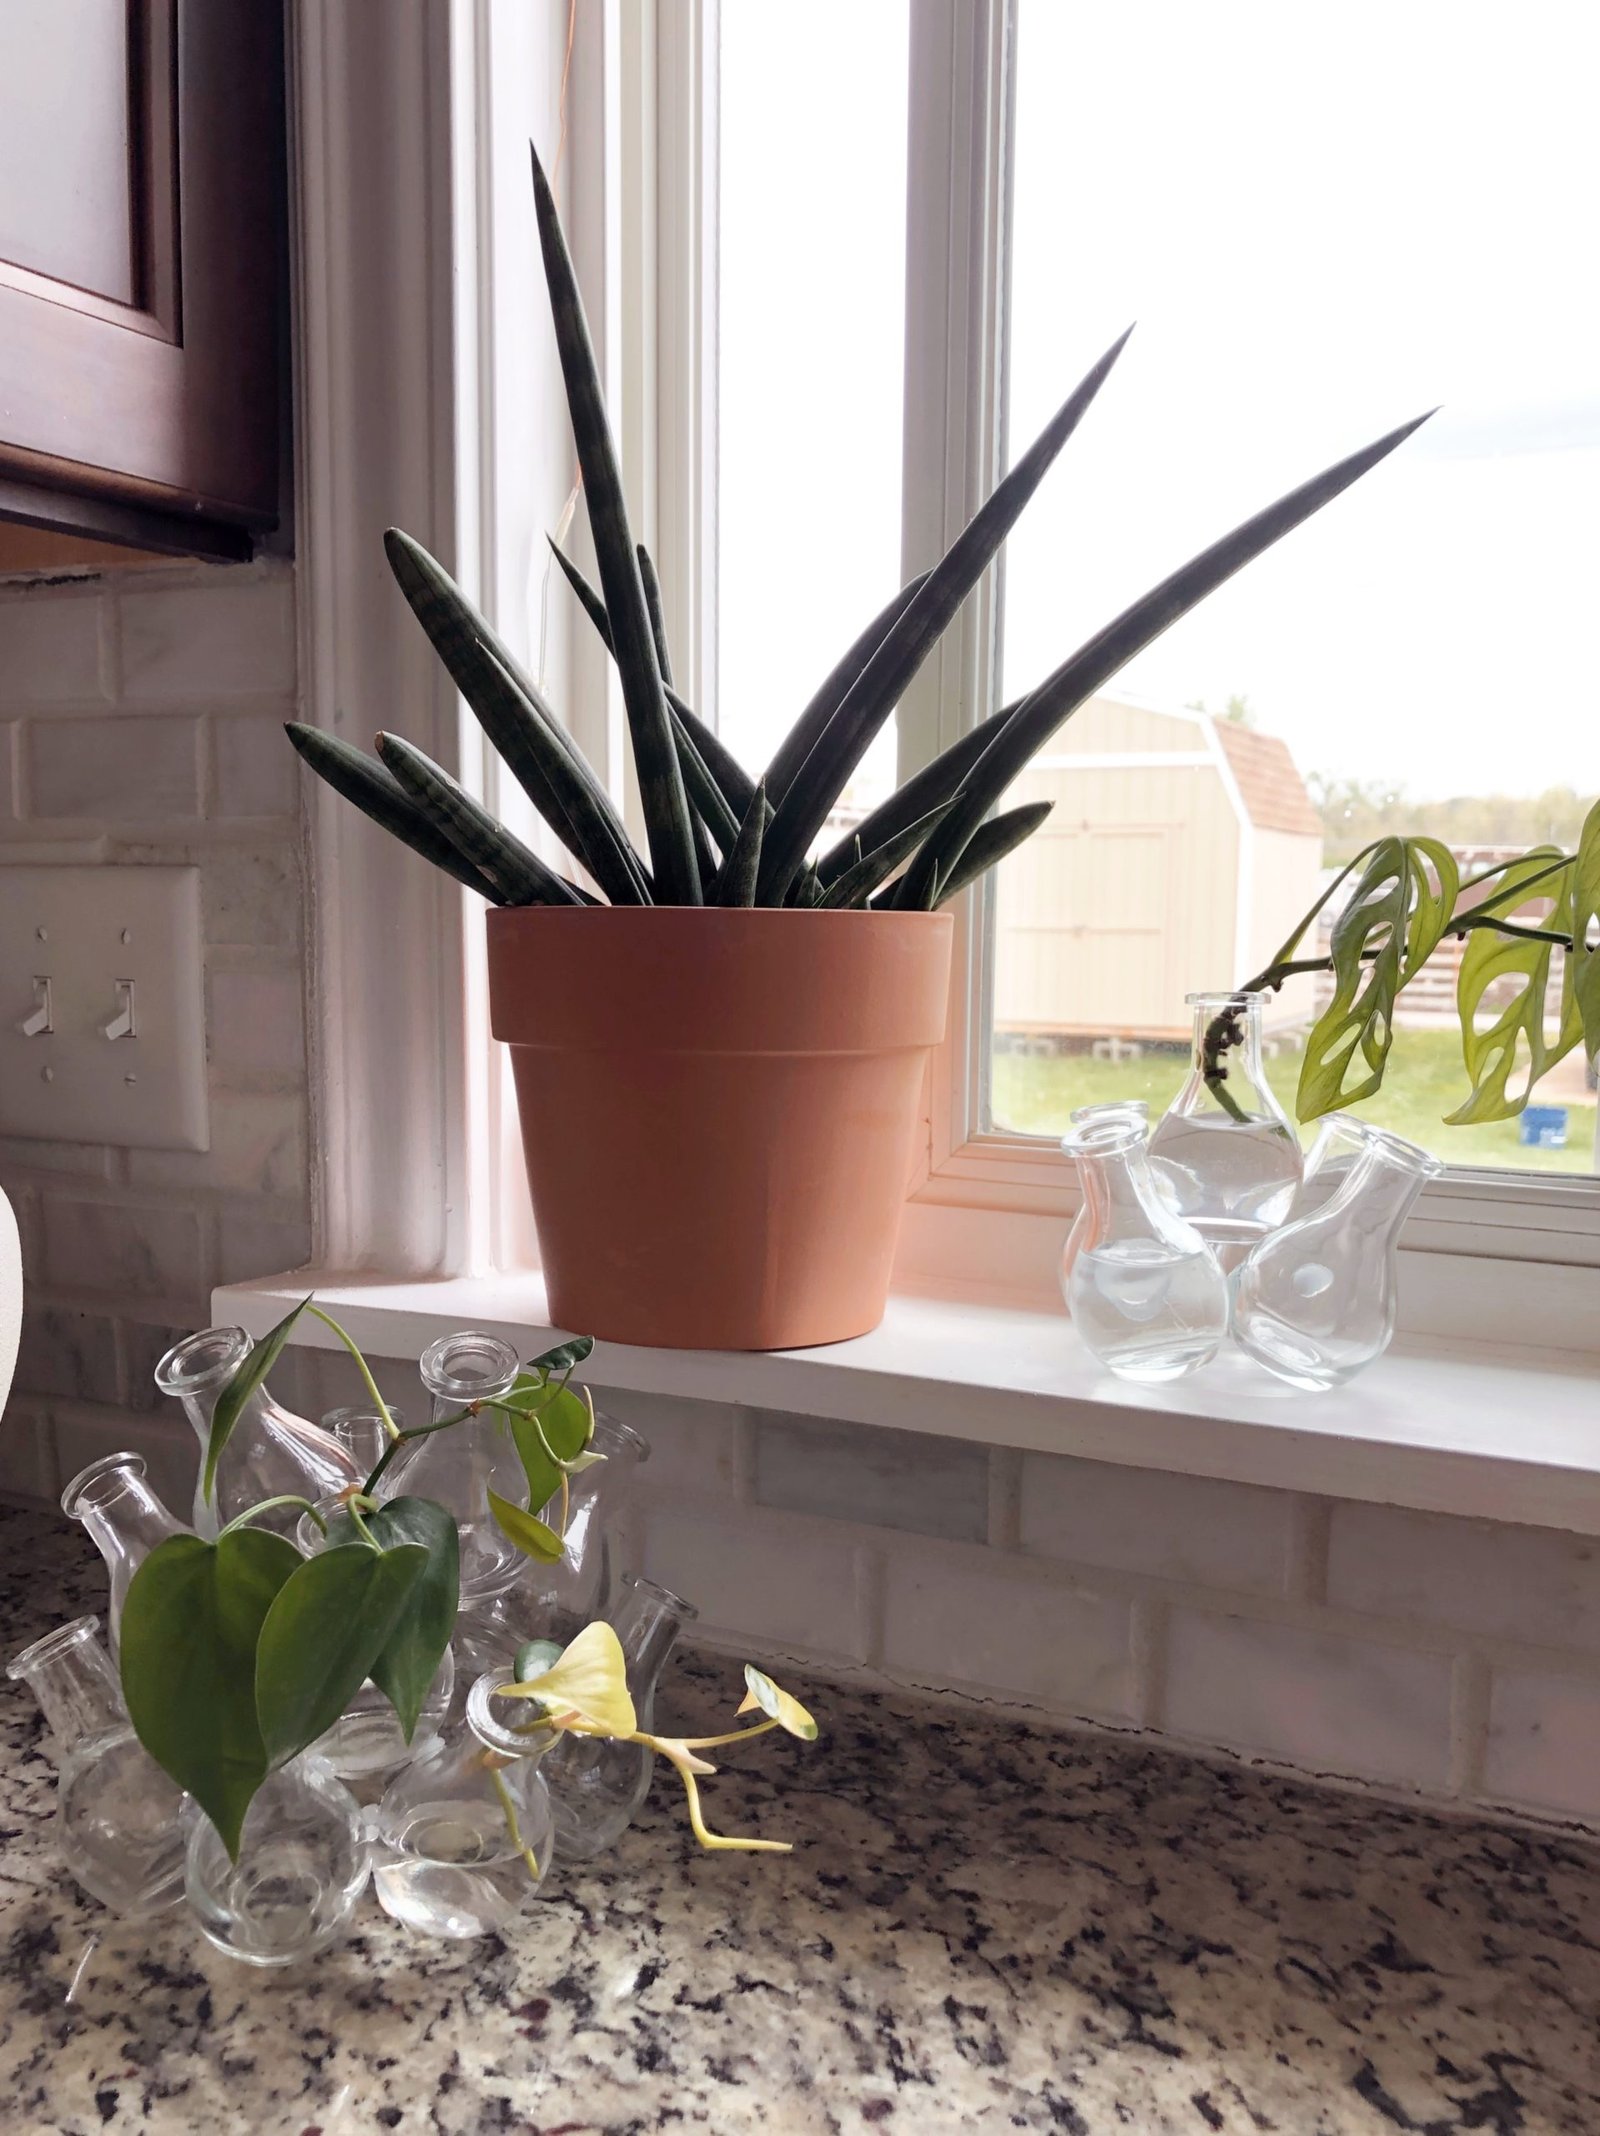
When deciding where to display your new diy plant propagation station, you will want to consider the amount of light that it will receive. Plant cuttings do better in sunny areas, but it shouldn’t be direct sunlight. I am leaving mine in our north facing kitchen windowsill where the cuttings will receive indirect light all day.
- North windows receive light all day, but it is often considered a weaker and more shaded light source compared to other window directions because of the way the sun moves across the sky. This can also depend on if anything is blocking your window from the inside (curtains or shades), what is outside your window (trees, awnings or other buildings) and how close to the plant is to the window.
- East windows give direct light in the morning hours.
- South windows are known for strong sun all day.
- West windows give direct light in the afternoon and evening hours.
If you need to utilize a window that gives stronger/direct light just place it further away from the window to decrease the strength of light.
PRO TIP: These make great gifts for plant lovers 😉
amazing propagation station ideas
If this diy plant propagation station is not your style, consider these alternative propagation station ideas for displaying the cuttings you are propagating.
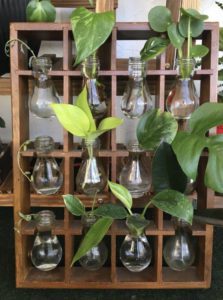
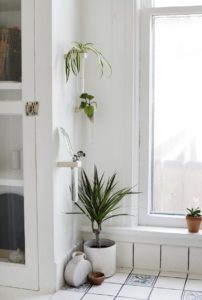
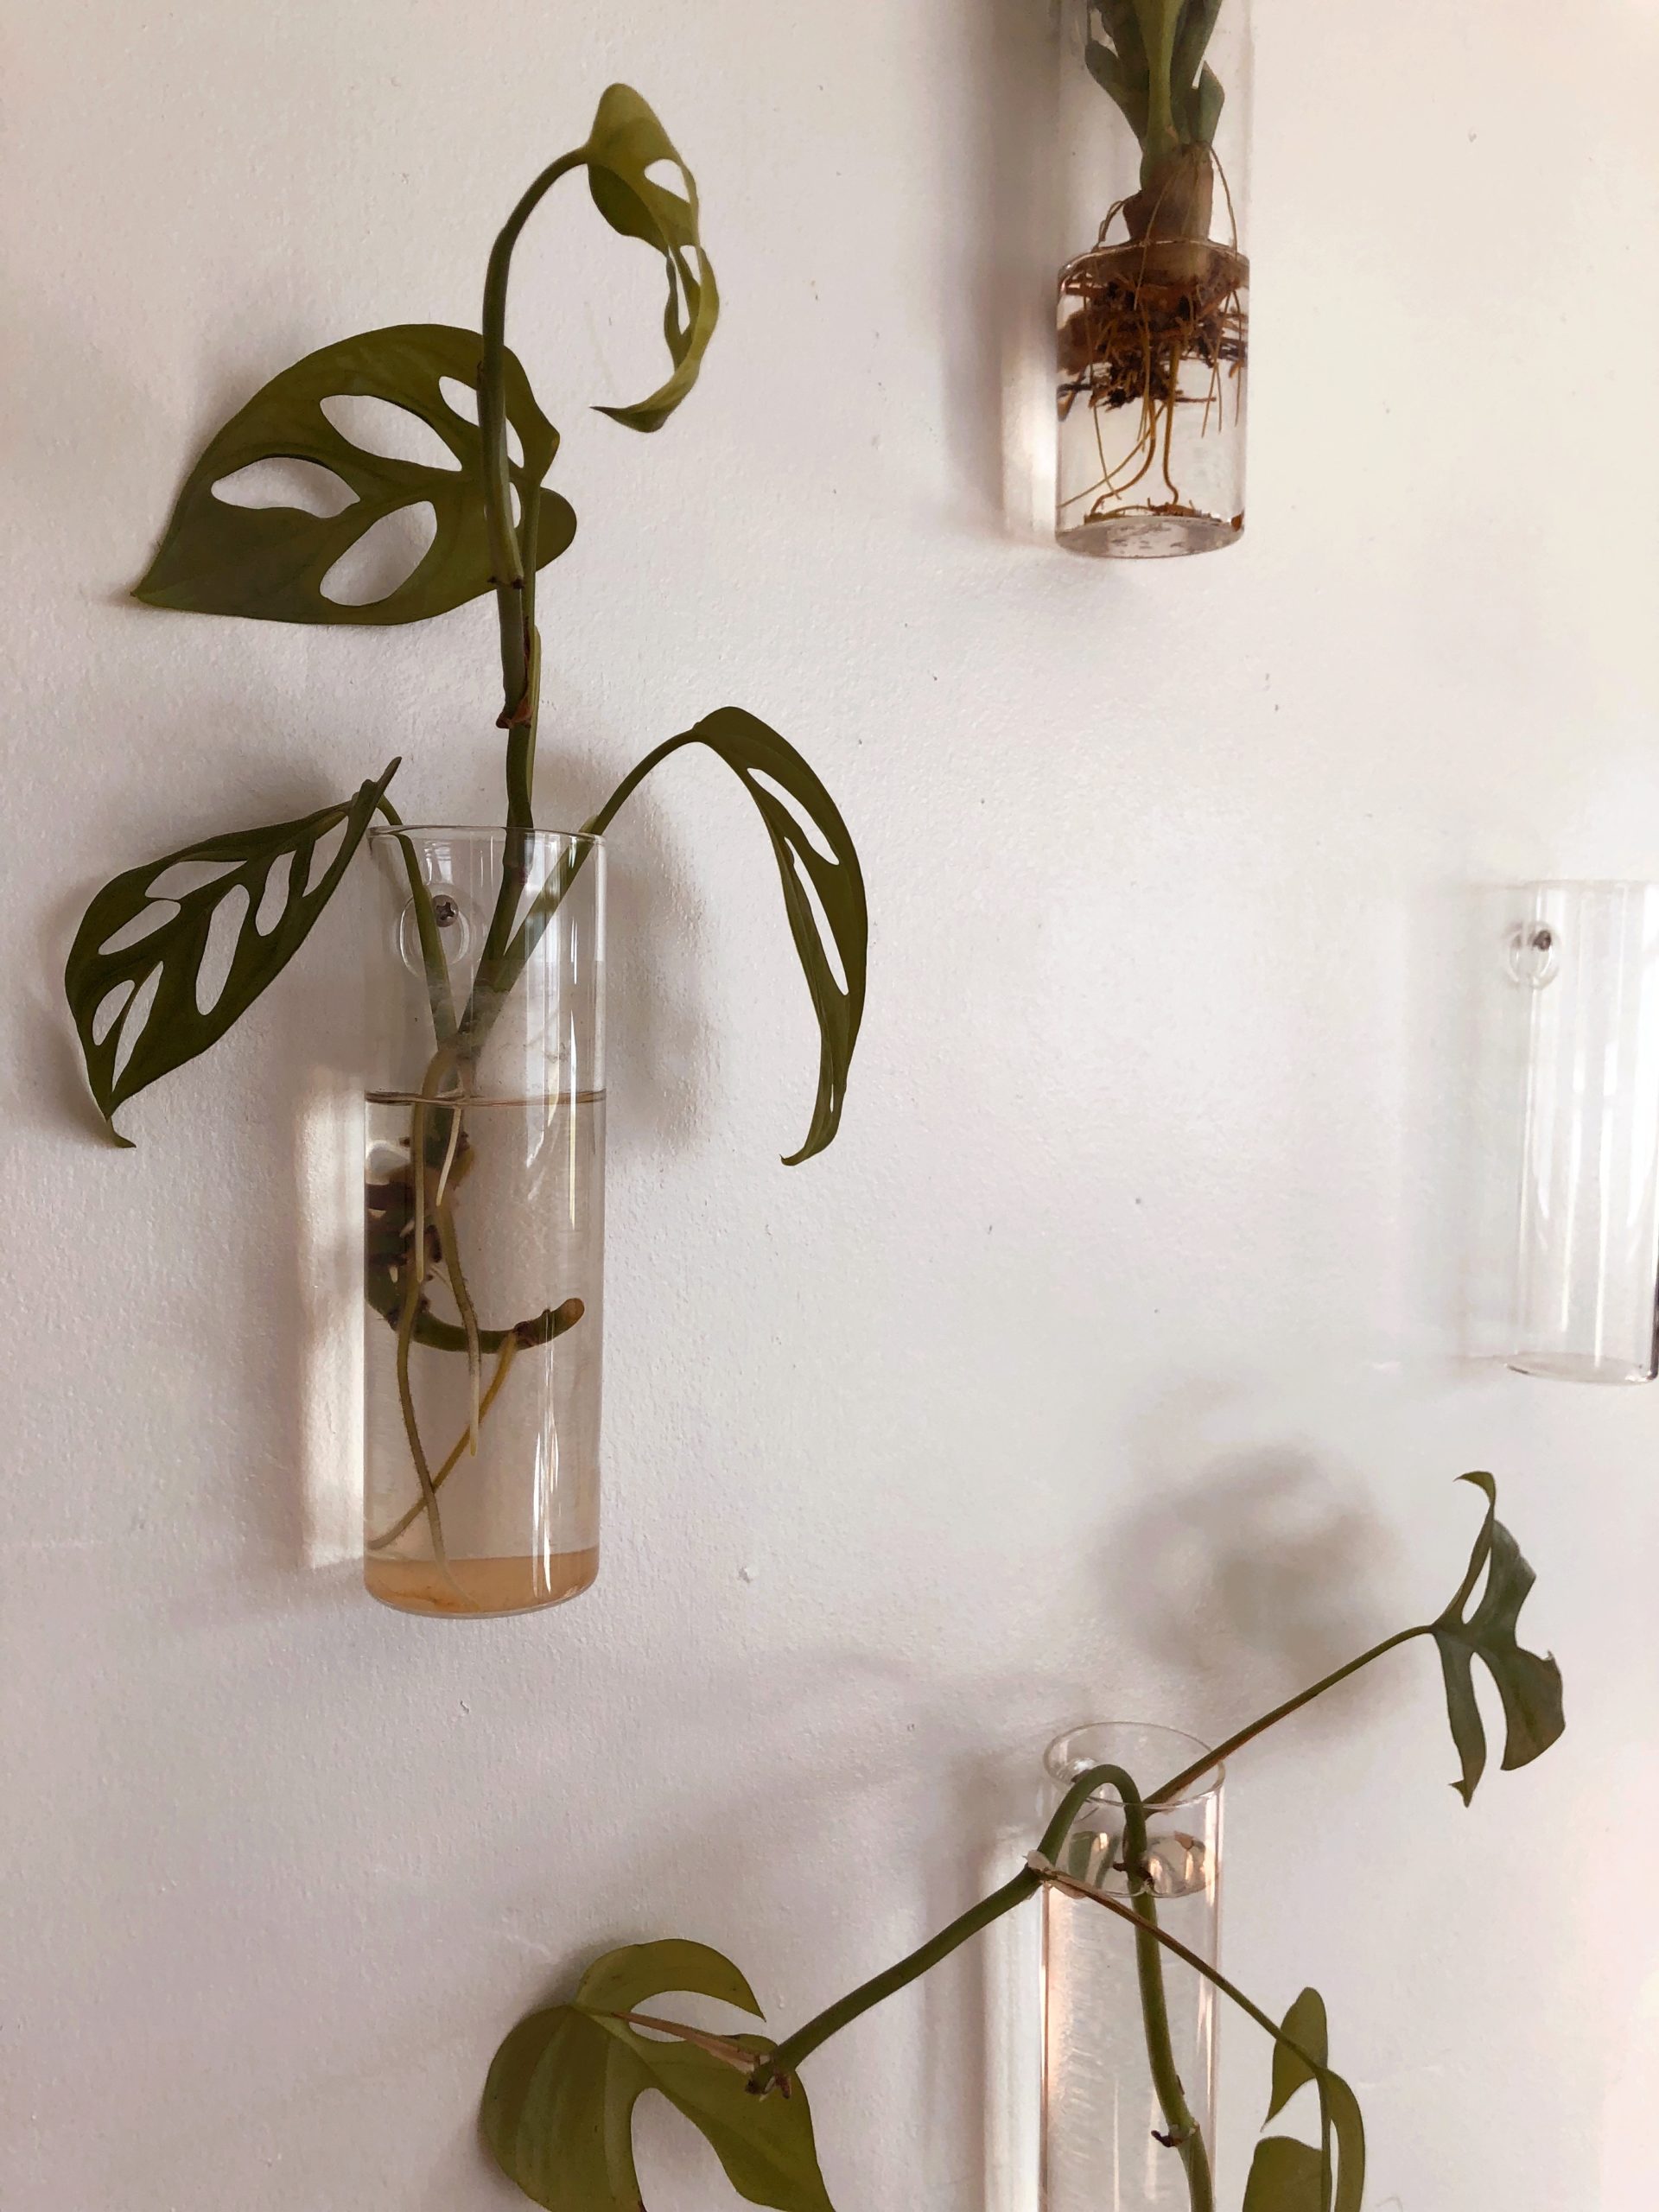
where to find plant propagation tubes
You can propagate plants in any style of jar or container. If you are looking for something other than the glass bud vases, you can use glass test tubes or wall vases like the ones on my propagation wall pictured below. You can find a ton of options on Amazon and Esty, but you can also find unique containers at the thrift store as well.
which plants are best for a propagation station?
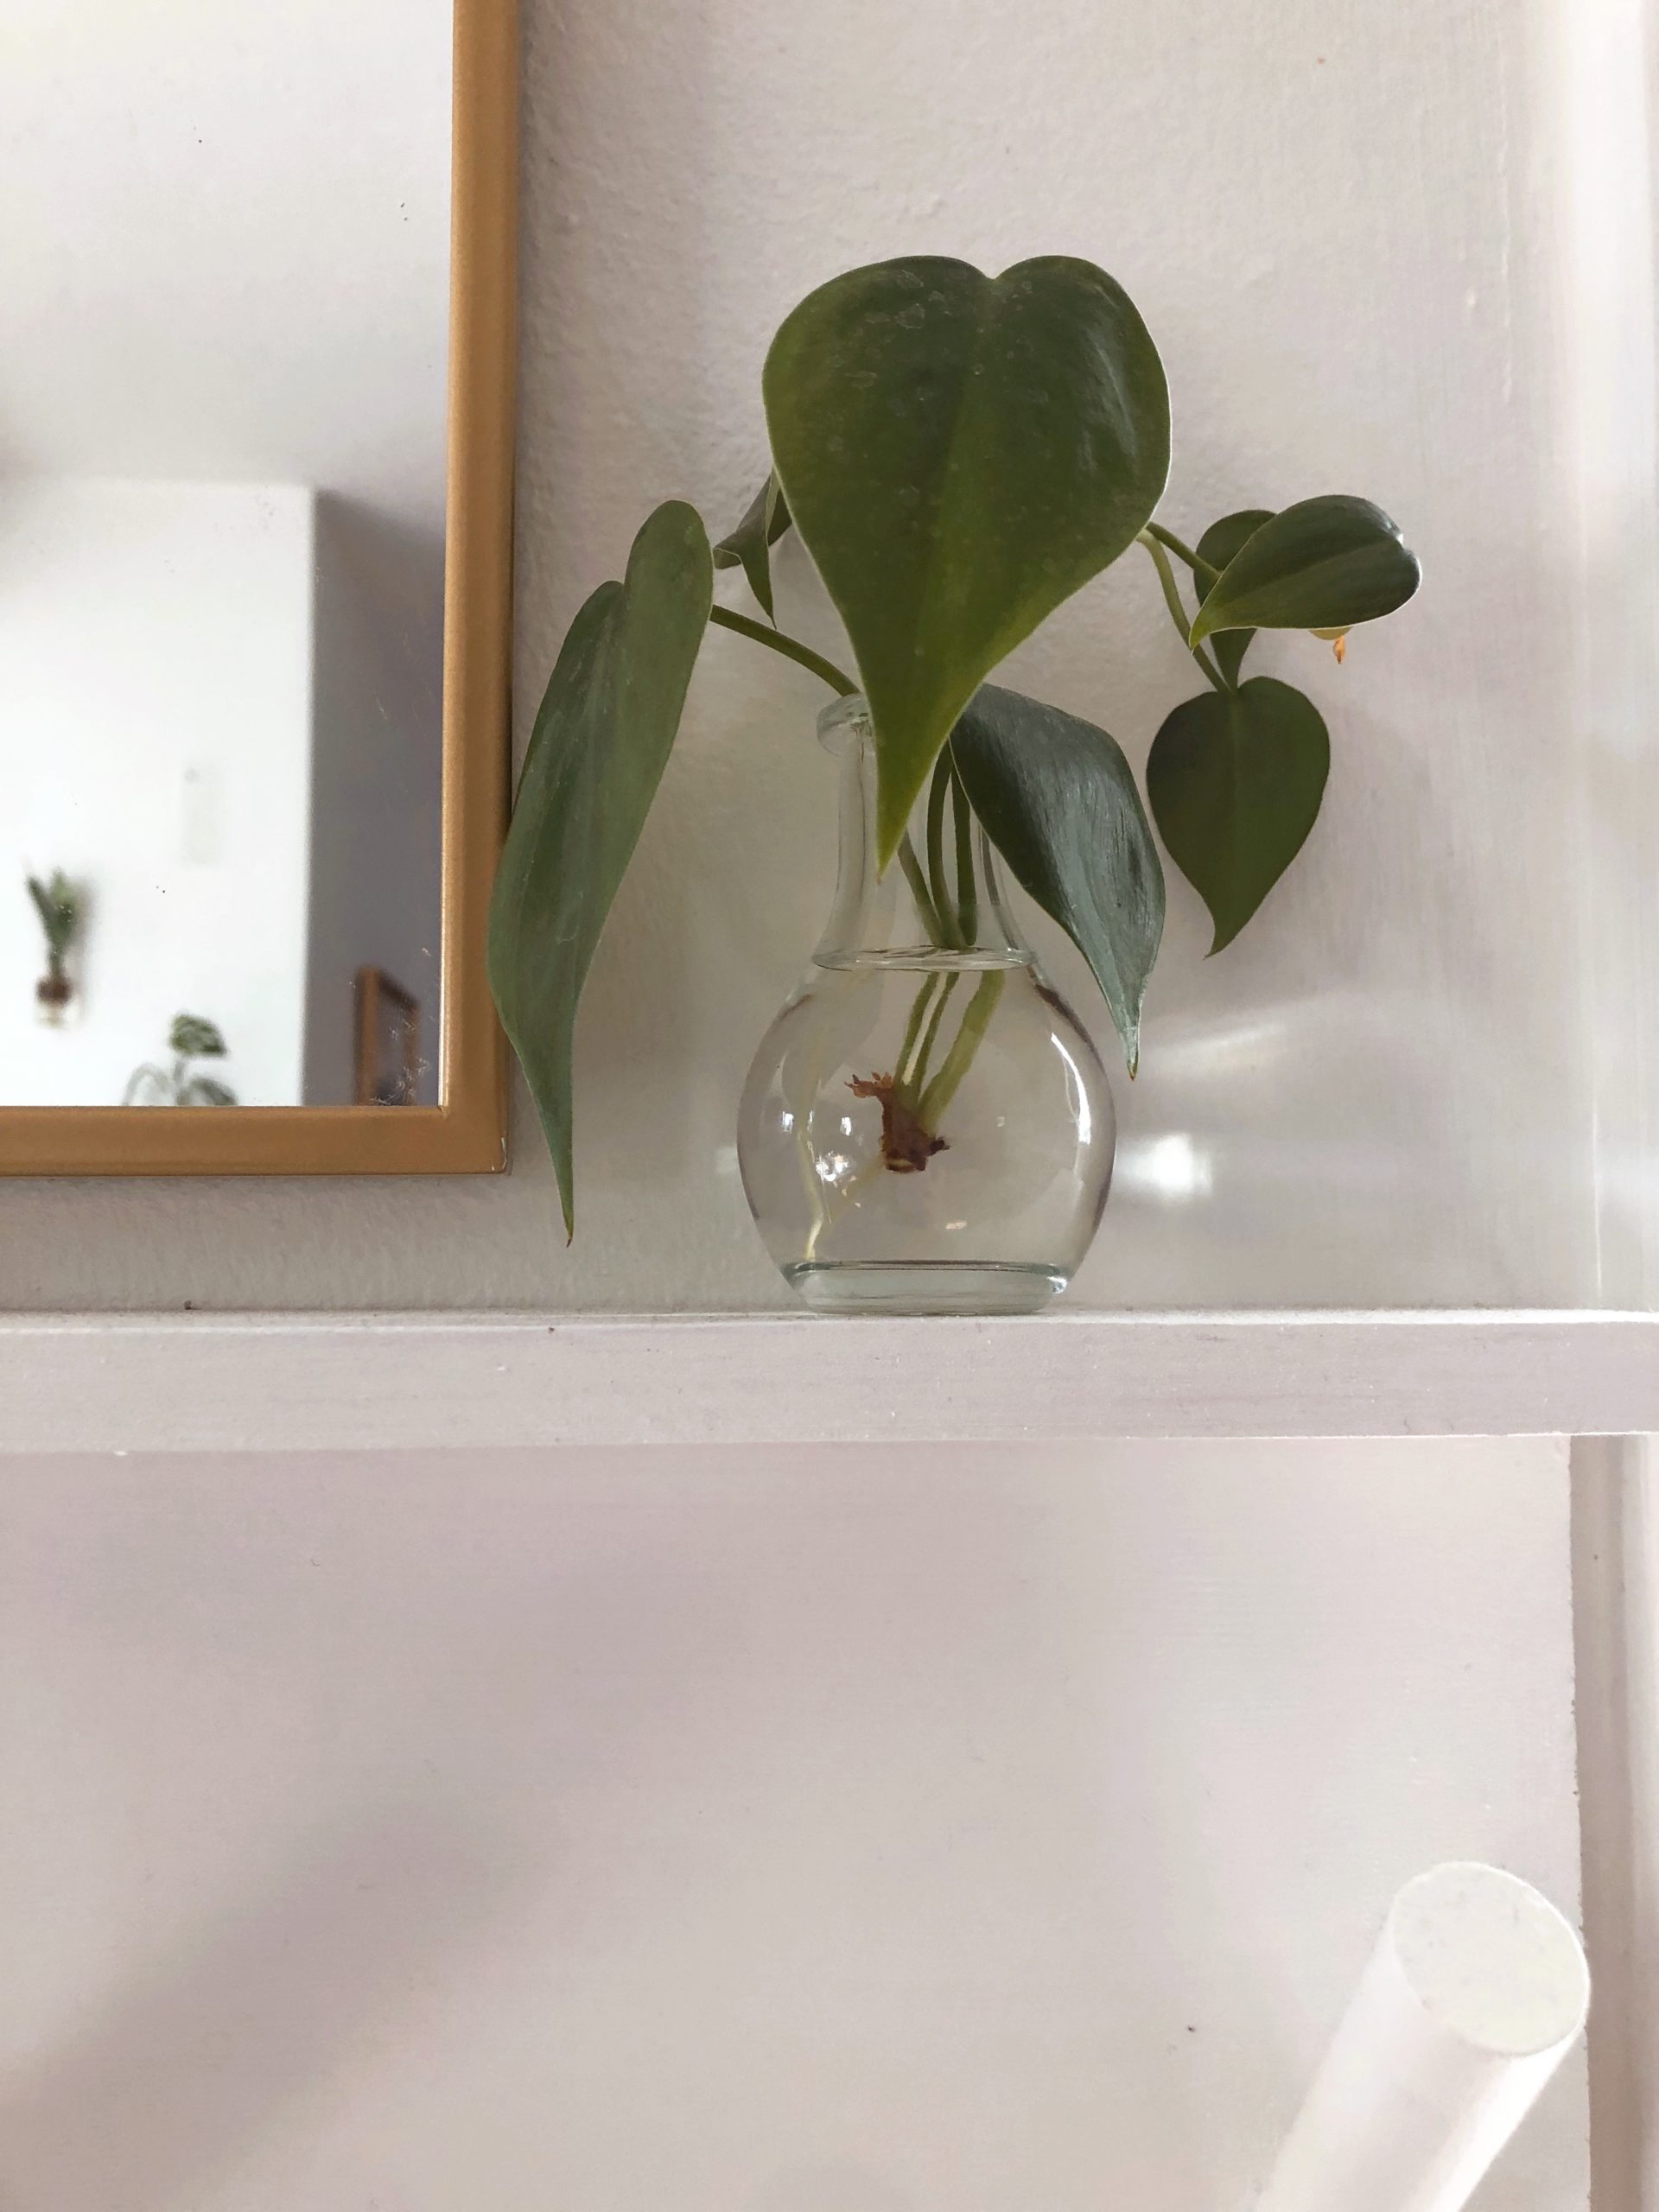
Almost all common house plants can be propagated, though you need to have a container large enough for the specific plant cutting you’re trying to grow. For example, snake plants need a larger opening to be placed in a container than a vining plant like a pothos that can fit into the small opening of the bud vases I used for this DIY.
For this specific propagation station I would stick to plants that have smaller stems/vines and nodes that can easily fit the bud vase.
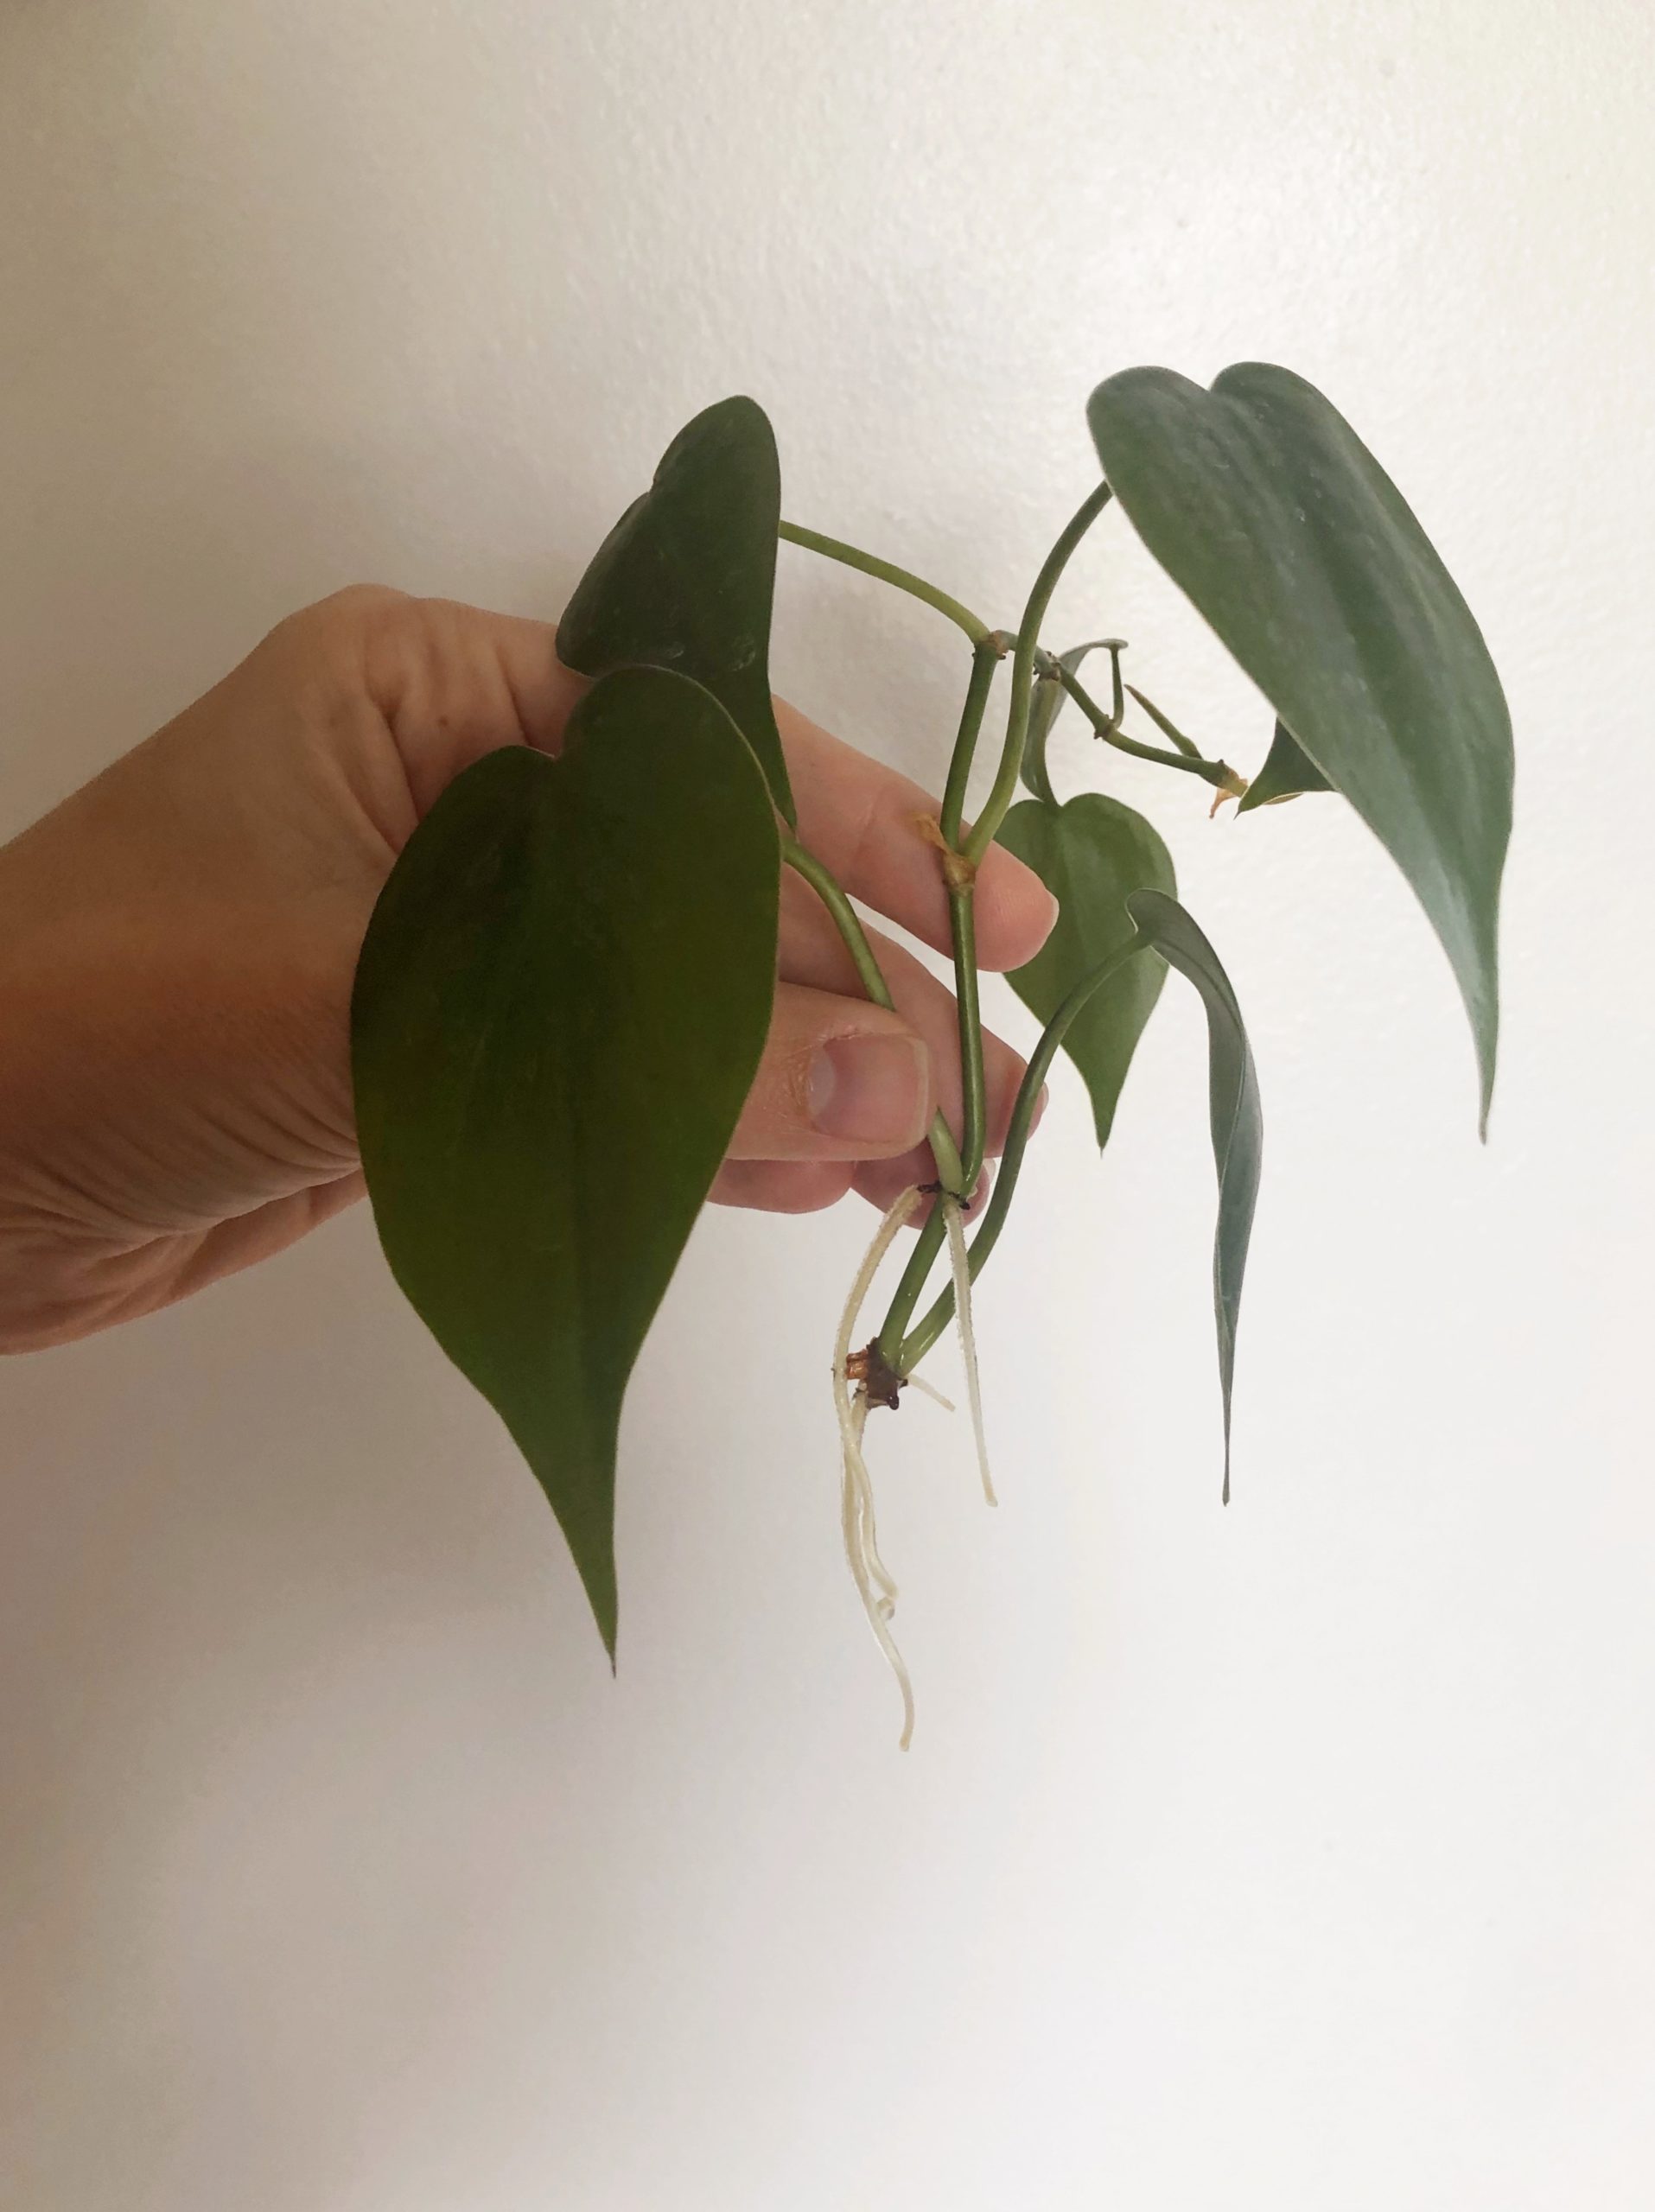
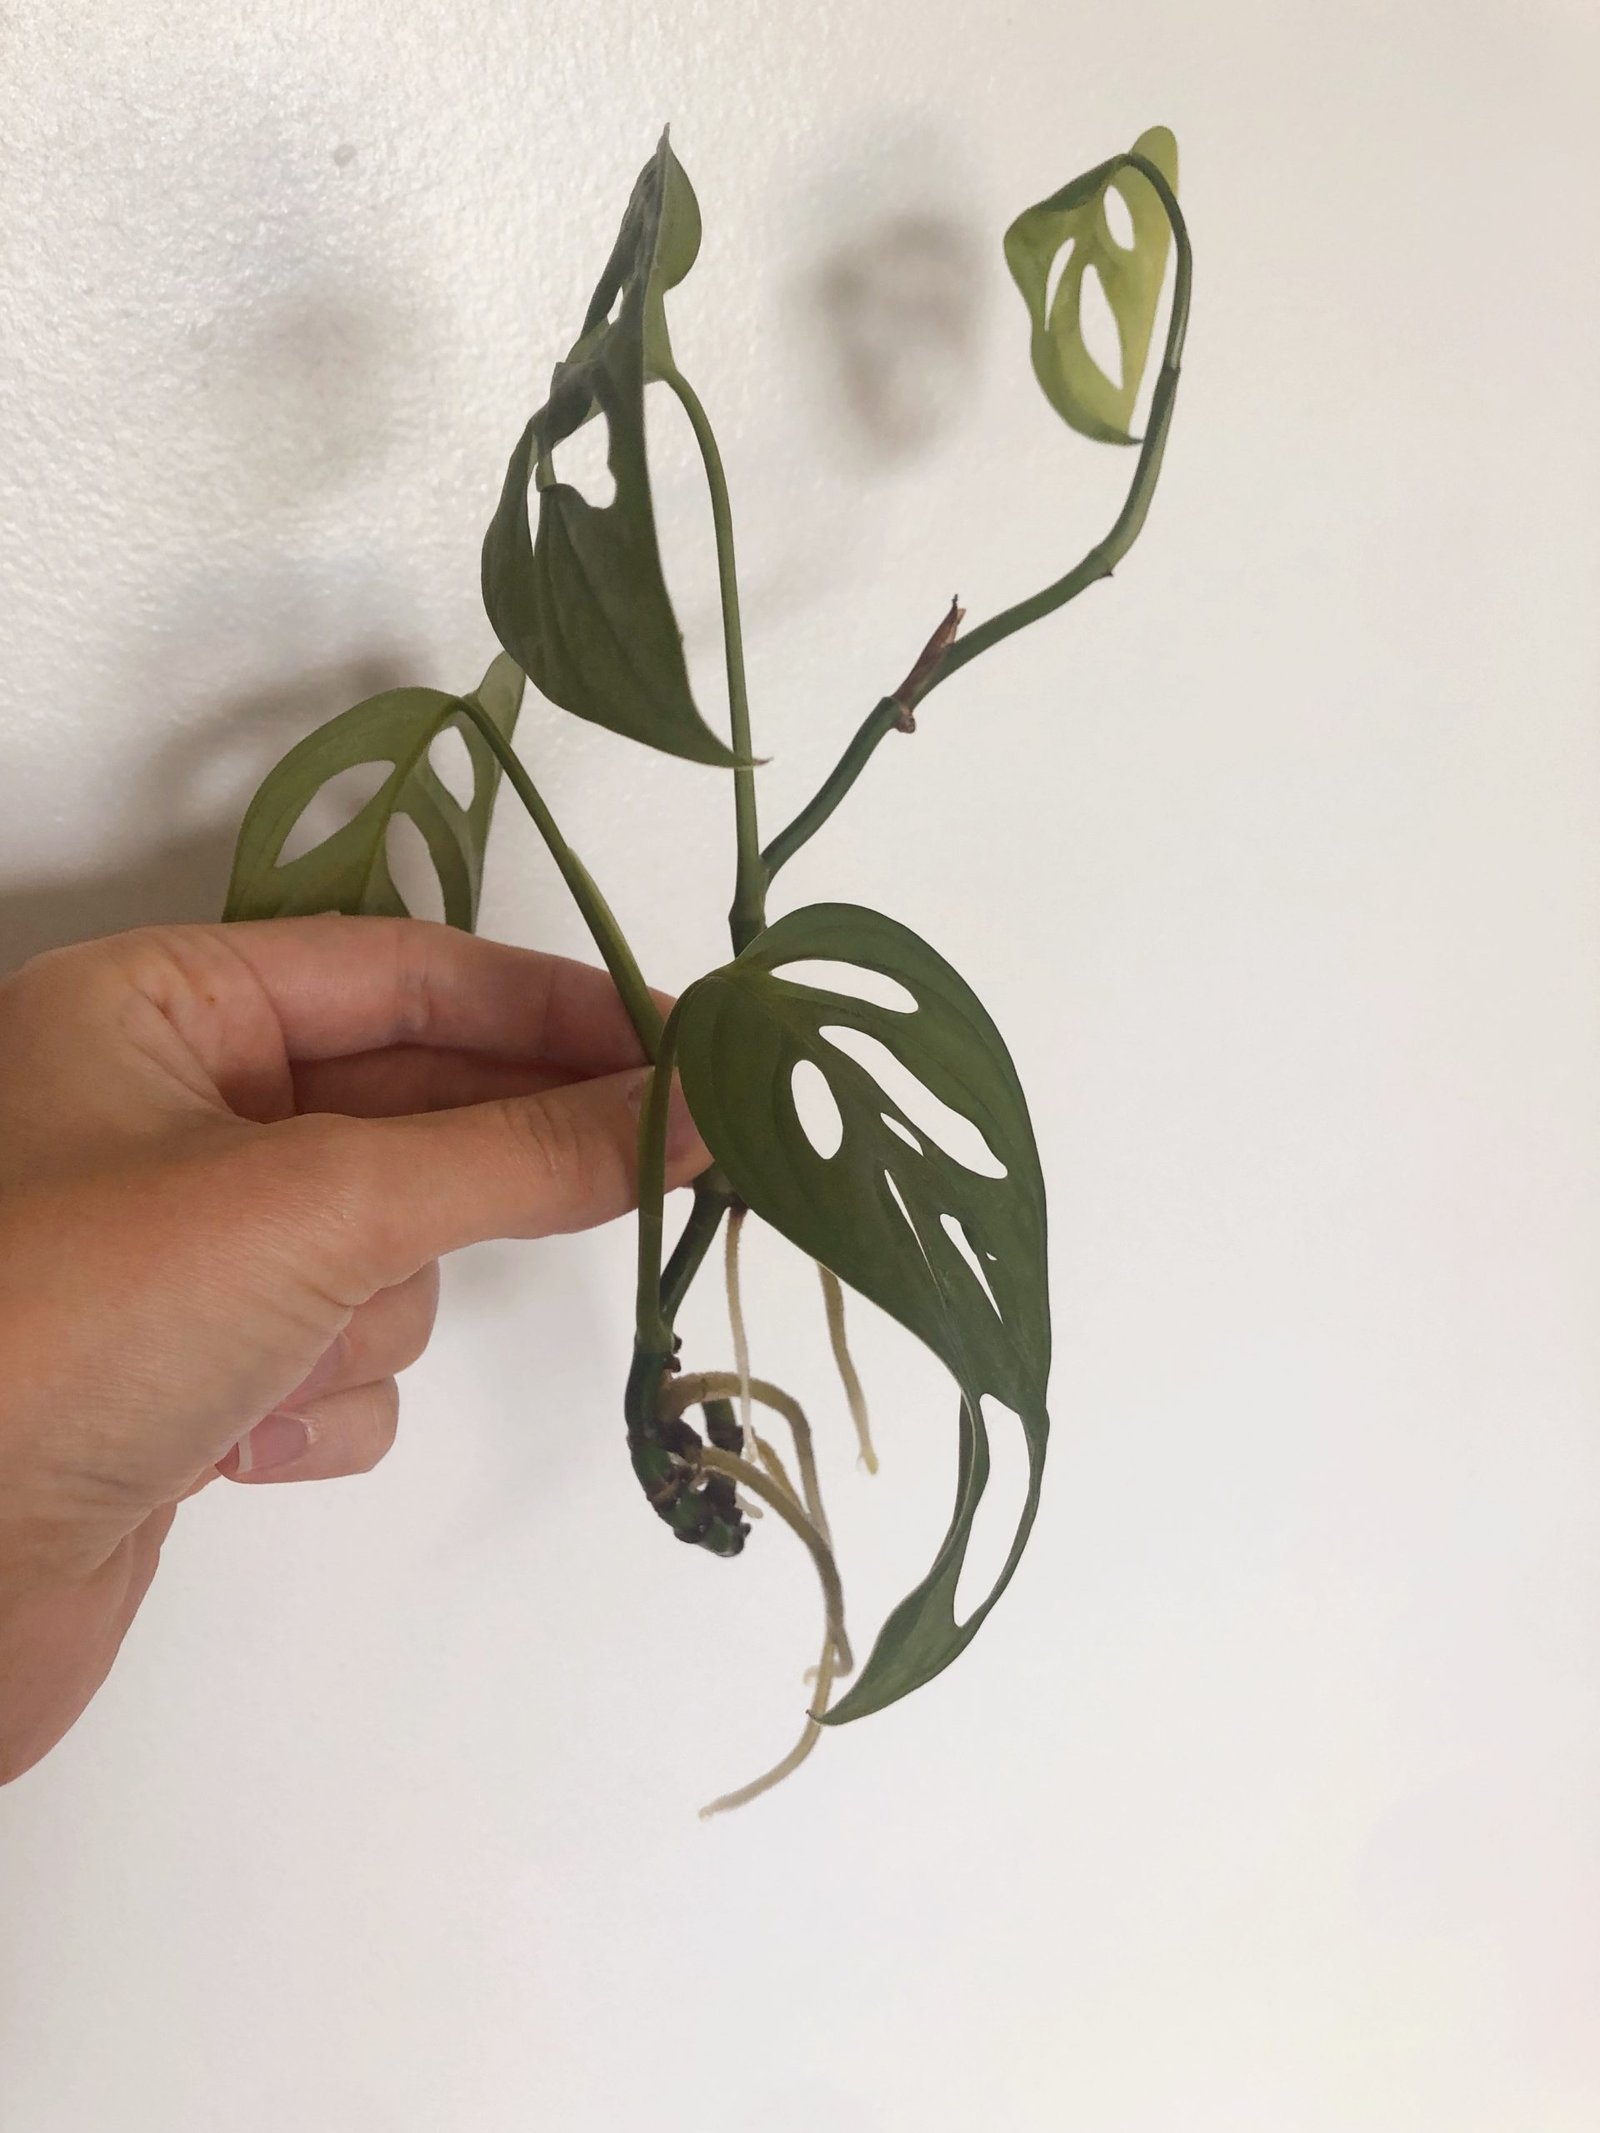
Nodes are the part of a plant that have the ability to grow roots as well as new growth. While there are some plants that can root from just a leaf/stem cutting (hoya kerrii, monstera deliciosa), they will never grow larger than that single leaf without a node.

To successfully propagate vining plants into entirely new plants you need a minimum of one node, but I like to have two if possible.
I used cuttings from a heart leaf philodendron and a philodendron brasil after completing this propagation station. They are easy to propagate and the small cuttings fit into the bud vases nicely.
other vining plants that are easy to propagate are:
- Pothos
- Rhaphidophora Tetrasperma (mini monstera)
- Monstera Adansonii
- Prayer Plants
common questions
how long do cuttings have to be?
Cuttings you intend to propagate should include at least one leaf and one node each. This is more important than the size of the cuttings. I have propagated from cuttings that are only a couple inches long as well as cuttings that are eight, plus inches in length.
where should I place my propagation station?
As mentioned above, you want to place your propagation station in a sunny area. Indirect light is optimal. While the plant needs plenty of sun to photosynthesize and create new roots/growth, direct sunlight can dehydrate the cutting and cause stress. Especially before it has roots to take up extra water. Try placing your new plant in a north window or slightly further away from other windows.
do I need to fertilize the cuttings?
No. You do not need anything besides water and sunlight to propagate plants. Some plants take longer to grow roots and are trickier than others to propagate so dipping the stem in rooting hormone or adding some plant food to the water may help speed up the process, but they are definitely not necessary. Another other trick for speeding up the process is using warm water in your container. Change the water about once a week.
when do I transfer the plant to soil?
Propagated plant cuttings can be transferred to soil once the roots are a minimum of 2-3 inches in length. This can happen as quick as 3-4 weeks after placing your cutting in water with easy to root plants in the prime growing season. Or it can take several months for any roots to grow at all. I like to leave my plants in water until a larger root system is established (the roots are growing roots). Place your cutting in soil like you would when re-potting any other plant. Keep the soil damp but not saturated for the first couple of weeks while the roots adjust to being in soil.
More How To Guides
- How To Get Rid Of Scale On Plants
- DIY Terrarium Table: How To Make A Table With Plants Inside
- How to Use Leca for Plants: Step-by-Step Guide with Pictures
- How To Use Grow Lights For Indoor Plants
- How To Propagate Peperomia Plants 2 Ways
- DIY Propagation Box With Grow Light
- How To Make Pothos Fuller (In 5 Minutes)
- How to Make a Moss Pole for Your Climbing Plants
- How to Make Potting Soil for Indoor Plants, Plus My Secret Ingredient
- How to Propagate a Split-Leaf Philodendron: Easy Step-by-Step Guide

Marquis *wants* to know how to keep happy and healthy plants, but had a hard time finding information that wasn't written by just another copywriter. After nearly losing one too many plants, it was time to take matters into her own hands. A team of plant scientists and nursery hands was brought together and The Indoor Nursery was born.