So you want to grow your own weed. If you don’t know where to start when it comes to growing cannabis, read this. This is an overview of the entire cannabis growing process starting from seeds.
First, we’ll go over the choices you’ll need to make before you start. Then we’ll walk you through the plant’s growth cycle. Finally, we’ll tell you how to harvest and cure your crop.
Please bear in mind that this is an overview. We wanted to get all the weed growing steps in one place. We can and do go into far more detail in other blog posts. We have prioritized the basics so you can have a handy reference for the complete process of cannabis growth and harvest.
Grower’s Note: we chose to start from seeds because they’re more common than starting from clones. If you are starting from clones, you’ll still want to prep the same way you would for seeds. Start from seedlings or vegetation depending on the maturity of your clone.
Step 1: Get Your Basics For Growing Cannabis

Read this section before you start to assess what you will need to start growing your own cannabis.
The main thing before you start: what kind of climate do you live in, and what time of year do you want to grow? If you live in Europe and want to grow in the middle of January, you’re automatically growing indoors. You also won’t need to worry about bugs.
But if you’re looking to grow weed in your backyard over a summer in California, you don’t need any grow lights but you’ll probably need lots of ladybugs.
Indoor Growing Versus Outdoor Growing
First things first: where are you hoping to grow weed? The space you have available to you is the first deciding factor when it comes to growing marijuana. If you live in an apartment, you might have to grow cannabis indoors.
But let’s say you’re lucky enough to get to choose. We’ll break down the pros and cons of indoor growing vs outdoor growing.
Pros of Growing Weed Outdoors
- Easier and more intuitive
- Fewer overall costs
- No grow light can out-do direct sunlight
- Fewer space limitations– your plants can get BIG!
Cons of Growing Weed Outdoors
- You are always fighting the bugs
- Greater risk of mold
- Wind, rain, and wildlife can damage your plants
- Unless you grow autoflower plants, you only get one harvest a season
- If not properly secured, teenagers might steal your plants
Pros of Growing Weed Indoors
- Complete control over grow environment
- Control over the growth cycle of photoperiod plants– you can harvest every 3 months
- Option to use hydroponics
- Less risk of mold or bugs
- Less of a security risk
Cons of Growing Weed Indoors
- Requires a lot more equipment than outdoor growing
- Your electric bills will increase
- Space limitations mean smaller yields
- Neighbors may not appreciate the smell
If you have a secure outdoor area to grow cannabis, we recommend you use it. Sativa plants in particular are hard to grow indoors due to how tall they can get.
That said, your best space might be your basement. Or maybe you want to grow weed all year. In that case, you’ll want to invest in a grow tent and create an indoor grow room.
Grow Medium: Hydro Versus Dirt
If you don’t know which grow medium to choose, you probably want dirt. It’s easier to work with. You can use it in both indoor and outdoor growing. Most people prefer growing with soil.
That said, hydroponics offers the grower a lot of control. When you adjust the nutrients in your hydroponic setup, they get instantly absorbed by the plant roots so you see immediate results because. It’s easier to maintain the perfect pH levels in water than in any other grow medium. Here’s a breakdown of the pros and cons of each.
Pros of Growing Cannabis in Dirt
- Easy and beginner friendly
- More leeway when it comes to pH levels
- Organic options
Cons of Growing Cannabis in Dirt
- Slower growth and lower yields than hydroponics
- You can’t always tell what the pH of the soil is down at the roots
- Dirt can host pests
Pros of Growing Cannabis in Hydroponics
- Faster growth, higher yields
- Uses less water
- The sterile environment prevents most diseases and infestations
- Issues show up quickly, so you can easily make changes before it’s too late
Cons of Growing Cannabis in Hydroponics
- Greater upfront costs
- More can go wrong
- Sterility is a must– the water can still get infected
Which one should you choose? If you’re growing marijuana outdoors, you have to choose dirt. Hydroponics is indoor-only.
If you’re growing cannabis indoors and still deciding, here’s an easy way to decide. Do you consider yourself more of a gardener or a scientist? If you said gardener, choose dirt. If you’re a scientist, go for a hydroponic system.
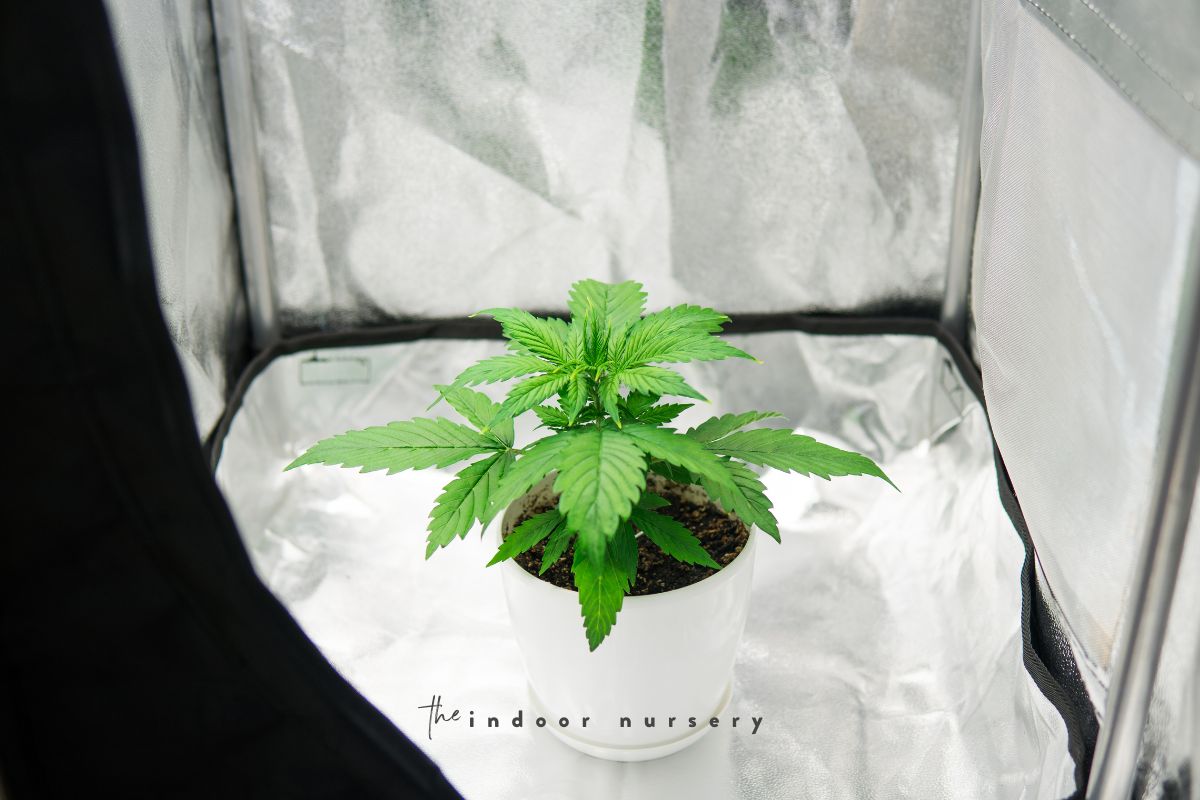
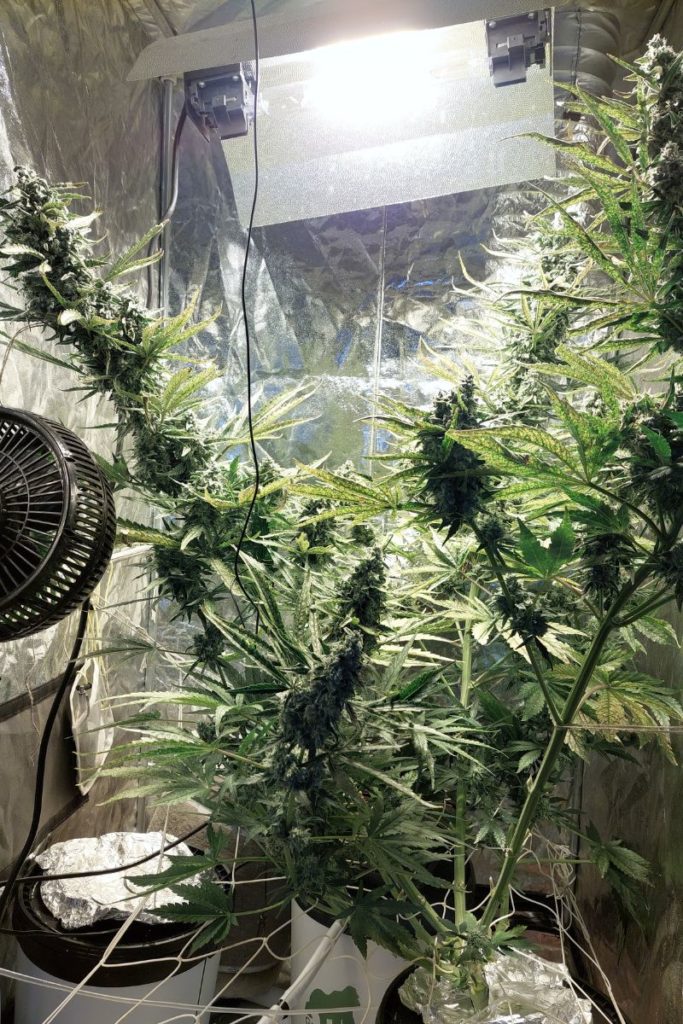
Grow Tent
The easiest way to construct an indoor grow space is with a grow tent. This is a metal frame box covered in fabric that’s dark on the outside and reflective on the inside. Some come with vents preinstalled, and others are designed for you to cut yourself.
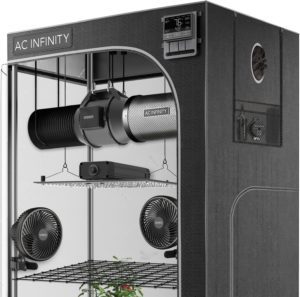
I really like this grow tent kit by AC Infinity. It comes with everything you need and is 4×4, making it large enough to fit a home grow and small enough to tuck into a corner.
If you want to gather everything separately, then you definitely can do that too. Here are our reviews of the best products for your grow tent setup:
Most places that sell grow tents will also sell you lights, ventilators, nutrients, etc. If you can find a brick-and-mortar grow shop, those are great places to speak with passionate folks about your particular growing needs. Online shops can also offer great deals on a complete grow tent setup.
Here are the most popular brands on Amazon:
It’s also a good idea to check out local cannabis conventions, they tend to be where you can get the best deals on big purchases.
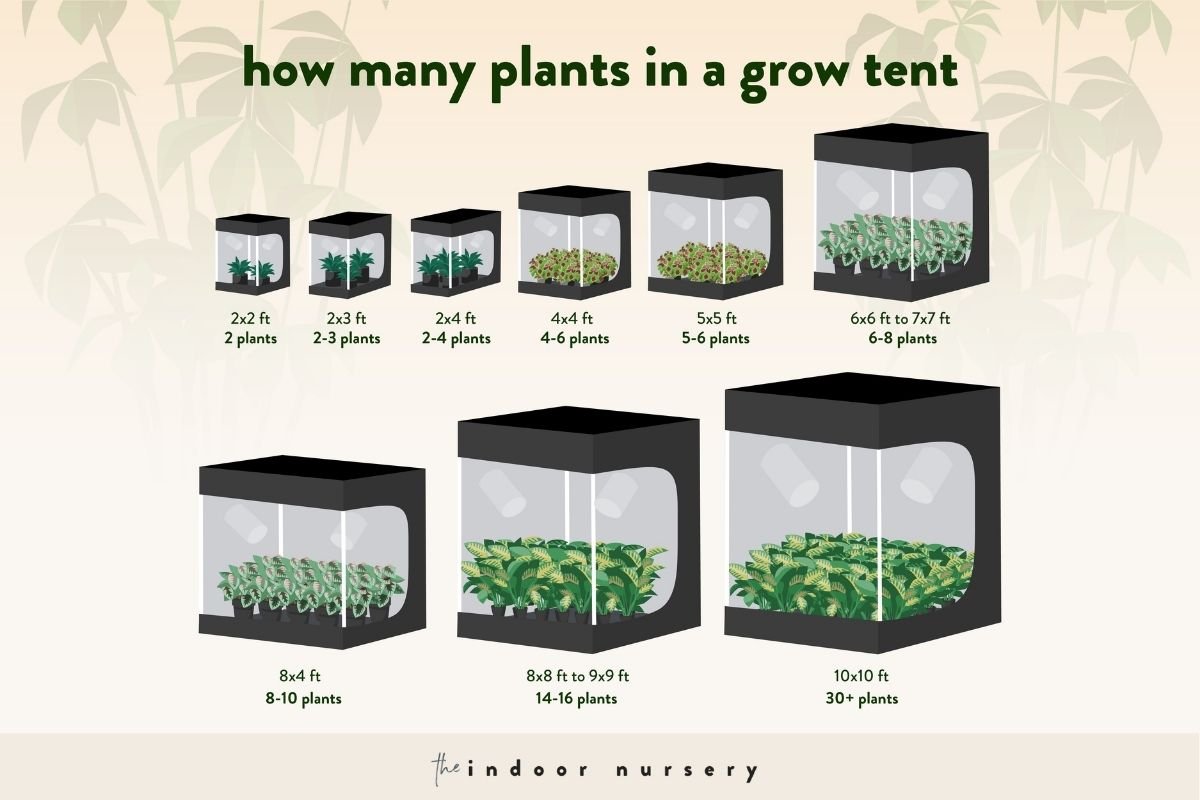
How big of a tent do I need?
Your grow tent should be slightly smaller than the place you set it up. If you’re growing just a few plants, get a smaller tent.
The smallest tents have a 2’x2’ footprint and are 6 feet tall. They can grow about one or two full-size plants. A 2’x4’ or a 3’x3’ can both handle 2-4 plants. 5′ x 5′ and 4’ x 8’ can take up a corner of a room and can do 4-10 plants. If you’ve got a basement or a garage, you can get a tent in the 10’x’10’ range and get 12+ plants.
Air Flow
You need fresh air in your grow room. Proper ventilation of a grow tent is necessary for healthy growth. Cannabis plants need to be able to easily exchange gasses in order to photosynthesize. Your plants can choke to death without air circulation.
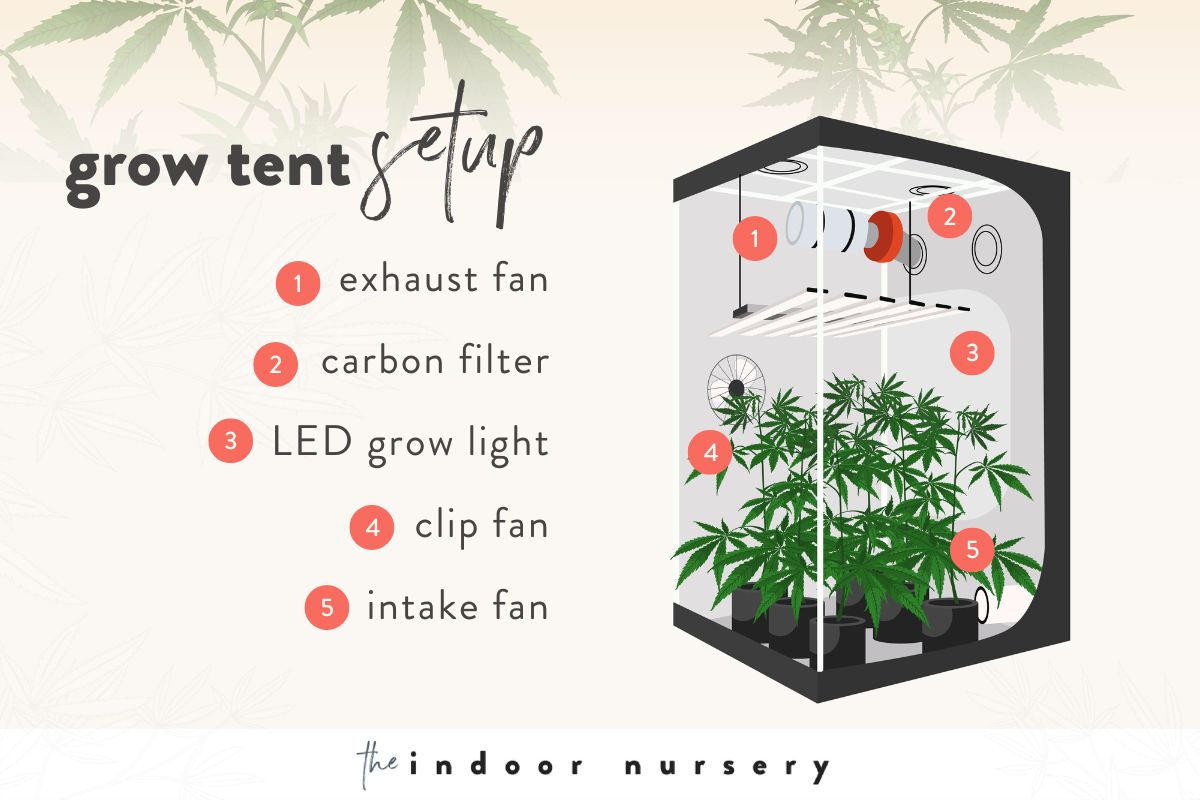
The three things you’ll need to ventilate your grow tent are:
- Extractor fan
- Carbon filter
- Oscillating fan
There are also lots of accessories that can do things like reduce the noise and smells while bringing your indoor cannabis fresh air.
There are multiple ways to configure your ventilation system. You can put your components inside or outside your tent. This is a great reason to talk to grow shop employees: they can help you figure out how to do this. We recommend you install your ventilation system before installing the grow lights. Grow lights can be hard to work around.
How much airflow do I need?
Most growers can use a 150mm extractor fan.
The measure of airflow of an extractor fan is called CFM or Cubic Feet per Minute. You need a minimum of your entire tent’s air volume exchanged every minute. So if you have a 6-foot tall 3’x7’ tent, you need a minimum 72 CFM extractor fan.
It comes to your ventilation, get more than the minimum CFM. Your lights will likely give off heat, which can require up to 50% great CFM capacity to offset the heat. Accessories like ducting and silencers can also restrict airflow by as much as 60%. Most accessories come with an estimated efficacy percentage that you can factor into your calculations when purchasing your air flow system.
How Much Light You Need
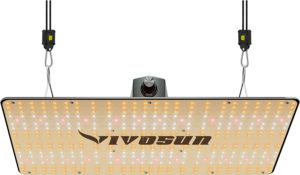
Grow lights are essential to the indoor growing environment. Any indoor grower needs a decent grow light. The main two types of lights are High-Pressure Sodium (HPS) lights and Light Emitting Diodes (LEDs). Your plants need 800 to 1400 micromoles (µmol) of light to grow. LED lights can hit this µmol rate at a lower wattage than HPS lights.
Now here’s where things get tricky. While light output is measured in micromoles, you’ll be buying lights by wattage. A 600W HPS light is a good place to start, it can grow 1-4 plants. You’ll also want to make sure all of your plants get decent light coverage.
If you’re debating over HPS or LED, we recommend LED grow lights. They cost more upfront but offer a lot of advantages. They are more energy efficient, a 340W LED grow light can cover a 3×3 growing area. LED grow lights are designed to distribute light more evenly than HPS bulbs. They also do not give off heat, which can burn your plants.
Temperature & Humidity
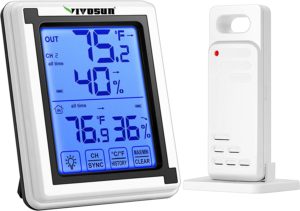
The plants want slightly different things at different stages. Overall, the ideal temperature to grow cannabis is 70-80 degrees Fahrenheit. The ideal relative humidity is 40-60%. You can get a combo humidity/temperature sensor when you buy your tent.
- When you’re first seedling, it’s better for things to be warmer and wetter. Keep the heat around 75-80℉ and RH 70-80%.
- Once you’re vegging, take it down to 68-7℉ and 45-55% RH.
- Once you’re flowering you’ll want to be around 65-75°F and reduce the RH to 35-45%. The lower temperatures and humidity will keep mold at bay.
- Once you’ve harvested, you’ll want to dry and cure them at around 60-70°F and 45-55% RH. The slightly higher RH will preserve the turpentines and prevent your buds from drying too fast.
Water
All plants need water. You will need access to a clean water supply. Exactly how much water you will need is hard to tell. That said, hydroponics uses about 1/10th the amount of water that traditional dirt farming uses.
Another thing you want to consider is water quality. Hard water is sub-optimal for growth, but not the end of the world. It tends to have a higher pH than regular water. If you have hard water, you can purchase a Reverse Osmosis machine to filter out the excess minerals. We do not recommend water softeners since softened water still has a high pH and extra salt.
That said, RO machines are very expensive and not necessary to produce a good crop. Basically, if your water is good enough to drink, it’s good enough to grow with.
Nutrients
There’s a lot to be said about cannabis nutrients that we just don’t have time to get into here. We recommend you buy a set of cannabis nutrients and follow the instructions.
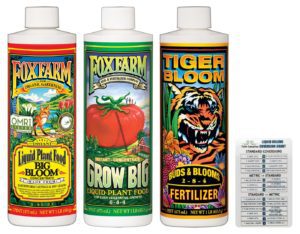
We are no longer in the days of going to the gardening store in our Deadhead shirts and winking while we ask about our “tomatoes.” Every cannabis nutrient company offers complete grow sets that have all the nutrients you need for every stage of healthy plant growth.
There are nutrient sets for dirt and hydroponic growers. You can even go all-organic if you like. They will also try to sell you a million supplements, buy only one or two supplements. You CAN overdo it and give your plant nutrient burn. It’s better to slightly underfeed your plants than overfeed them.
Think about it like this. If you took every vitamin in the drugstore for a week, would your body be able to absorb all those extra nutrients? No! You might give yourself a kidney stone. Nutrient burn is like the plant’s version of a kidney stone. Plants don’t have kidneys, so once nutrient burn occurs, it’s hard to undo.
Also, those nutrients give the plants a funky taste when you smoke them. You need to stop giving your plants nutrients before harvest. This is called “leaching,” we’ll discuss it more in the Harvest section.
Even advanced growers mainly follow the instructions with the nutrient sets they choose. Keep it simple by sticking to one set.
Step 2: Choose Your Cannabis Seeds
Here’s one of the fun parts: choosing seeds! When it comes to seeds, it’s better to get feminized seeds. These are bred to reduce male chromosomes and produce only female plants. A lot of people have favorite strains, if you have a favorite, go ahead and grow it.
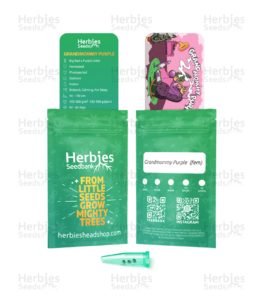
If you happen to just have a handful of seeds from baggies you’ve purchased, you can just throw it in your garden and see what pops up. Plenty of growers start that way. Just be aware that seeds you find in sacks typically aren’t feminized so you’ll need to sex them at the flowering stage. If you want to be able to choose your seeds, go to a reputable seed bank.
What factors should I consider when choosing seeds?
Here are some things to consider when choosing seeds:
- Photoperiod vs autoflower strains
- Flowering time
- Average plant height
- THC content
- Strain effects
When growing from seeds, buy more seeds than you think you need. You may think it’s an unnecessary cost, but it is not. Genetics vary from seed to seed. Even if you only intend to complete the full life cycle with one cannabis seed, buy a few seeds so you can choose the strongest plant to grow.
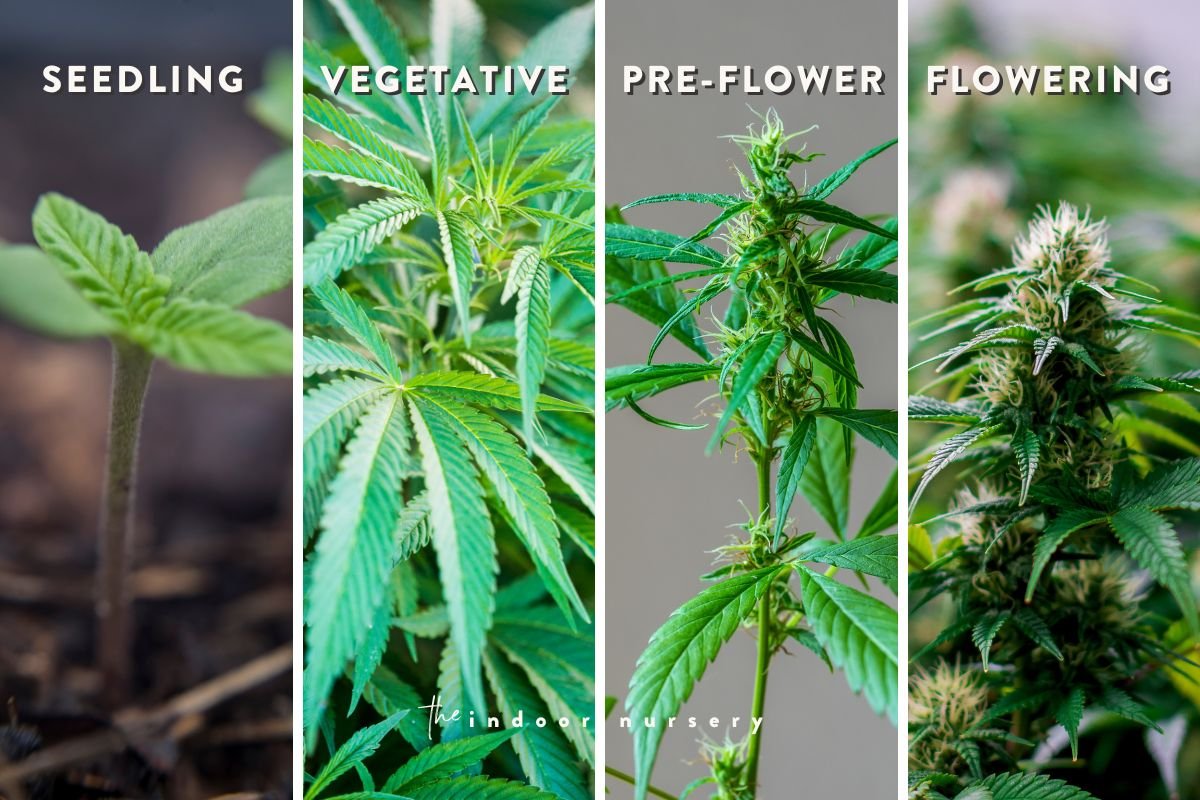
Step 3: Germination And Cannabis Seedlings
The paper towel method to germinate seeds is one of the easier parts of growing healthy plants. If you ever had the grade school project of growing a beanstalk from a lima bean, you are already familiar with the germination process. You will need:
- Cannabis seeds
- Paper towel
- Clean water
- Tupperware (2 plates also work)
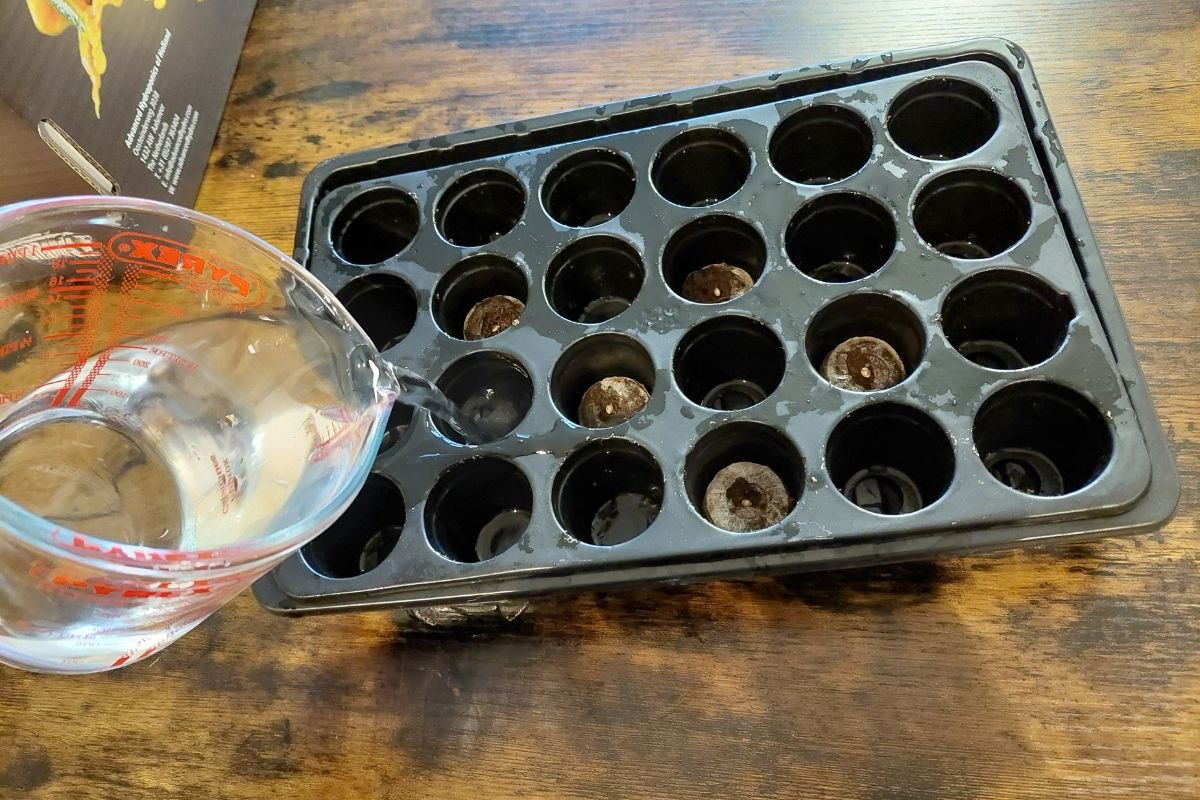
- Small dirt container or hydroponic sponge
Fold the cannabis seeds into the wet paper towel and put them in the Tupperware. Cover it and walk away. It does not need any light in this phase. You can give the paper towel a spritz every couple of hours, but it only needs to stay damp. Be patient, germination can start in as little as 12 hours or as long as 7 days.
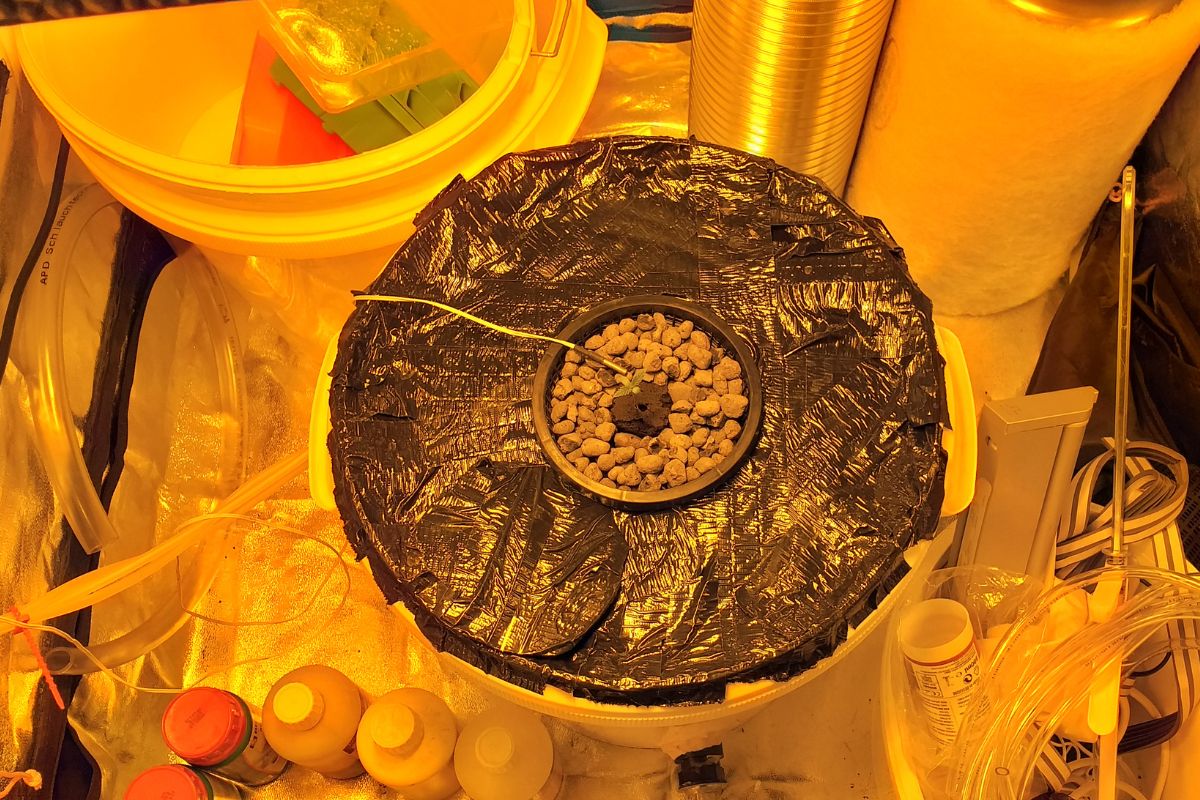
You’ll know it’s germinated when you see the very first tap root coming out of it. Then you move it into its first cup or hydro media. It should be 3-5 cm deep with its taproot facing down.
In the seedling stage, you’ll want things warmer and wetter. Keep your grow space at 75-80℉ and RH 70-80%. Keep them on an 18/6 light cycle for the first 2-3 weeks, during which the young plants should develop the first true leaves and nodes. When it has 2-3 nodes, you can transplant it to its big pot and start vegging.
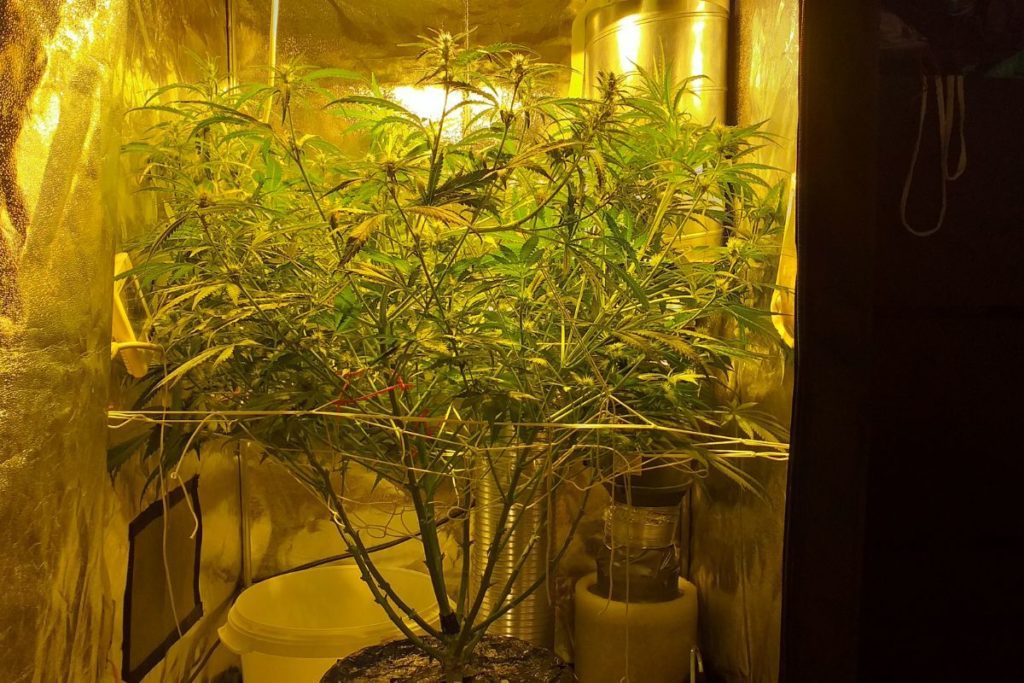
Step 4: The Vegetative Stage Of Cannabis
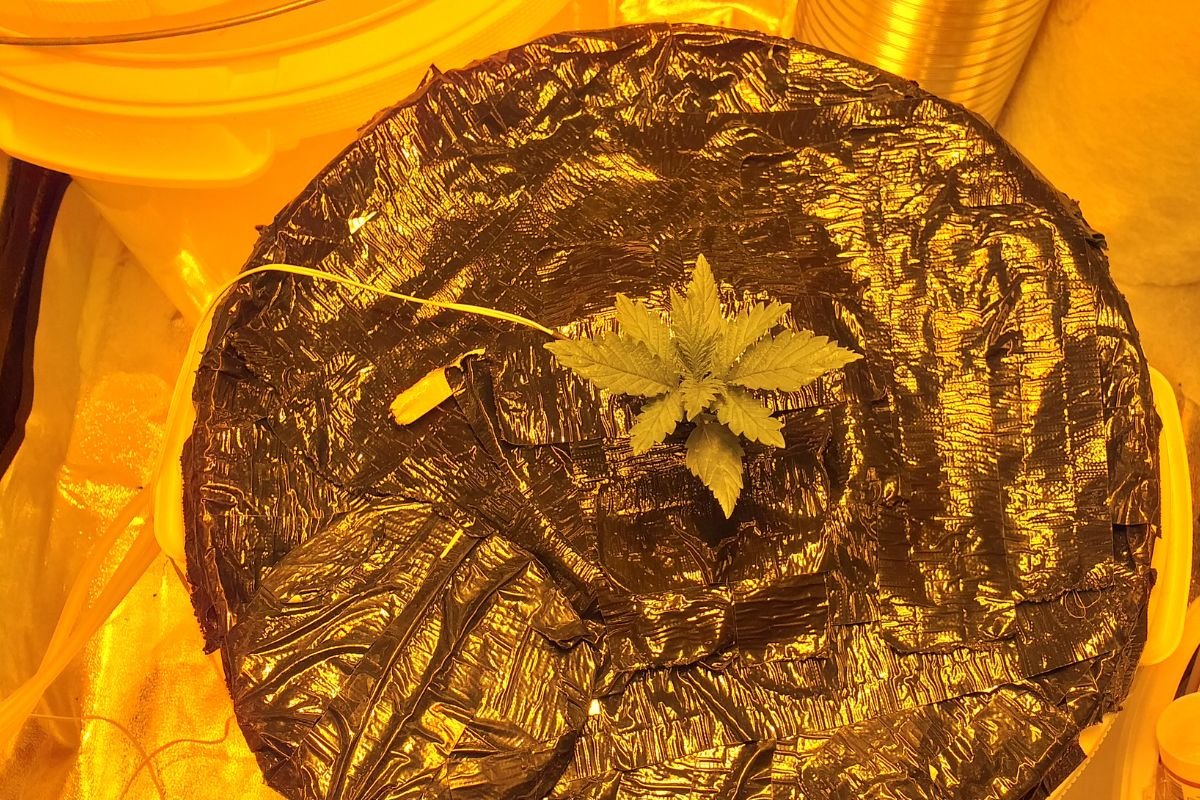
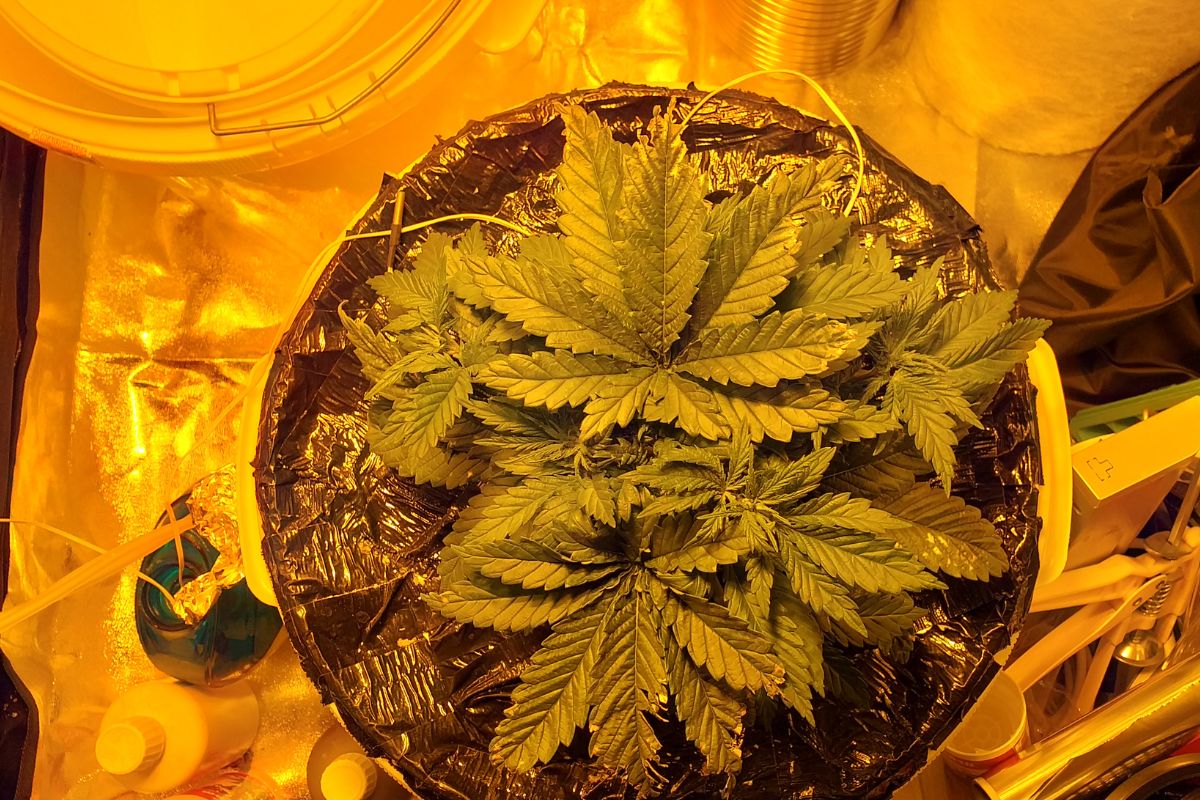
The vegetative growth phase is where your plant gains a lot of height and puts down roots. Marijuana plants in this stage are often called “teens.” Vegetative plants need a lot more water and Nitrogen than seedlings.
Dirt growers will want to water further away from the base of the plant. This encourages it to stretch its roots, which makes the plant more stable in flowering.
If you’re interested in growing practices like topping and training, this is the stage to do it.
How long does the vegetative stage last?
For most weed plants, the vegetative stage lasts 3-16 weeks. That’s a pretty big range, we can explain.
With photoperiod cannabis plants, the vegetative phase lasts as long as the plant gets more than 12 hours of light every day. This means if you’re growing indoors, it lasts as long as you choose. Some indoor growers choose to greatly shorten or skip the veg phase and go straight to flowering. This lets growers with limited space control the size of the plant, but it can become too heavy to support itself in flowering.
If you are growing outdoors, you’ll have to wait until after the solstice to start flowering. If they’re in pots, you can possibly move your plants indoors to give them less than 12 hours of light a day. This is a huge hassle with multiple plants. This is one of the reasons outdoor growers like autoflower plants. With autoflower plants, check the strain information to find out how long the vegetative phase lasts.
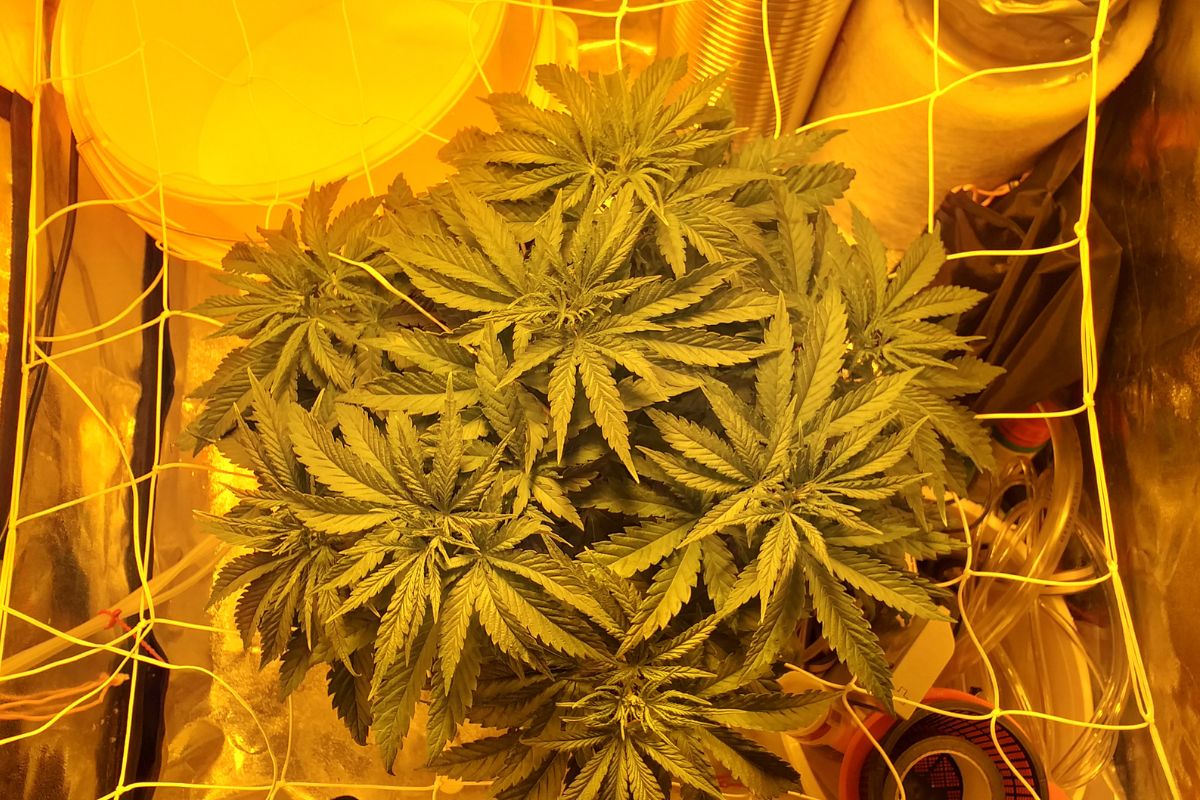
Step 5: The Flowering Phase Of Healthy Cannabis
The flowering cycle is when your plant starts to produce buds. It starts when the cannabis plant gets at least 12 hours a day of uninterrupted darkness. In photoperiod plants, this will occur if you switch the lights to a 12-hour light cycle. For outdoor growers, this will occur in late summer after the solstice or whenever your autoflowering strains hit their genetically programmed time to flower.
In this phase, they need a cooler dryer space of 65-75°F and RH of 35-45%. They need more Phosphorus and Potassium and less Nitrogen. You might also need to sex your plants if you didn’t choose feminized seeds.
In the first few weeks of flowering, your plant might double in height. This is one of the reasons indoor growers shorten the veg phase. It’s also in this phase your female plants will start growing fine white hairs called pistils.
Male plants will not have these hairs and instead have little pollen sacs. If this is the case, harvest it immediately. If you let them keep growing, male plants will pollinate all your female plants. This will make them grow seeds instead of dedicating all their energy to producing THC. Male plants can be turned into edibles or hash.
Around week 3, it will stop growing larger. In the places where you saw the first few hairs, you’ll start seeing the first little buildings. It hasn’t grown in its resin glands yet, so it won’t be potent or smelly. By week 4, it’s done growing bigger and is now only growing buds. In the later stages of flowering, between weeks 6-8, you’ll need to flush/leach your plants.
How long does the flowering stage last?
The flowering period of most cannabis plants is 7-9 weeks. Make sure to check your strain because some need to flower for 10+ weeks.

Tips for the flowering stage of cannabis:
- Do not transplant immediately before or during flowering. Growing cannabis plants need a few weeks to recover from the shock of the transplant.
- Don’t change everything at once. Switch the light cycle, temperature change, humidity change, and nutrient change over a couple of days.
- When it comes to nutrients, underfeeding is better than overfeeding
- For indoor growers, raise CO2 levels to 1,000 to 2,000 PPM to bolster growth
- Keep humidity at 45% to prevent mold
- Outdoor growers can mitigate rain by either moving potted plants or setting up tarps
- Trim away excess leaves to maximize bud growth
- Observe your flowering plants every day for hair and trichome maturation
Remember, towards the end of the flowering stage, you need to stop giving them nutrients. Otherwise, they’ll have a weird chemical taste when you smoke them. Dirt farmers need 7-10 days of flush, hydro growers need 5-7. Start leaching when you see about 70% orange pistils and a mix of clear and milky white trichomes.
Step 7: Harvesting, Drying & Curing For Best Quality Buds
Once you’re finished flushing the plants, it’s time to harvest.
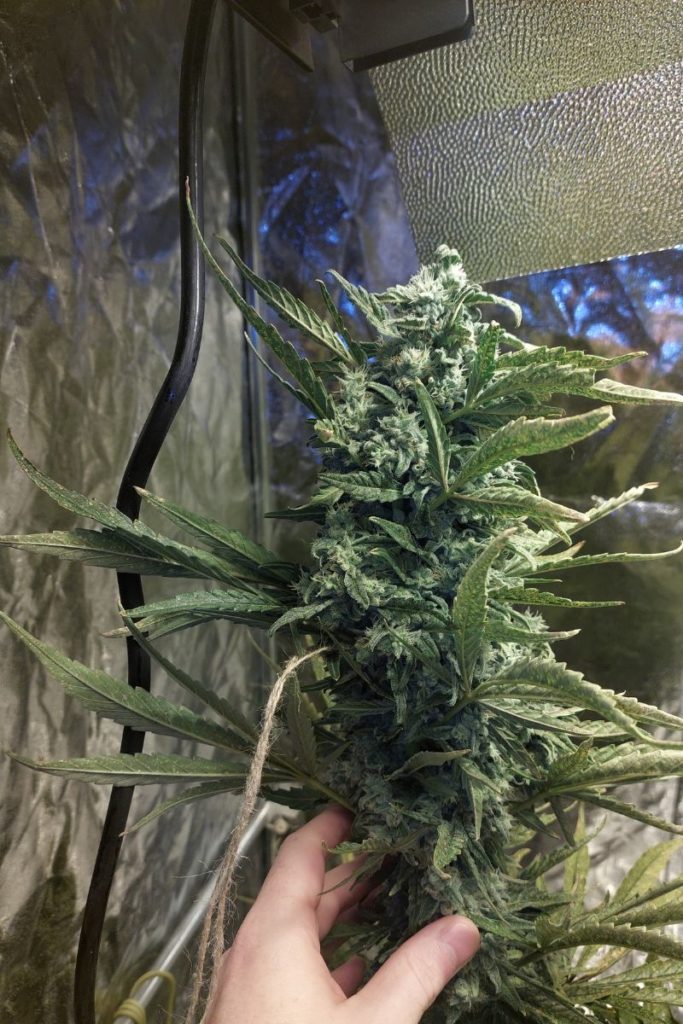
When Is My Cannabis Mature?
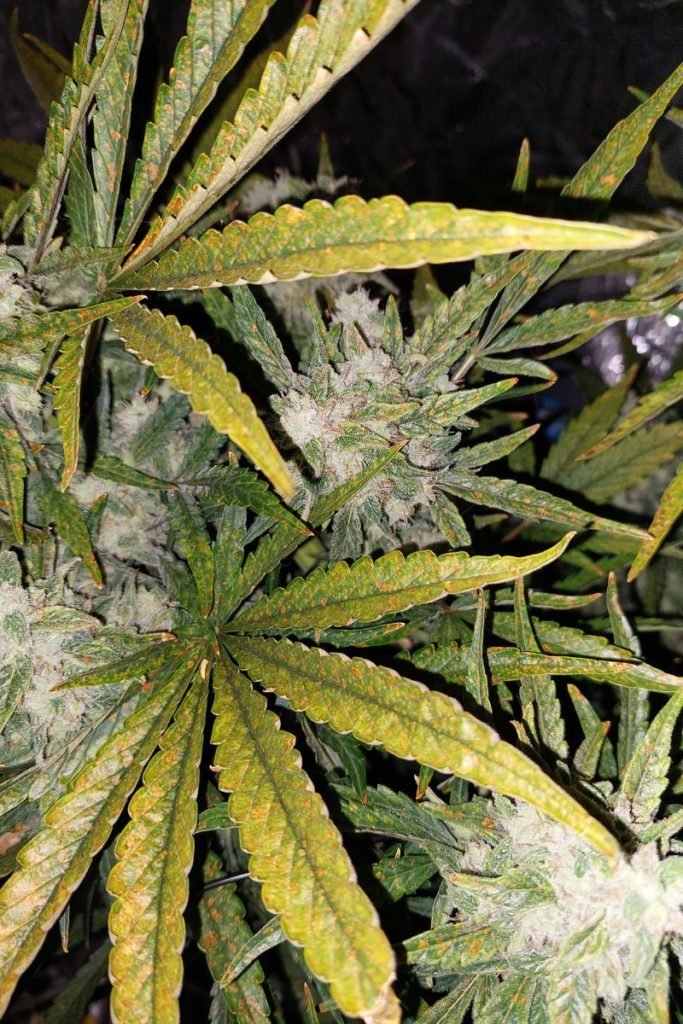
Your cannabis is ready to harvest when ~90% of the pistil hair have turned orange and the trichomes are a mix of milky white and amber.
You’ll need to closely observe the pistil hairs and trichome maturation for signs that it’s nearing the end of flowering. When it flowers for too long, the THC in starts to convert to CBD. Feel free to allow flowering to continue if you intend to grow a high CBD plant, but most growers are looking for peak THC.
Signs of maturation can be observed in the pistils and trichomes. Mature pistils turn from white to yellow or orange. Trichomes start off clear and mature into a milky white and then amber color.
You can use a magnifying glass, a jeweler’s loupe, or a mini microscope to observe your buds up-close. That said, most modern smartphones have good enough cameras to get a close look at your trichomes.
Harvesting The Marijuana Plant
Your first cannabis harvest is an exciting time! It’s also time-consuming, messy, and very fragrant so you want to come prepared.
Tools you’ll need:
- Isopropyl alcohol
- Box of latex gloves
- Lobber or pruning saw
- Newspaper
- Bud trimmer or pruning shears
- Paper bags
- Trash bags
Before you start, you’ll want to decide whether you want to wet trim the plant or dry trim it.
Wet Trimming vs Dry Trimming
Before your plant is ready to smoke, you’ll need to remove a bunch of sugar leaves from the buds. These leaves are not smokable, but they have a lot of trichomes on them and are good for making hash and edibles.
When you wet trim a plant, it means you trim the sweet leaves during harvest. When you dry trim a plant, you harvest, let the plants dry, then trim.
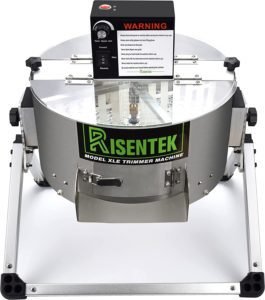
Most people who are trimming by hand prefer to wet trim. We recommend using a bud trimmer because it saves you hours in labor, and most low-end bud trimmers can do wet or dry trimming.
How to harvest cannabis plants
- Set down plenty of newspaper, have your gloves on and tools ready.
- Take your lobber, cut down the plant. You can start on individual branches or chop the whole thing down
- For dry trimming, trim off the fan leaves, hang up the plant ip
- For wet trimming, chop the plant down, trim the buds, then hang up the plant for drying.
- Clean up.
Tips for harvesting
- Figure out how you’re going to clean up before you start.
- If smell is an issue, try to ventilate as much as possible. Consider harvesting in the dead of the night when people are less likely to notice.
- Have some podcasts or movies ready, this process takes hours if not days.
- A trimming machine will greatly reduce the amount of time this takes. While they aren’t strictly necessary, we highly recommend them.
- This is where you’re likely to discover bugs or mold in your buds. If you find these, cut it all out. Be willing to sacrifice for the greater good.
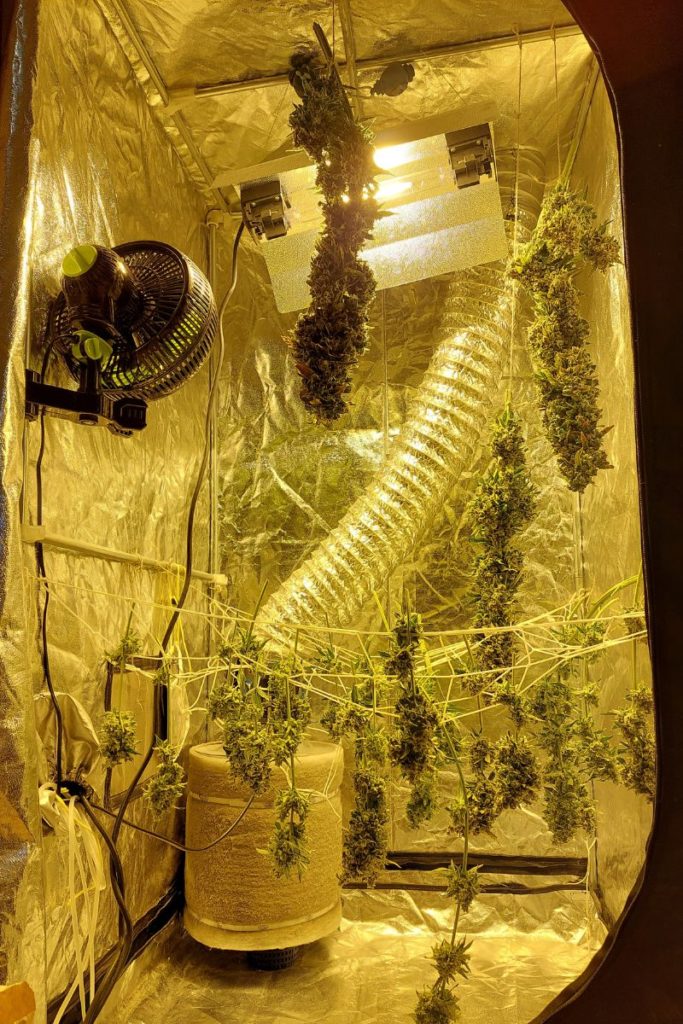
Drying And Curing Cannabis
Drying cannabis is super simple, just hang it upside down in a place that’s 60-70°F and 45-55% RH. To hang it, use one of the sections where it branches to put it on a clothesline or drying rack. You can also use a clothespin to hang it.
Once the buds are dry, you then cure them by putting them in glass jars. This lets your bud develop its flavor and aroma. It also gives it a chance to convert those last little bits of THC. You need to properly cure your bud for maximum potency.
How long does cannabis take to dry?
That really depends. It usually takes 7 to 10 days, but it can take anywhere between 1 and 4 weeks. You can tell it’s properly dry because the branches snap when you bend them.
How Long Does Cannabis Take To Cure?
The curing process takes 2 to 8 weeks. This is where it pays to be patient. Yes, you can start smoking your bud that has been curing for as little as 2 weeks. It will be a noticeably lower quality than the bud you let cure longer. 4 weeks is a good amount of curing time.
Storing Cured Buds
To cure your buds, store them in glass jars. Only fill these jars 70-75%, leave room for air. Keep them in a cool, dark place around 60-70°F and 45-55% RH. Once a day, open your jars to allow your buds to exchange gasses. This is also a good time to inspect buds for any mold that you may have missed during harvest.
More about cannabis
- How To Treat A Magnesium Deficiency In Cannabis
- It’s Not O-K: Potassium Deficiency in Cannabis
- How to harvest cannabis (and use the entire plant)
- Male Weed Plant Stages: Don’t Ruin Your Crop
- How To Decarb Weed For Homemade Cannabis Products
- Loving the Ladies: Female Weed Plant Stages
- Patience is a Virtue: Curing Buds for Best Taste
- Understanding weed light cycles: Get the most from your harvest
- When to switch to flower nutrients for high cannabis yield
- How to make live resin at home, step-by-step

Marquis *wants* to know how to keep happy and healthy plants, but had a hard time finding information that wasn't written by just another copywriter. After nearly losing one too many plants, it was time to take matters into her own hands. A team of plant scientists and nursery hands was brought together and The Indoor Nursery was born.