The swiss cheese plant, or monstera adansonii, is by far the easiest plant I’ve ever propagated.
Yup, even more than the propagation-loving pothos.
I bought this little monstera plant a few months ago and the swiss cheese vine has grown several feet since.
Craving more plants in my space, as usual, I saw the golden opportunity to propagate my new swiss cheese plant.
I tried a few different ways to propagate. Read on to find out which method was the fastest!
Monstera adansonii cutting
To propagate monstera plants, you’ll want to cut between the plant nodes. The node is the little nubby part along the swiss cheese vine that often turns into an aerial root.
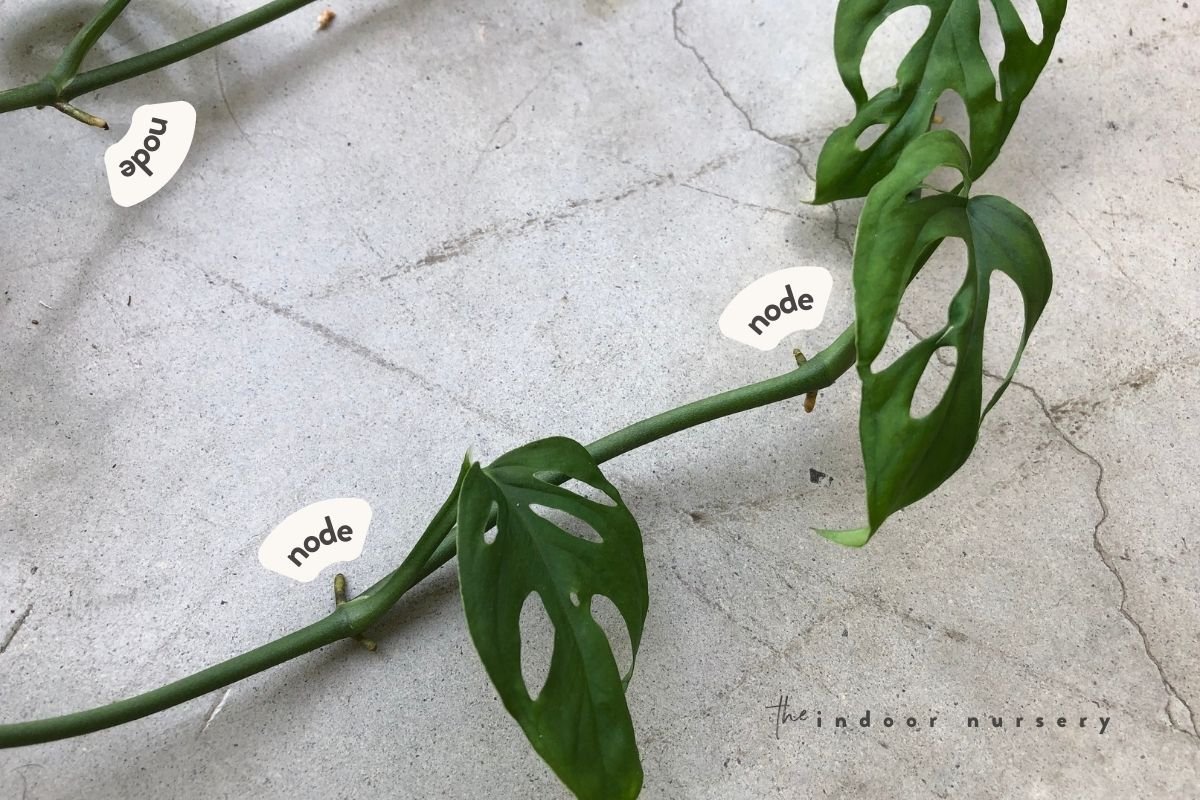
I like to cut in a few different places, with each stem cutting centered on the nodes.
The best part? The mother plant will sprout out a new stem from the nearest leaf node to the cut point, giving you an endless monstera adansonii vine that goes on forever.
How to propagate monstera adansonii
The three different methods that I tried were soil propagation, water propagation, and sphagnum moss propagation. These are the steps I followed for each:
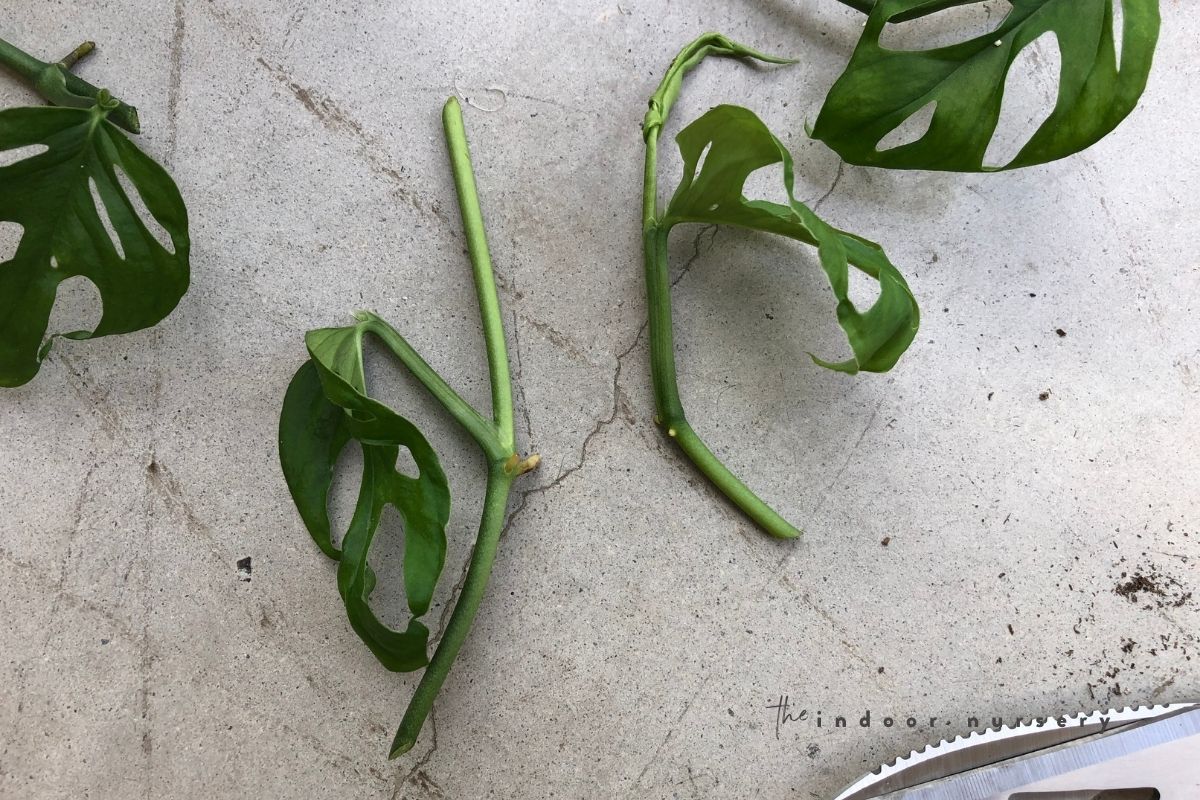
- use a sharp knife to cut your Swiss cheese plant in between leaf nodes or aerial roots
- take stem cutting with an aerial root or node on it, preferably with a leaf
- place at least one node comfortably in its propagation medium, ensuring that that area is moist
- spray the monstera leaf and surrounding area with filtered water
- place the newly propagated monstera stem in indirect sunlight
You will generally see root growth before a new leaf pops out. The root growth is prioritized as it allows the small monstera cutting to absorb nutrients and water, which are needed to grow a new leaf.
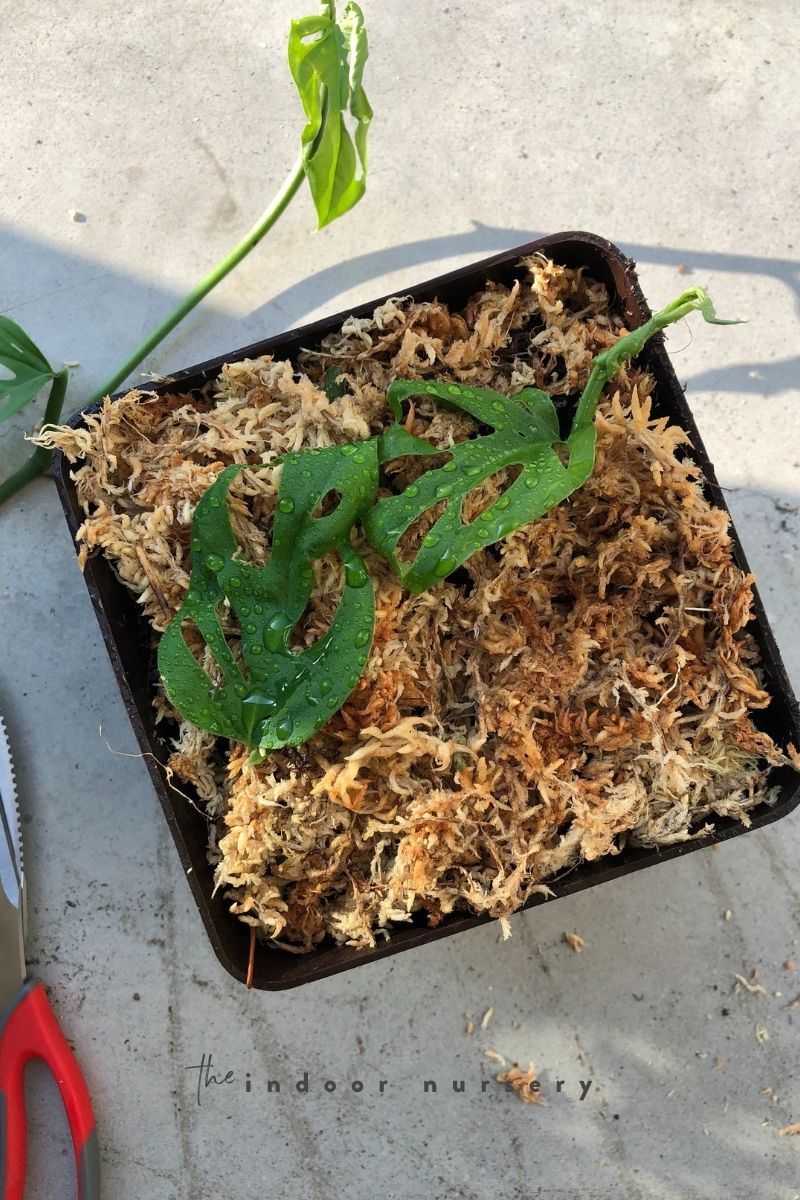
Propagating monstera adansonii in moss
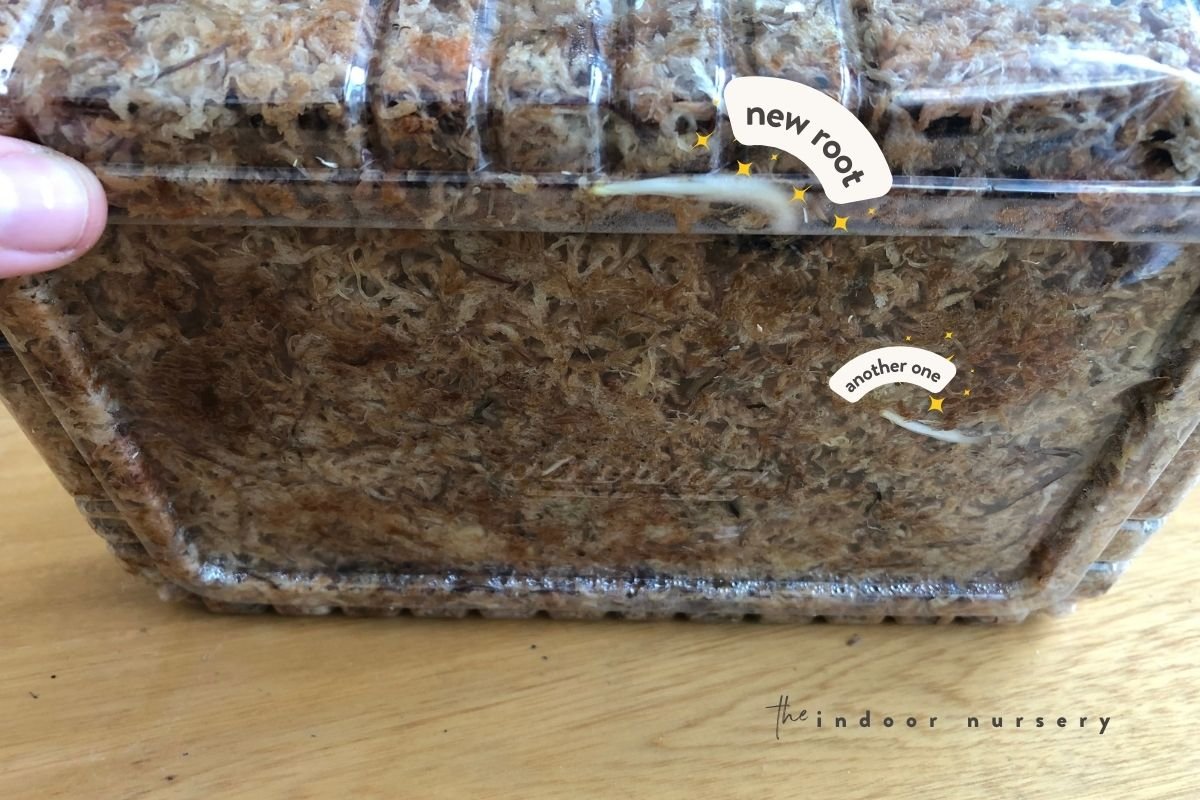
I prefer this method over the others because it makes Swiss cheese plant propagation a breeze. I first snuggled my Swiss cheese plant cuttings in peat moss that had previously soaked in filtered water.
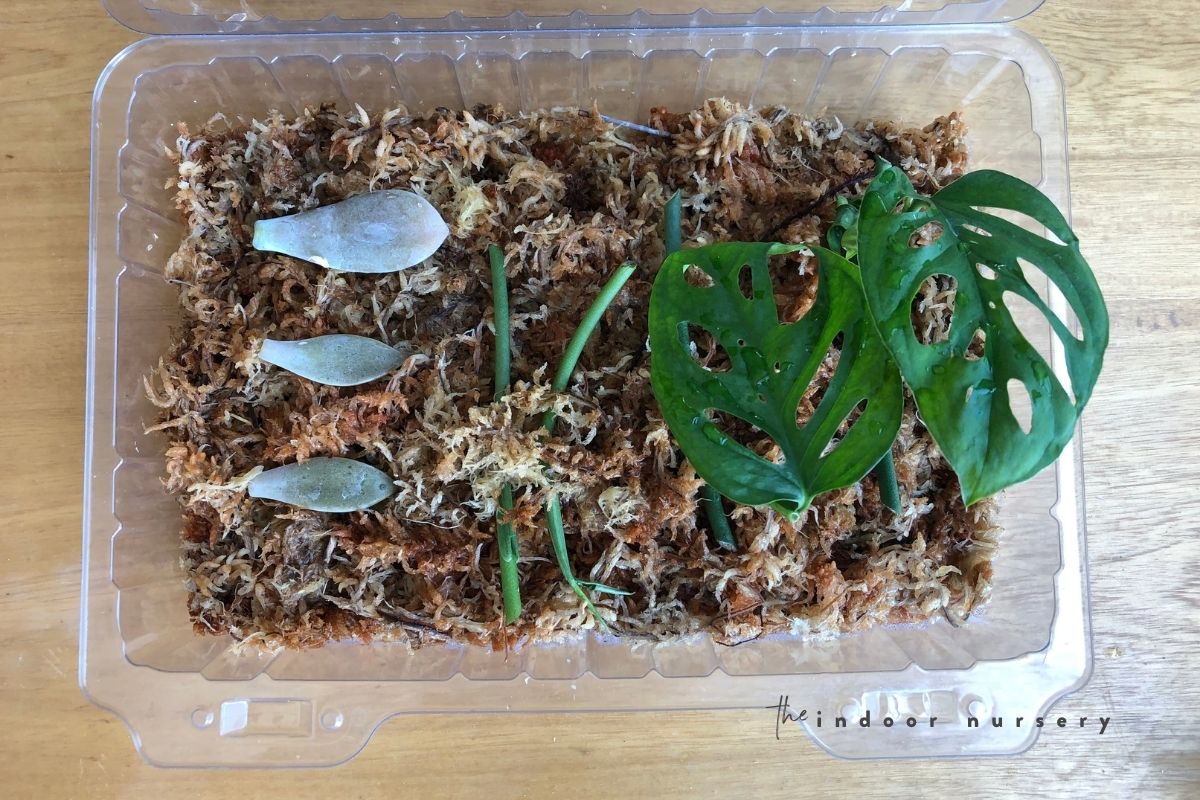
I put the damp peat moss and cuttings inside a recycled plastic food container to help maintain humidity. I propped the lid up slightly so that fresh air could move through the container and prevent things from getting dank (and to avoid premature root rot).
You could use any small container or plate and put a plastic bag or plastic wrap over the top. Just use something to prop the plastic up so that air can continue to flow through the space (this will help prevent mold growth.)
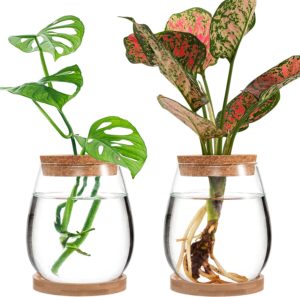
You could also get the perfect small container made exactly for rooting cuttings:
Within a couple of days, I saw signs of root growth from the bottom of the container. I let the new roots develop for a few days until they were thick and white.
When I was ready to transfer the cuttings to a pot, I filled my pot about 3/4 of the way full with this nutrient-dense potting soil by Fox Farm.

I pulled the peat moss out of the container, and out come my newly propagated plant cuttings with it.
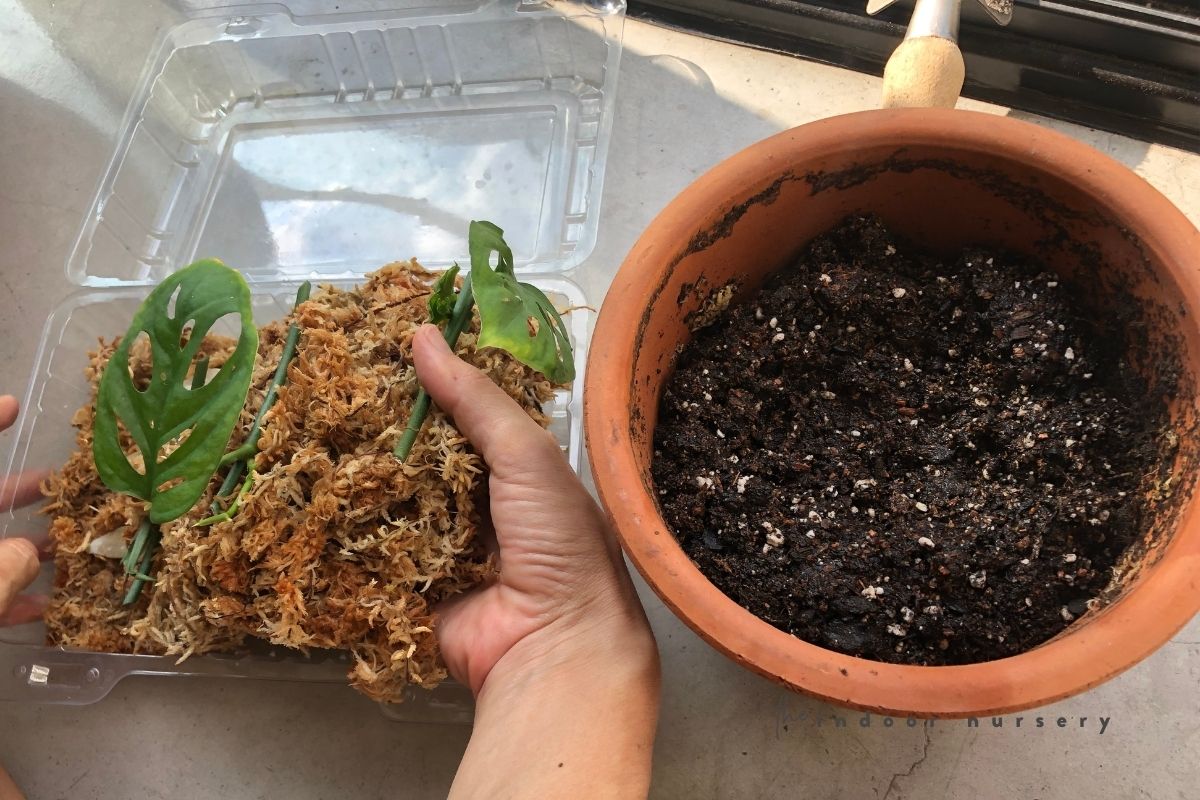
I thoroughly dampened the potting soil with filtered water and then placed everything (including the moss) on top of fresh potting mix.
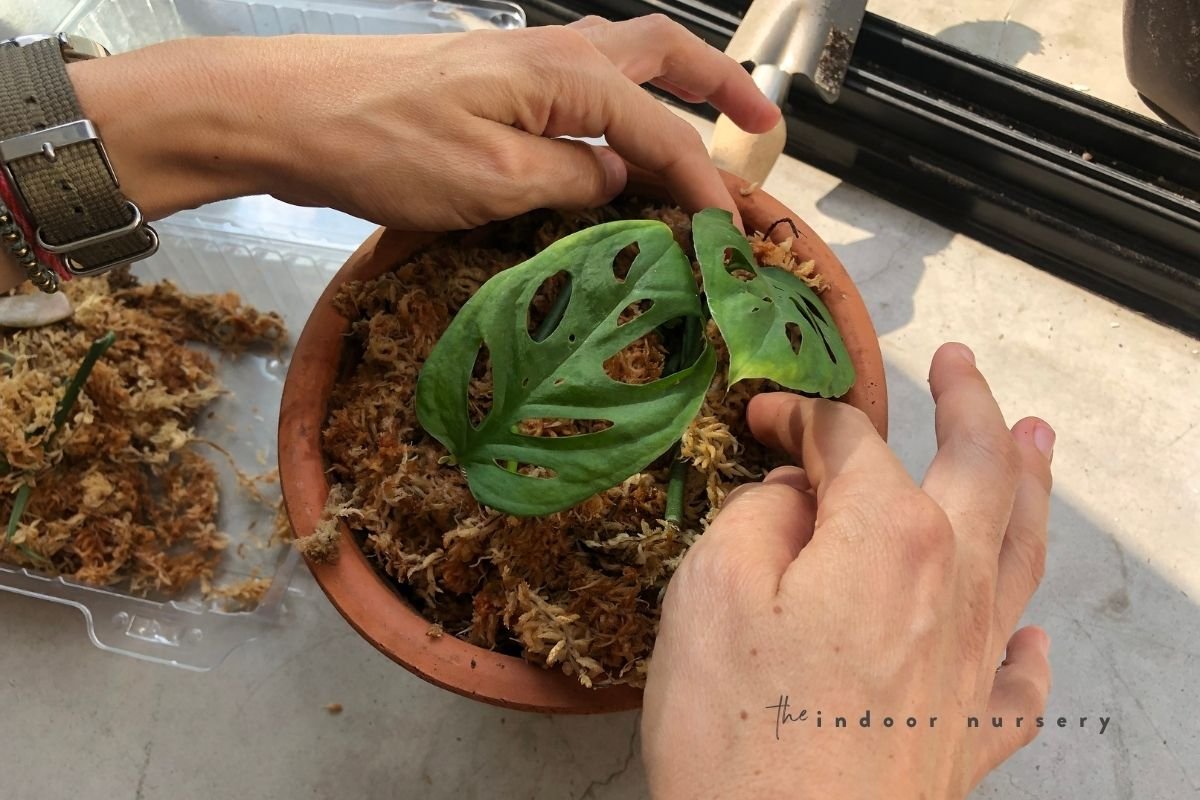
I sprayed everything with filtered water and will keep it in indirect sunlight. Once those curious roots reach the soil waiting just below, it will have all the nutrients it needs to go wild.
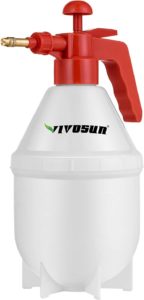
I really like this kind of continuous spray bottle. It evenly distributes the mist as long as there is pressure in the mechanism. It’s a lot less effort than pumping a spray bottle by hand and more thoroughly waters your plants.
Propagating monstera adansonii in water
I tried this method a few days after the peat moss propagation. Before cutting, I inspected the monstera stem for nodes that could reasonably reach the water when placed in the little salsa bottle I was about to place it in.
I found one such stretch of monstera stem that had tiny little bumps emerging along the stem, making it the perfect candidate for water propagation.
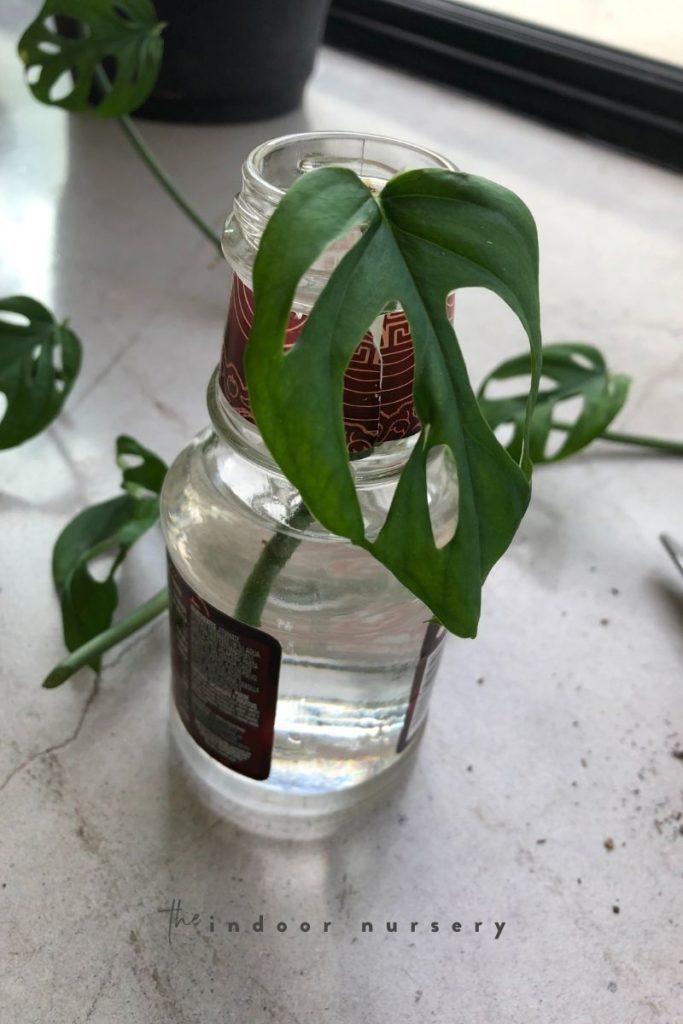
I made the cut with plenty of space for the stem to reach the water. Once the cutting was comfortably resting in its new water-based home, I moved it to a bright spot with indirect light coming in through our large floor-to-ceiling windows.
I suspect it will be a few days before I see a new root on healthy stem of my growing monstera adansonii plant.
If you’re looking for a little DIY project, try making our propagation station for your plant cuttings.
Otherwise, I love these cute options.

Propagating monstera adansonii in soil
Of all the ways to propagate plants, doing it straight into potting soil is my least favorite. For a successful propagation, the cutting needs well draining soil and a lot of moisture. Sometimes it is difficult to keep potting soil moist.
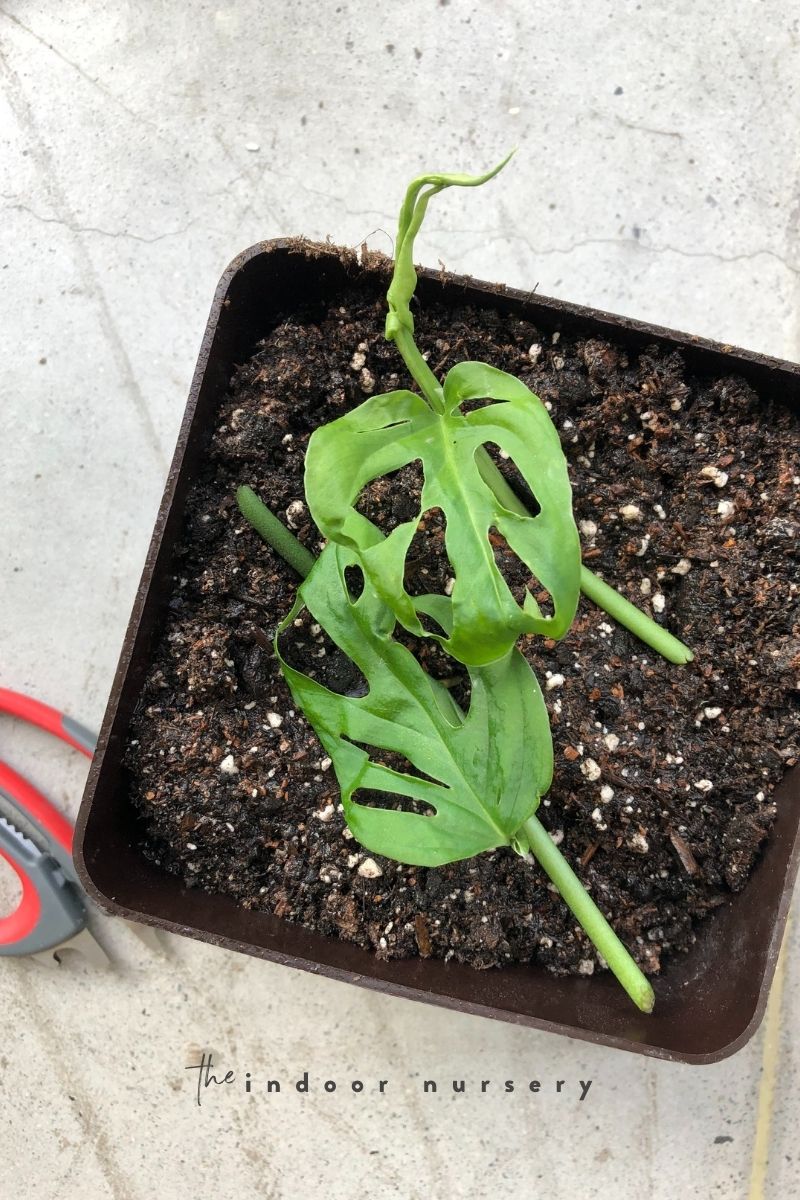
So although I did try planting my stem cuttings in the Fox Farm soil, I also padded the top with sphagnum peat moss dampened with filtered water.

It’s important to maintain moisture in the soil to foster growth in new plants from the stem cuttings. Be sure to use a pot with a drainage hole so that excess water drains easily, keeping the soil damp but not wet.
Tips and tricks for successful swiss cheese plant propagation
Propagating a Swiss cheese plant can be a fun and rewarding experience, but it’s important to take some key factors into account to ensure success.
I’ve tried propagating the hell out of my swiss cheese plant and there are a lot of things I learned along the way. Check out my top tips and tricks for a propagating swiss cheese plant into a healthy and thriving Monstera adansonii.
- Not all plant cuttings are created equal. To give your propagation the best shot at success, choose a stem cutting with at least one node or aerial root that looks healthy and strong. It’s like picking the perfect avocado at the grocery store, except with plants.
- Timing is everything, baby! Depending on the season and the growth stage of your plant, some propagation methods may work better than others. It’s like trying to make a pumpkin spice latte in the middle of summer – it’s just not going to taste the same.
- Sometimes things don’t go as planned, but don’t worry – we’ve got your back. If you run into issues like root rot or mold during propagation, don’t panic. We’ll give you the lowdown on how to troubleshoot these common problems and get your plant back on track.
- Congrats, your propagation was a success! But now what? It’s time to learn about aftercare, AKA how to keep your new plant baby happy and healthy. Read up on our monstera adansonii plant care guide to keep your new plant baby happy, healthy, and ✨ thriving ✨.
Common questions
Monstera adansonii propagation without leaves
Everyone prefers to get a little monstera cutting with a big bright leaf on it (okay, maybe just me) and that big leaf does more than just look pretty…
…it continues to absorb energy from the light to fuel new growth from the stem cutting. It’s for this reason that cuttings with leaves are far more successful than cuttings without leaves.
When you propagate swiss cheese plants, though, you inevitably end up with a tip that is all nodes and no leaves.
At the time of this writing, my monstera propagation without leaves has not rooted down yet or shown any signs of growth.
*womp womp*
How long does it take to propagate monstera?
There are a few factors that can affect how long it takes an adansonii plant to propagate. First, consider that the monstera adansonii plant is a tropical plant, hailing from Central and South America. So although it is a dutiful houseplant, it craves moisture, indirect sunlight, and lots of surface area to explore.
If you can provide these conditions, then your little monstera plant will thrive. It took my stem cuttings a few days before there were noticeable roots. The cutting in the moss started to grow a new leaf within a few days as well
Another factor is the size of the leaves. Larger leaves will be able to provide more energy to the plant, which fuels new growth. Smaller, weaker, or younger leaves will slow your monstera propagation down noticeably.
Final thoughts
So how’d you go? Which method will you try? Let me know in the comments or shoot us an email with your pictures at hello [at] theindoornursery [dot] com.
more about propagating plants
- How To Propagate Peperomia Plants 2 Ways
- How to Propagate a Split-Leaf Philodendron: Easy Step-by-Step Guide
- How to propagate swiss cheese plant (3 ways)
- How to grow pothos in water for *decades*
- diy propagation station: how to make an plant propagation station
- Tags:
- Vining

Marquis *wants* to know how to keep happy and healthy plants, but had a hard time finding information that wasn't written by just another copywriter. After nearly losing one too many plants, it was time to take matters into her own hands. A team of plant scientists and nursery hands was brought together and The Indoor Nursery was born.