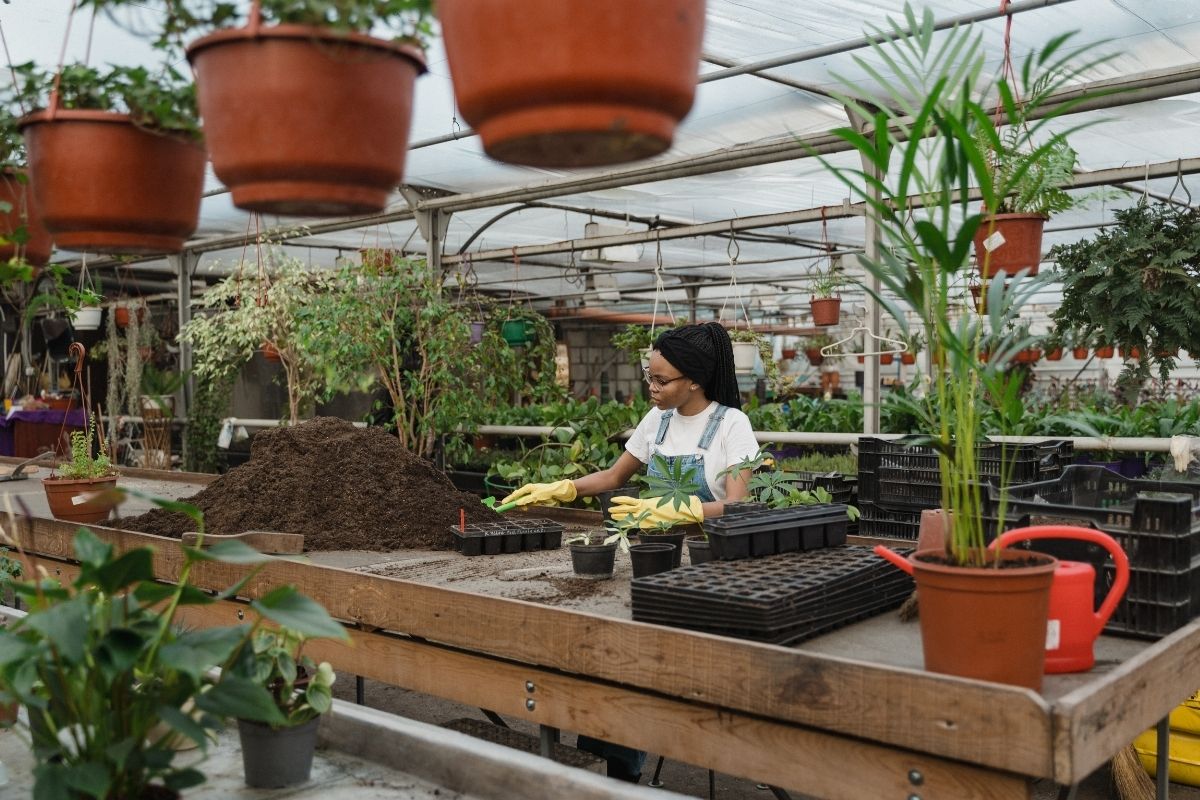
DIY plant fertilizers like homemade compost, vermicompost, and bokashi all make excellent options for keeping your indoor plants healthy, happy, and thriving. Plus, they reduce household waste, save money, and put all those nutrient-dense household scraps that usually end up in the trash to good use.
Here, I’ll explain everything you need to know about indoor plant fertilizers and break down the different ways you can make your very own ✨ homemade indoor plant fertilizer ✨.
Why Should You Make Your Own Plant Fertilizer?
There are many benefits to making your very own plant fertilizer. First, homemade plant fertilizers are very inexpensive to make. Indoor gardeners can simply use food scraps and garden waste to make high-quality fertilizers that your indoor plants will absolutely love.
For this reason, homemade plant fertilizers are great for reducing household waste. Instead of throwing away nutrient-dense components from your home, with a little know-how, you can start making great fertilizer absolutely packed full of essential trace elements and minerals in no time at all.
Another tremendous bonus of DIY plant fertilizers is that they’ll contain a diverse collection of microbes thanks to the relatively high content of organic matter. Beneficial soil microbes and mycorrhizal fungi all play a role in making DIY plant fertilizers. The organic matter that is used in this process creates conditions that these mutualistic microbes thoroughly enjoy.
As a thank you, they’ll continue to live on in the soil once you’ve applied your homemade fertilizer, benefiting the health of your indoor plants. Use this potent fertilizer to rescue yellowing plants and boost their overall wellbeing. You’ll definitely love the results!
What Goes Into Homemade Natural Fertilizers?
Fertilizer comes down to what nutrients it contains. All fertilizers will have some kind of NPK ratio. I’ve already written about this extensively so take a look at my NPK ratio guide for more details.
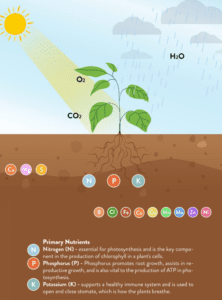
But to quickly catch you up here, NPK stands for:
- Nitrogen
- Phosphorous
- K.. potassium
Most houseplant fertilizer will have a balanced nitrogen, phosphorus, and potassium ratio unless it’s made for treating certain nutrient deficiencies. This is actually where homemade fertilizers come in real handy… you can treat deficiencies in a pinch!
Natural fertilizer will also contain a wide range of essential micronutrients, which support healthy plant growth too!
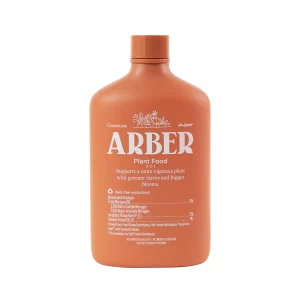
If you’re looking for an organic fertilizer that uses these same methods discussed below but is already packaged up ✨ nice and neat ✨, I reallllllly like Arber products. You can read my full review using Arber organic fertilizer to see what’s in it.
When it comes to homemade fertilizers, the ingredients are as diverse as the plants they nourish. Here are some of the most common and effective organic materials you can use to create your own indoor plant fertilizer:
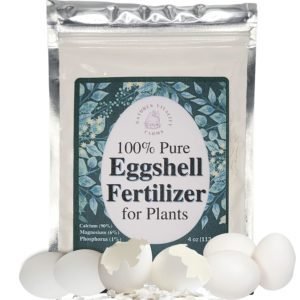
Crushed Egg Shells
Don’t throw away those egg shells after breakfast! Egg shells are rich in calcium, a nutrient that helps in cell wall development. They are most known for reducing soil acidity. If your plant’s leaves look distorted or if the tips and edges are dying, it might be a sign of calcium deficiency.
Egg shells are suitable for all plants, but they’re especially beneficial for fast-growing plants that require a lot of calcium, like tomatoes and peppers. Simply rinse, dry, and crush them into a fine powder before mixing them into your potting soil.
Banana Peels
Rich in potassium, a nutrient that aids in water and nutrient movement in plants, banana peels are a great addition to your homemade fertilizer. You can either chop them up and mix them directly into the soil or soak them in water to create a nutrient-rich “banana tea” for your plants.
If your plant’s older leaves are yellowing and its growth is stunted, it might need more potassium. Banana peels are great for flowering plants, like roses, as potassium also helps with blooming.
Used Coffee Grounds
If you’re a coffee drinker, your plants will love you for it. Coffee grounds are a good source of nitrogen, which is essential for leaf and stem growth. Just make sure to let the coffee grounds dry out before adding them to your soil to prevent mold growth.
If your plant’s leaves are yellowing, starting with the older leaves, it might be nitrogen deficient. Coffee grounds are particularly beneficial for leafy plants and plants that love acidic soil, like azaleas and blueberries.
Green Tea
Believe it or not, your plants might enjoy a cup of tea as much as you do. Green tea can help acidify the soil, making it perfect for plants that prefer a lower pH, such as acid-loving plants like azaleas, ferns, and rhododendrons. If your plant’s leaves are yellowing between the veins, it might be a sign of iron deficiency, which can be caused by high soil pH.
Molasses
This sweet syrup isn’t just for baking. Molasses is packed with macronutrients like carbon, iron, and sulfur, making it a great addition to your homemade fertilizer. If your plant’s new growth is pale or the plant is growing slowly, it might need more sulfur. Molasses is suitable for all plants, but it’s especially beneficial for plants grown in containers where nutrient depletion can be a problem.
Epsom Salt
Epsom salts are high in magnesium, which is crucial for photosynthesis. Just be careful not to overdo it, as too much magnesium can harm your plants. If your plant’s leaves are yellowing between the veins, it might be magnesium deficient. Epsom salt is particularly beneficial for green, leafy plants like spinach and Swiss chard.
Wood Ashes
If you have a fireplace or fire pit, don’t let those ashes go to waste. Wood ashes can help increase the alkalinity of your soil, making them a great addition for plants that prefer a higher pH, like asparagus and beetroot. If your plant’s leaves are yellowing at the edges, it might be a sign of potassium deficiency, which wood ashes can help address by making the nutrient easier to absorb.
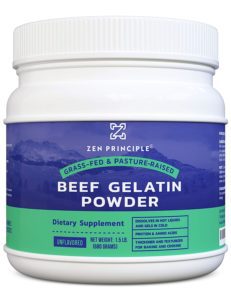
Gelatin Powder
This common baking ingredient is a surprising source of nitrogen. Dissolve a packet in water and use it to water your plants for a quick nitrogen boost.
If your plant’s older leaves are yellowing and falling off, it might be nitrogen deficient. Gelatin is suitable for all plants, but it’s especially beneficial for leafy plants like lettuce and spinach.
Used Cooking Water
Next time you boil vegetables or pasta, don’t pour the water down the drain. It’s full of essential nutrients that your plants will love. Just make sure to let it cool before watering your plants with it.
Cooking water contains various nutrients, depending on what was cooked in it. If your plant’s growth is slow or the leaves are pale, it might need a general nutrient boost. Cooking water is suitable for all plants, but it’s especially beneficial for container plants where nutrients can quickly become depleted.
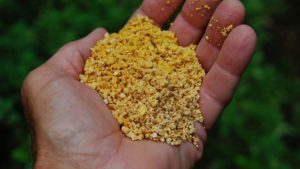
Corn Gluten Meal
This byproduct of corn processing is high in nitrogen, making it a great addition to your homemade fertilizer. Just be sure to use it sparingly, as too much nitrogen can harm your plants. If your plant’s older leaves are yellowing and falling off, it might be nitrogen deficient. Corn gluten meal is suitable for all plants, but it’s especially beneficial for leafy plants like lettuce and spinach.
PRO TIP: Remember, the key to a successful homemade fertilizer is balance. Each of these ingredients offers different benefits, so try a mix of them to see what your plants respond to best.
Now, these are the ingredients used to make your own fertilizer BUT you can’t just throw them on the soil surface. You need to let them break down into an absorbable dose, which is done through one of these methods below.
How To Make Your Own DIY Houseplant Fertilizer
Making natural fertilizers is A LOT of fun (okay just for me?!). My favorite way is with a worm composting bin because worms are fun and they break down the food waste quicker than composting alone.
There are several methods that you can use to make natural fertilizer from the kitchen waste, fruit, and vegetable scraps that you’d otherwise throw into the trash. I’ll briefly list the different techniques and the equipment you’ll need below, and you can pick your poison.
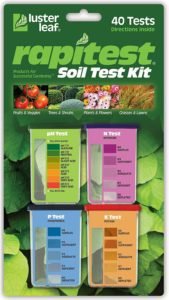
Just a warning before we get into it, always test your soil to get a better understanding of your plant’s needs. You can easily overfertilize with organic materials since they’re so “green” and raw. Letting your food scraps break down fully is extremely important as well as testing soil pH and nutrient levels.
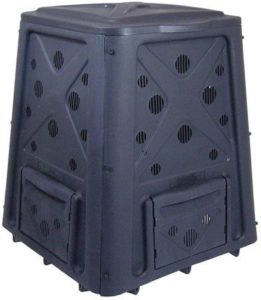
Compost bin
No matter if you have a large indoor collection or wish to fertilize your whole garden, the king of all homemade fertilizers has to be the good old trusty compost bin. Anything from grass clippings to fresh manure, to eggshells, coffee grounds, fireplace ash, or any other organic matter will do just fine in a compost bin.
With a compost bin, you can quickly and easily start your own compost pile. Compost is great for decreasing methane production, a by-product of landfill, and instead terrific at producing humus – a great addition to potting soil.
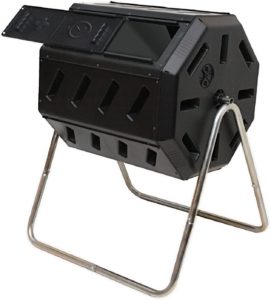
What you’ll need
- Compost bin
- compost starter (unnecessary but it will speed things up)
- If it isn’t a tumbler bin, something to turn the compost with (a shovel or pitchfork will do the job)
- Start your composting process on the bare ground. To encourage worms, other garden invertebrates, and soil borne microorganisms to take advantage of your new compost, it’s best to start it on bare earth. That way, they can wiggle and squirm their way up into all the juicy food scraps you have waiting for them.
- Next, place a layer of brown (carbon). Start your compost by making the first layer a base of straw, cardboard, leaf matter, or twigs and sticks.
- Alternate the layering. On top of your brown, add a green layer (nitrogen) of organic matter like food scraps, fresh garden prunings, or grass clippings. Then alternate back to brown, then green, then brown, and so on. By doing this, you’ll ensure you are getting an equal amount of both carbon and nitrogen in your compost. Too much either way and the compost won’t be as effective.
- Keep compost moist. Compost requires the addition of water. Not too much, just enough to keep things ticking along and decomposing nicely. You can either water it yourself or allow nature to do the hard work by opening the compost bin’s lid when it’s raining.
- Keep compost covered. When the compost is not in use or you’re not adding water, be sure to keep it covered. This will both prevent it from becoming too wet from heavy rain but also ensure that adequate amounts of warmth are trapped within the center of the compost. Compost requires heat to decompose at a fast rate. So the hotter it becomes, the quicker you’ll be able to apply it to your plants.
- Turn your compost. If you aren’t using a tumbling composting bin, you’ll have to turn it every 2-4 weeks. A shovel or pitchfork will do the trick. Simply pull the compost bin off the compost pile, move it to another location nearby, and shovel the pile back into the bin. If you don’t turn your compost, it will become anaerobic (meaning, not aerated or under conditions with little to no oxygen and airflow). Sure, compost will still decompose under anaerobic conditions, but it will be much, much faster if it gets the odd turn.
- Go forth and fertilize. Depending on the size of your compost bin, what went into it, and how often you turn it, a compost can take anywhere between a few months to up to a year or so before it’s ready. Using compost too early, something referred to as “green compost”, could harm your plants. So be sure to allow the compost to break down. Compost is ready when it acts like soil. It should be a rich brown color, smell like earth, and crumble in your hand.
Our experience: Having a compost bin was great for reusing food scraps. Rich earthy soil definitely came out the other end, but it took a very long time to get started. This is a long process so likely isn’t good for anyone who is transient or renting a small space.
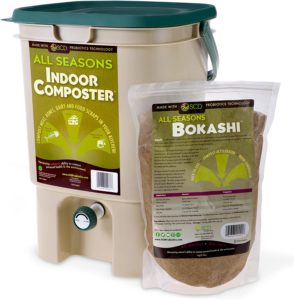
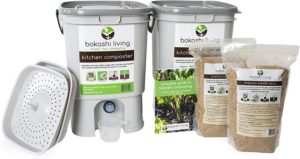
Homemade fertilizer without ammonia – Bokashi
Bokashi is a great way to make your very own fertilizer without ammonia. Ammonia within the soil captures and binds airborne nitrogen, making it available to plants. As important as ammonia is in fertilizer, some indoor gardeners wish to avoid the synthetic ammonia that is added to chemical fertilizers and, instead, recruit the help of microorganisms to produce it naturally.
Bokashi is a Japanese term that translates to “fermented organic matter” and is typically referred to as a bokashi bin. Bokashi bins are composting bins that make use of anaerobic bacteria which break down food scraps and other organic waste.
The process only takes a week or two before the bokashi will start producing bokashi juice, a homemade liquid fertilizer tea that can be used on indoor plants. The remaining organic matter can then be added to a compost pile or thrown into the trash.
What you’ll need
- Bokashi bin
- Liquid bokashi spray or compost starter
- Fruit and vegetable scraps
Process:
- Purchase a bokashi bin with a bokashi starter. Unlike benchtop compost bins, bokashi bins have been designed purposefully for brewing bokashi. Bokashi bins have a specialized grate nestled within them that gives room for decomposing banana peels and other kitchen scraps to release their juicy goodness. These bins also have a tap located that is used to drain this bokashi juice.
- Use the liquid spray or compost starter. A bokashi kit will also come with either a liquid spray or compost starter. Both contain microbes that help the decomposition process and get your scraps to release their trace minerals and essential nutrients quickly. Either spray or sprinkle the liquid or starter on regularly. You can apply these inoculants every two-three days or once a week, depending on how often you are adding food scraps.
- Allow your bokashi bin to do its thing. Once your bin is full, allow it to sit for a round two weeks. This will give the microorganisms enough time to do their work.
- Start using your new homemade fertilizer. Once the bokashi has sat for two weeks, you can drain the juice using the tap and empty the food scraps into a compost bin or straight into a hole in your outdoor garden. If you’re applying straight to the soil, bokashi juice should be diluted to a ratio of around 100:1. Although if you’re applying it as a foliar spray, a 500:1 ratio is used.
Our experience: We were So excited to try the Bokashi, which was first recommended to us by our neighbors. When used correctly, the potent juice can be used as fertilizer on your plants. The part that I didn’t anticipate was all of the compost leftover afterward from inside the bin. We ended up tossing it into our compost bin anyway since it was still too green to use directly on plants. I suggest getting a decomposing station to let the compost continue to break down into soil over time until it resembles, well, soil. Either that, or make compost tea with it, as described later on in this post.
Worm farm
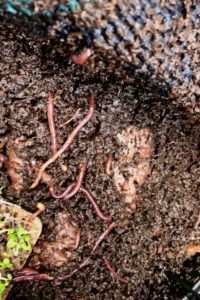
Worm farms are a kind of mixture between a composting set up and a bokashi bin. A worm farm is a composting system used to cultivate earthworms to produce vermicompost, a nutrient-rich organic fertilizer. In this system the worms eat organic waste, which is broken down by bacteria in their gut to create a nutrient-rich, low odor compost.
Worms also produce a liquid called worm juice. Worm juice can be used just like bokashi juice, as a liquid fertilizer. I wouldn’t recommend using that, though, because it can be quite strong and cause more harm than good. Stick with the worm castings instead.
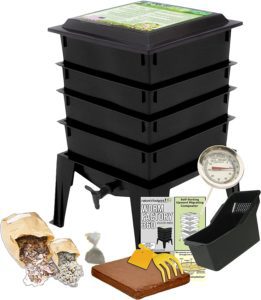
What you’ll need
- Compost worms
- A worm farm
- Damp cardboard, newspaper, or coconut coir
- A piece of hessian sack or a whole newspaper
- Fruit and vegetable scraps
Process:
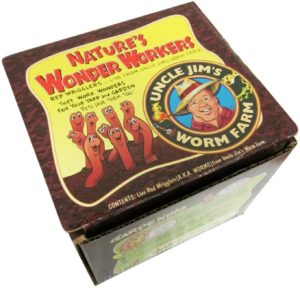
- Buy yourself a worm farm kit. Your best bet when starting a worm farm is to buy a specialized worm farm kit. A worm farm kit will come with a specialized worm farm container or bin that has interchangeable layers and a tap at the bottom. The kit will also come with composting worms. These little guys are smaller than their vegetable garden brothers and sisters. They are also a bright pinky-red color rather than the brownish red that your regular vegetable garden worms are.
- Set up your worm farm. Add a layer of worm bedding. First up, take the base of the worm farm and place the first story on top. Now, grab your worm bedding, a bunch of damp cardboard, newspaper, or coconut coir, and layer it across the bottom of the first story.
- Add some food scraps. Next, add a small number of kitchen scraps. Don’t completely fill the entire story up, just one corner. Maybe 1/4 or 1/5 of the space that is available. This will give your compost worms a chance to move about and not be completely covered by scraps, something that they aren’t particularly fond of to begin with.
- Add your compost worms. Gently pour your worms into the worm farm, being careful not to damage their sensitive little bodies. You can place them away from the food scraps. They’ll smell them out when they’re hungry and move their way over to it when they’re ready.
- Apply your worm blanket. Worms like to be tucked in. Most worm farm kits will come with a piece of hessian sack. If not, no biggy. You can always use another layer of newspaper.
- Take the remaining worm farm storys and place them on top. Depending if your worm farm has additional storys, take them and place them on top of the bottom story where your worms are housed.
- Take advantage of the labor of your squirmy friends. Your worms will soon begin to munch away at the food scraps you feed them and quickly create a soil-like material that they’ll enjoy living in. Keep adding scraps and building out the first layer. Once it’s relatively full, start adding food scraps to the upper layers. They’ll make their way up there when they are ready and begin feeding. In only a couple of weeks, you’ll have worm juice that’s ready to use. And in only a short period after that, you’ll have fresh vermicompost that you can start adding to your potting soils.
Our experience: This is by far our favorite way to fertilize plants. The worms turn food scraps into what is basically fresh soil within a matter of weeks. Plus, it’s kind of like having pets. They grow on you and you start getting excited about feeding them little treats.
Easy homemade fertilizer – Compost Tea
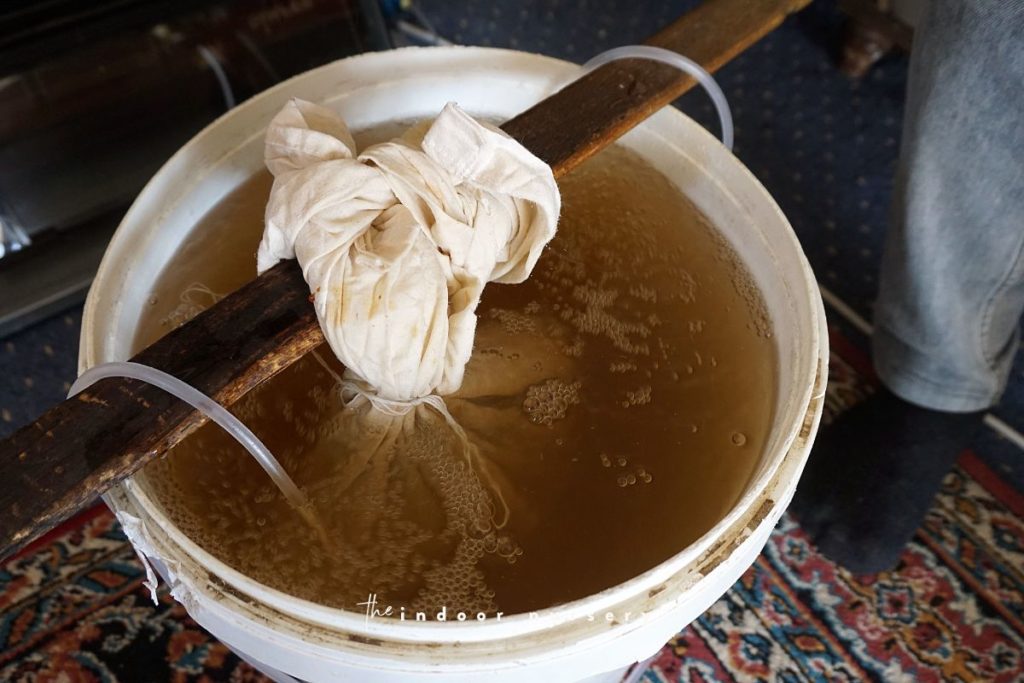
Compost tea is an organic liquid fertilizer that is created by adding compost to cold water, letting it steep for a few days, and then filtering out the solids. The liquid creates a nutrient rich solution that can be sprayed on areas of plant life or poured around root zones.
Compost tea is a natural fertilizer made using compost, water and a natural culture of microbes – similar to how bokashi is made. The microbes used for this fertilizer are bacteria, protozoa, and fungi, which can be bought or made at home.
Compost tea is created by combining water with compost, but the mixture also needs to include an inoculant and a source of aeration. Compost tea provides the same benefits as compost but with additional microbial components to help improve soil quality.
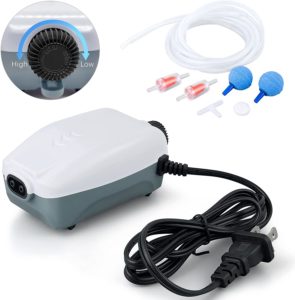
What you’ll need
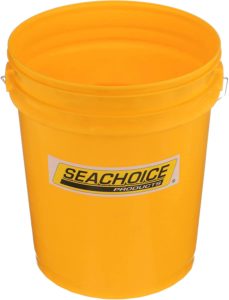
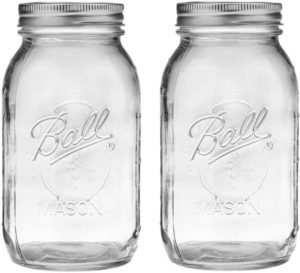
- 5-gallon bucket or similar large container (if you’d like to make a small batch, a large glass jar will do the trick)
- Non-chlorinated water (rainwater works best)
- 1-2 cups of bacterial inoculant (a handful of compost or vermicompost will do the job)
- A handful of garden soil (optional, but garden soil will add beneficial soil borne microbes)
- An aquarium aerator
- Seaweed fertilizer or extract (available from any good gardening center)
Process:
- Collect your brewing ingredients. Compost teas are typically created with kitchen scraps like banana peels, garden soil, finished compost, shredded paper, animal manure, and tea bags. So start collecting, as you’re going to need them to make your brew. A bacterial inoculant like garden soil, compost, or vermicompost will be the catalyst your compost tea needs to start its fermentation process.
- Fill your container with cold water. Once you’ve got all your brewing ingredients ready to go, it’s time to fill your container with cold water. If the weather has been dry where you’re living or you’d prefer not to collect rainwater, simply let a bucket of tap water to sit for a few days. This will allow many of the toxins like chlorine to release. Chlorine kills beneficial microorganisms that your compost tea will need to brew properly.
- Place your brewing ingredients in the water. Either place the brewing ingredients straight into the water or place them in some sort of satchel, like a large cloth bag. If you opt to put the scraps straight into the water, you’ll just need to strain it before using it on your plants.
- Set up your aquarium pump. The final step, place your aquarium pump into the container and kick off the brewing process. The air pump will aerate the water and keep your little microbe friends fed with oxygen.
- Sit back and wait. Now, all there is left to do is to wait 24 hours for tea to do its thing. The finished product should look like a rich, foamy brew. The foam indicates that all the nutrients and beneficial microbes are ready to do their magic for your indoor plants.
Aquarium water
This one is pretty self explanatory. If you have a freshwater fish tank set up, when you change the water be sure to use it on your houseplants.
Aquarium water can be used as a plant fertilizer, as it contains nitrates and phosphates, two of the most important nutrients for plant growth. The chemicals in the tank, usually from fish waste and leftover food, can act as an organic fertilizer that helps plant growth.
Waste materials from the plant roots – mainly nitrogen and phosphorus – are taken up by the fish, which convert it to ammonia and nitrite. These waste products are then converted to nitrate by bacteria living in the tank, which is available to plants.
Aquarium water is also good for plants because it removes toxins like chlorine and ammonia.
Common Mistakes to Avoid
When it comes to fertilizing your indoor plants, there are a few common mistakes that many plant owners make. Avoiding these pitfalls will help your plants thrive and grow in a healthy manner.
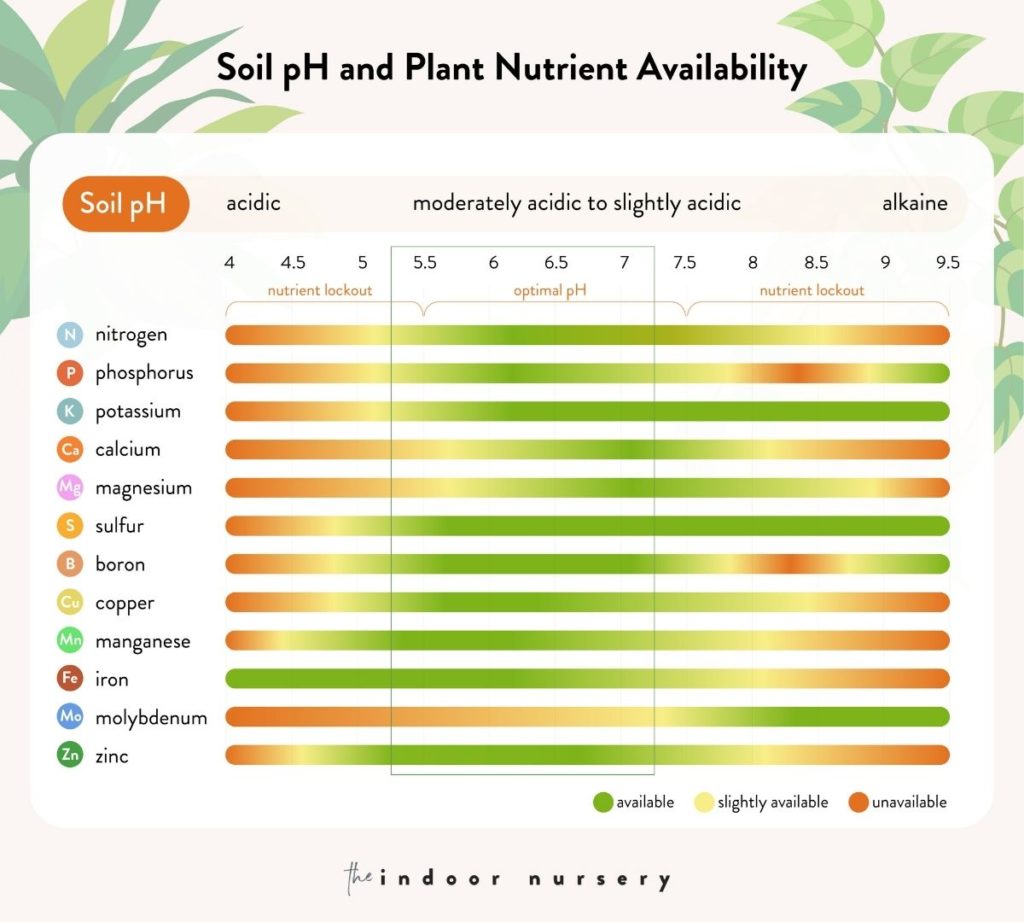
You’ll want to get to know your plants, the type of soil pH they prefer, which nutrients that need the most, and alllllll those details. Generally speaking, a soil pH in the range of 5.5 to 7 is ideal for most plants.
Things to watch out for
If you’re overfertilizing, your indoor plants are sure to let you know. Some signs of overfertilization include:
- Yellowing and wilting of a plant’s lower leaves.
- Browning of a plant’s leaf margins and tips.
- Dropping leaves or defoliation.
- Deformities like leaves curling or growing in strange, irregular shapes.
- Death of seedlings.
In addition to these signs, here are some other common mistakes to avoid:
- Using the Wrong Type of Fertilizer: Not all fertilizers are created equal. Some are specifically designed for certain types of plants. Using the wrong type can lead to nutrient imbalances, which can harm your plants. Always make sure to use a fertilizer that is suitable for your specific indoor plants.
- Overusing Fertilizer: More is not always better when it comes to fertilizing your plants. Overuse of fertilizer can lead to a buildup of salts in the soil, which can damage the plant’s roots and lead to leaf burn. Always follow the recommended dosage on the fertilizer package.
- Neglecting to Test Soil: Before applying any fertilizer, it’s important to test your soil’s pH and nutrient levels. This will help you understand what your plants need and prevent you from over-fertilizing or applying the wrong nutrients.
- Ignoring the Importance of Water: Water plays a crucial role in helping plants absorb the nutrients from the fertilizer. Without adequate water, the nutrients will not be properly absorbed, leading to nutrient deficiencies. Always water your plants thoroughly after applying fertilizer.
- Risks of Using Worm Juice/Leachate: While worm juice or leachate can be a great organic fertilizer, it’s important to use it correctly. Overuse can lead to high levels of salts and other minerals in the soil, which can harm your plants. Additionally, if the worm juice is not properly processed, it can contain harmful pathogens. Always use worm juice that has been properly processed and diluted correctly.
Common Questions
Still have questions about natural homemade fertilizers? Good. Because I’ve overfertilized a few plants when I first started out feeding plants with my homemade compost… I wish I had asked a few more questions about how much to use and when it’s ready.
How often should you use homemade fertilizer?
It can be super easy to over fertilize indoor plants, particularly with homemade plant fertilizers that are extremely variable in the amount of nutrients they contain.
Timing (how often)
Depending on what it is you are using, it is important to get the timing of your fertilizer applications right.
- Compost. Compost can be used as both a fertilizer and a component of potting soil. It’s best to use small amounts as it can be quite strong. Ideally, compost should only be used only a couple of times a year during growth periods, like in the Spring.
- Bokashi. Bokashi juice is quite subtle when diluted correctly, so it can be used rather frequently. In fact, everytime you brew a new batch of bokashi juice you should be fairly safe applying it to the houseplants that you think could use a feed – so every 2-3 weeks.
- Worm juice and vermicompost. Diluted worm juice is very similar to bokashi juice, it can be applied fairly regularly as long as the mix isn’t too potent. Vermicompost isn’t as potent as compost but still should be used sparingly as some plants will absolutely love the added nutrients but some may find it too strong.
- Compost tea. Compost tea can be used rather similarly to worm juice. Every 2-4 weeks it can be applied, particularly during the growing season.
How much fertilizer
Be sure to dilute your worm juice, bokashi juice, and compost tea down to an appropriate ratio.
- For worm juice, that’s a 1:1 water to worm juice ratio.
- For Bokashi, that’s a 200:1 water to bokashi juice ratio.
- For compost tea, that’s a 10:1 water to compost tea ratio.
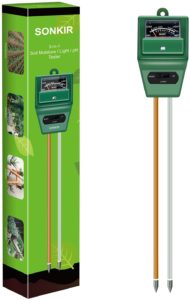
One way to ensure you aren’t over-fertilizing or even under-fertilizing is to use a soil test kit. A soil test kit will give you insight into whether or not the soil mix you are using for your indoor plants holds adequate amounts of essential nutrients.
Can I use homemade fertilizers on all types of plants?
Absolutely! One of the great things about homemade fertilizers is their versatility. They can be used on a wide range of indoor plants, from your delicate ferns to your sturdy snake plants. However, it’s important to remember that different plants have different nutritional needs.
For instance, flowering plants like African violets or orchids may benefit from a fertilizer high in phosphorus, which promotes blooming. On the other hand, foliage plants like pothos or spider plants prefer a nitrogen-rich fertilizer to support leaf growth.
That’s the beauty of making your own fertilizer – you can customize it to suit the specific needs of your plants. Just remember, when it comes to fertilizer, less is often more. It’s better to under-fertilize than over-fertilize. Always start with a small amount and see how your plant responds before adding more.
How should I store my homemade fertilizer?
Storing your homemade fertilizer correctly is crucial to maintaining its effectiveness. Most homemade fertilizers can be stored in an airtight container in a cool, dark place. This could be a pantry, a basement, or a garage, as long as it’s away from direct sunlight and extreme temperatures.
If you’ve made a liquid fertilizer, such as compost tea or aquarium water, it’s best to use it immediately for the best results. If you must store it, keep it in the fridge and use it within a week.
Remember, homemade fertilizers are organic and don’t contain the preservatives found in commercial products. This means they can spoil or lose potency over time. Always make a note of when you made the fertilizer and try to use it within a few months.
The Bottom Line
Your indoor plants will absolutely adore homemade plant fertilizers if they are made correctly. When plants are properly fertilized, it increases their resistance to diseases, helps plants grow faster, flower more vigorously and look healthier.
And really, that’s all we really want for our plant babies, isn’t it?
More about fertilizing
- 10 Best Worm Composter Bins For Easy Homemade Compost
- Compost Starter 101: When You Need It And How To Make It
- Our top pothos fertilizer picks for luscious vines
- 5 reasons to use coffee as fertilizer for your plants
- Best fertilizer for Monstera plants for gorgeous leaves
- Fertilizer Burn on Plants? Here’s How to Fix it
- Fiddle leaf fig fertilizer: How to feed your fiddle leaf

Marquis *wants* to know how to keep happy and healthy plants, but had a hard time finding information that wasn't written by just another copywriter. After nearly losing one too many plants, it was time to take matters into her own hands. A team of plant scientists and nursery hands was brought together and The Indoor Nursery was born.