I recently wrote about watering my plants while on vacation and recommended a drip irrigation system for anyone going away for more than a couple of weeks.
Because I had experience with setting up a drip irrigation system for my outdoor plants when I was living in Queensland, I knew that I could do basically the same thing in my apartment here in Mexico.
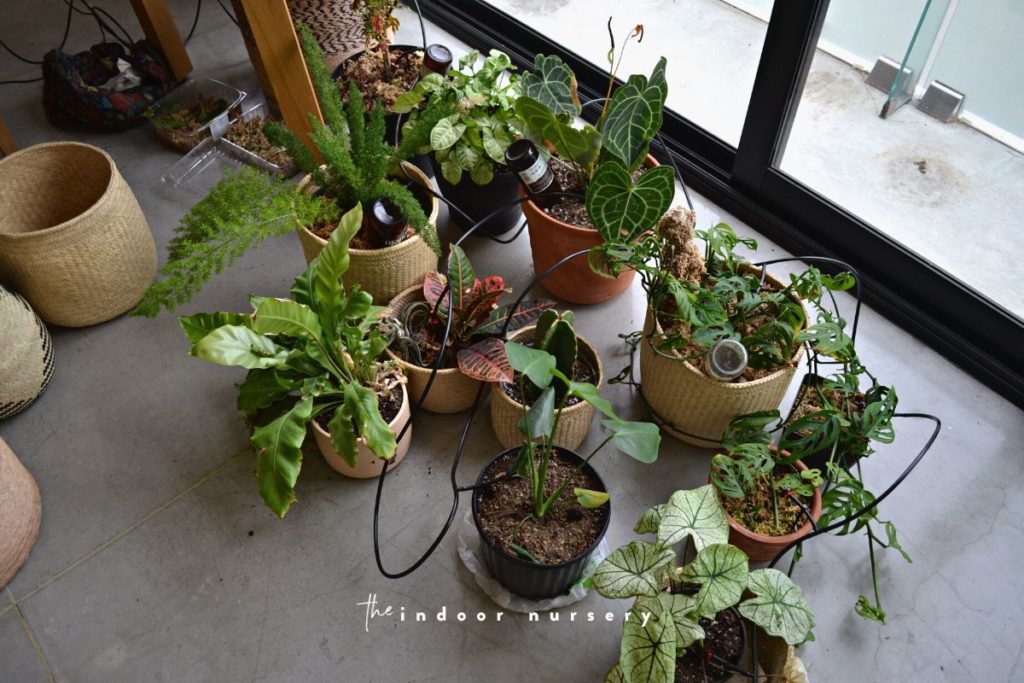
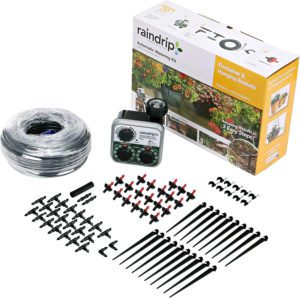
While I do have self watering planters and watering spikes, they just don’t cut it when I go on longer trips. (And watering globes don’t work at all.) I’ve just set up this nifty drip irrigation kit and am letting it run while I’m still home to see how everything works.
So far, so good.
I’ll share everything I’ve learned since using automatic watering systems and walk you through the set up.
What to know about drip watering systems
Setting up a drip system is super easy, in theory. But it definitely takes strong hands and a little patience. The patience isn’t for the setup process, that was pretty quick. Overall, it took about an hour or so to set this up for 20 plants. You’ll need patience for the unruly tubing that will make your task to deposit water directly over the plant seem like a work of art.
Here’s a rundown of what you need a heads up on before you begin:
- It requires strong hands. The drip irrigation system that I used back in Queensland was from Bunnings and was a little softer and more pliable than the supply tubing in the drip irrigation kit I use in this blog post. Cutting the tubing requires either strong hands or good garden shears.
- They can be messy. Though it is insanely convenient to automatically water your plants with an automatic watering system, it does lead to a bit of overwatering for some plants. I recommend setting your watering system up a few weeks before you leave for vacation so that you can adjust the water flow or drip heads, and add some kind of water reservoir to any of your indoor plants that release most of the water onto the ground. Something like this repotting mat would work perfectly here.
- Double check the attachments. This kit attaches to an outdoor spigot or faucet, so make sure that you have something to hook it up to. We have a spigot at our laundry room sink so we were able to attach the drip irrigation system no problem.
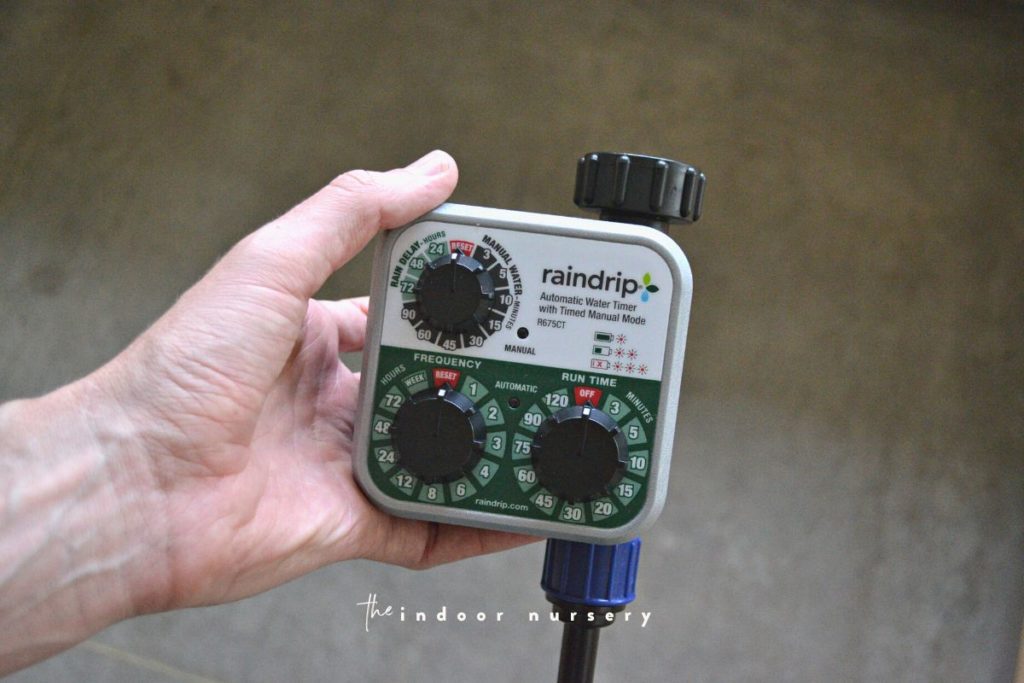
- Look for a timer system with great flexibility. The previous automatic watering system I used allowed you to customize the watering schedule down to the last second. The shortest duration for water flow for this plant watering system is three minutes; I can’t change it to water for any less than that at a time.
- It’s a great solution for dry periods. Honestly, as much as I love connecting with my indoor plants by caring for them, an automatic watering system makes life easier. So much easier. In places where there is low humidity, a drip system helps keep you from under watering your plants.
- Watering needs vary by plant. Bigger plants can handle more water and smaller plants don’t need as much. Ferns like more frequent watering and pothos can tolerate soil drying out. Keep this in mind as you’re setting up your automatic watering system. I put my ferns in self watering pots to catch any drainage, that way they can always have fresh water at hand to meet their thirsty watering needs.
How to set up an automated drip irrigation system for potted plants
The drip irrigation kit I got had three steps to it and they were easily explained right on the box it came in. If you’re not using a kit, then most watering systems for potted plants will function pretty much the same. Whatever automatic watering system you end up with, follow the directions that come with it to go along with this tutorial.
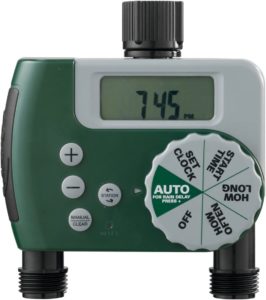
step 1: connect timer to faucet
Most indoor plant watering systems are designed to connect with common faucets, but it’s important to pay attention to what you have in your house and what your irrigation system connects to.
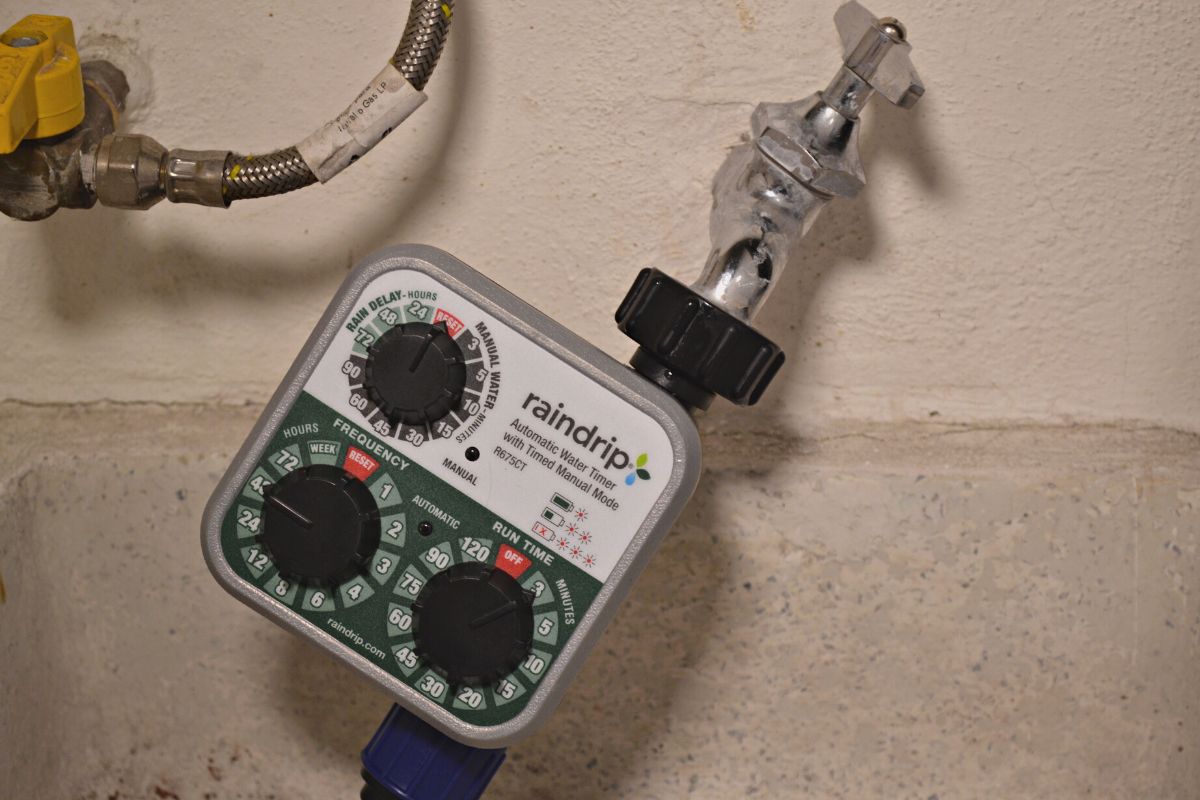
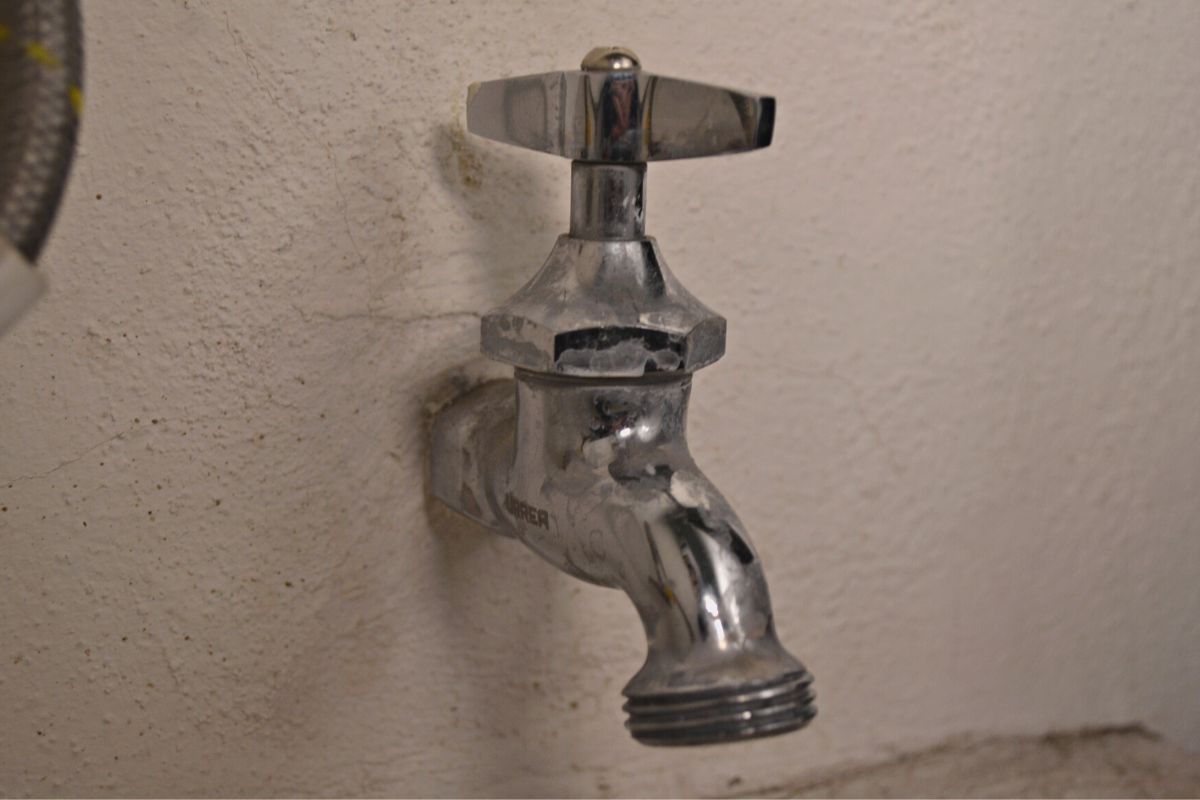
We have a faucet in our laundry room, so we connected the drip system to that. We had to turn it sideways to fit inside the sink! Alternatively, we could unscrew the faucet head on our kitchen sink to connect the timer, but we didn’t want it in the way of using the kitchen sink for, well, living.
If you don’t have a garden faucet, then you can get a faucet adapter kit.
You can set your timer either before or after connecting it to the faucet. It’s helpful to test out the self watering system on your plants while you’re home so that you can find the right set up for your climate and your plant needs.
If you’re making a DIY drip irrigation system, then you essentially follow the same steps. Follow the instructions on your faucet timer before continuing to the next step. Something like this is great because you can connect two tubes to it, allowing you to be more creative with your drip lines and reach further.
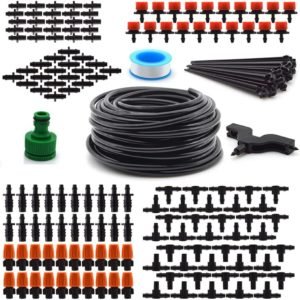
step 2: connect supply tubing to timer
The kit makes it easy to connect the supply tubing to the faucet timer; it already has the connector attached. If not, then a tubing kit like this one will connect with your faucet timer.
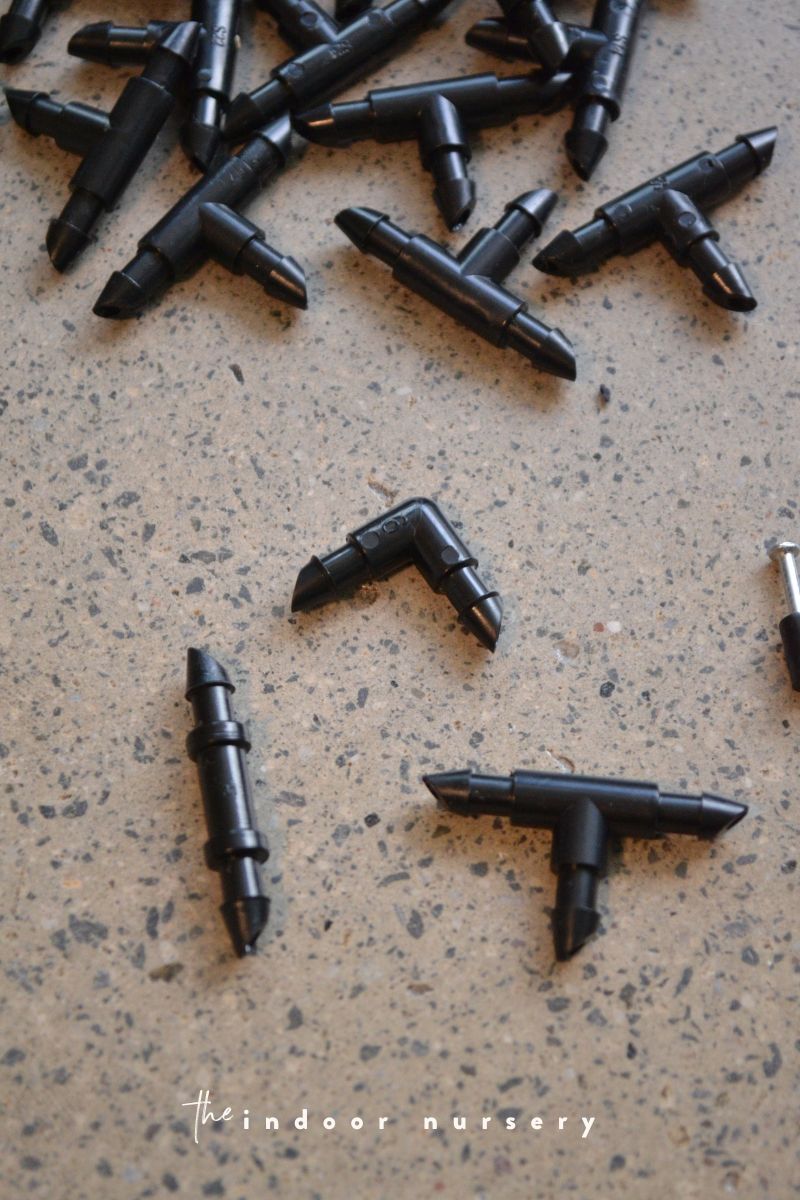
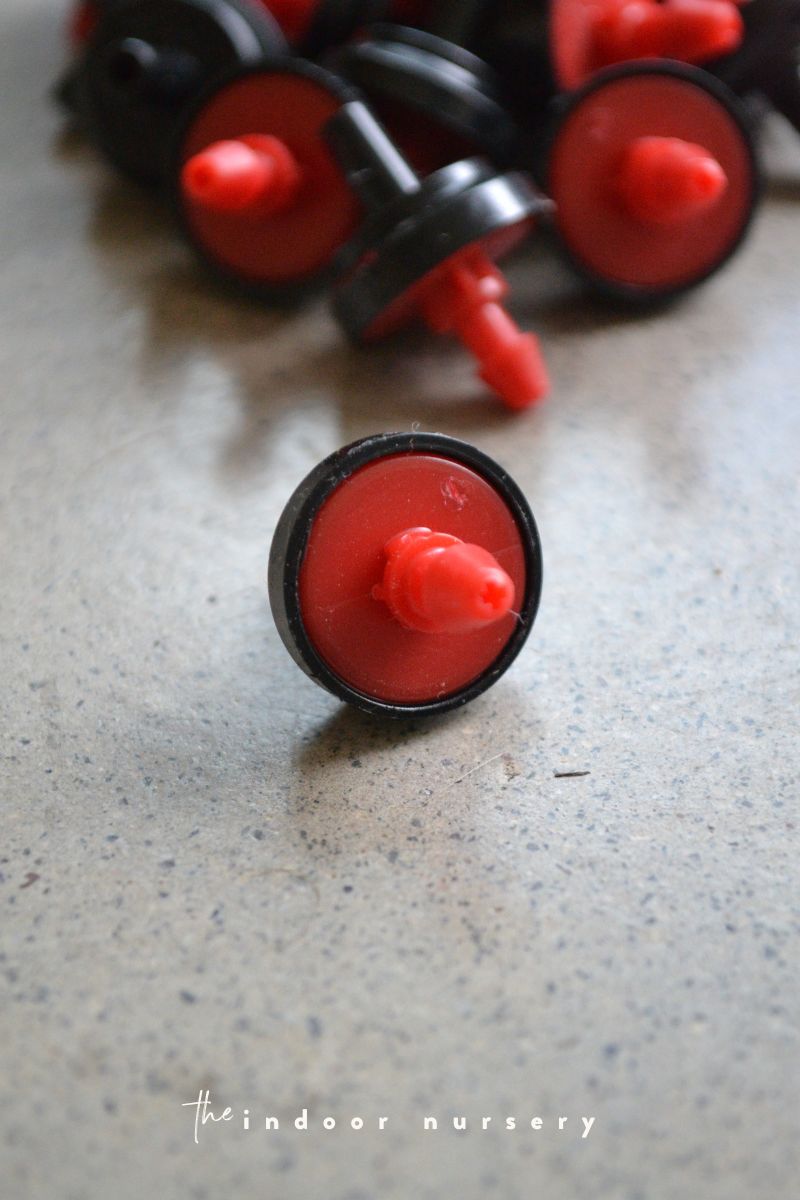
step 3: cut supply tubing at each potted plant and insert dripper
Trail your drip lines where you want them and place a drip head next to your potted plants that you’ll be watering. I like to start at the end of the tubing, farthest away from the connector, and then work my way backward. This way, I have a lot of tubing to work with if I need to change my setup in any way.

Then, follow these steps:
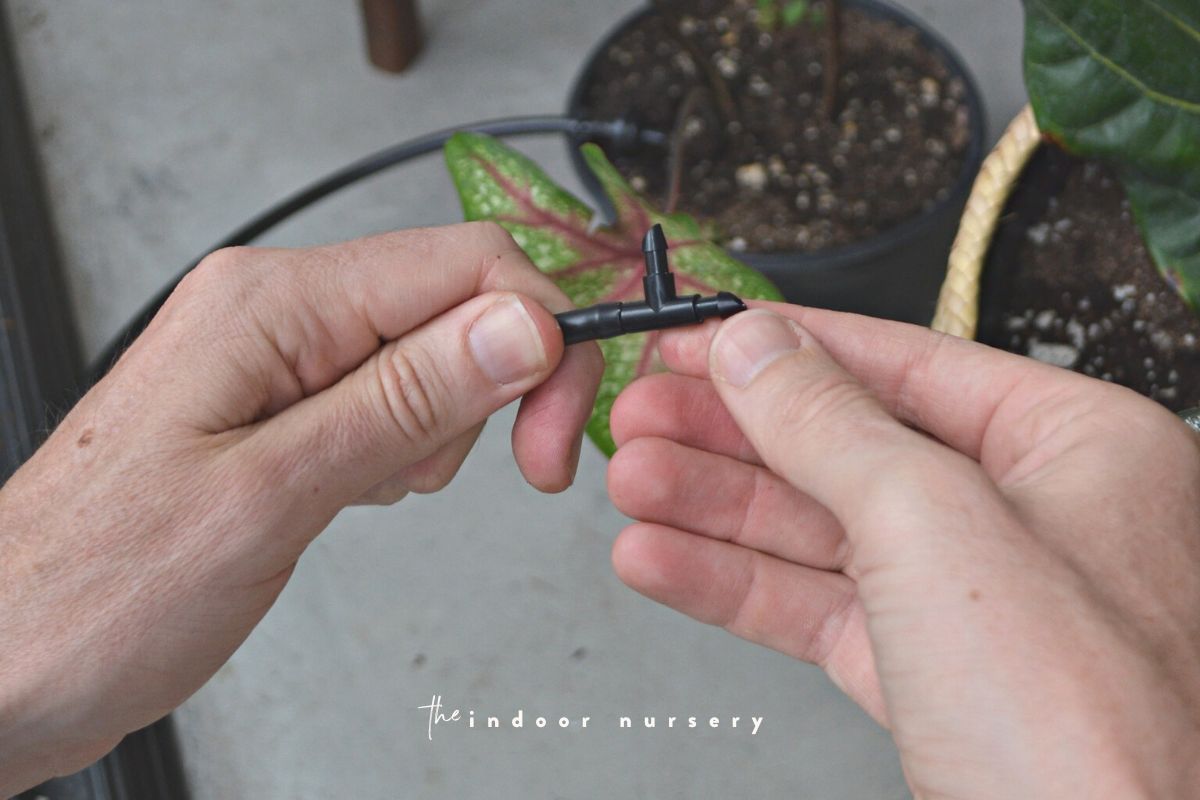
- make a cut where you want to insert the first drip head
- from the tubing ahead of your cut, cut another inch or so off; this will be used to apply the drip head
- take a “T” shaped connector and insert the cut ends of the tubing onto either end of the arms on the “T”
- insert the long end into the one-inch tubing you recently cut
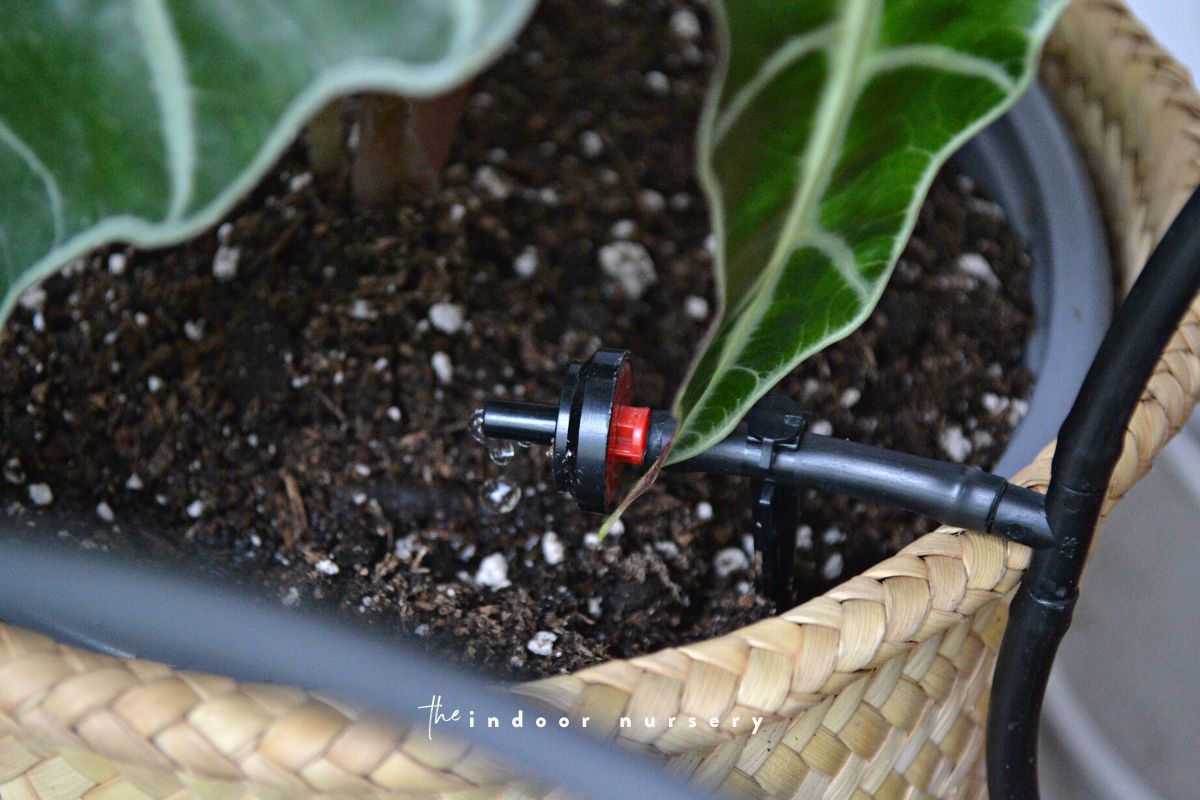
- insert the drip head on the other end of the one-inch tubing
- use a stake to hole the end in place over the potted plant
Repeat these steps for every plant you want to water with this drip irrigation system.
When it’s all set up. Do a test run and adjust the water pressure as needed. Also check that each head drips water where you’re expecting it to. You’ll also want to drop a water reservoir or repotting mat underneath any plants that spill water onto the floor.

common questions
what should I set the timer for on my automatic watering system?
I’m finding that every other day for 3 minutes is a good amount for larger potted plants but too much for smaller potted plants. I’m in a really dry climate so I try to keep the soil moist by watering the plants by hand a couple times a week. With this drip system, however, I feel that watering once a week will be plenty. I cannot stress enough how important it is to test your system for a few weeks before you leave for vacation to see how much water your plants really need.
can I attach a second kit to extend the length?
You don’t need to buy a second faucet timer to extend the length, but you can get a drip irrigation tubing kit with the connectors and stakes to attach to the end of your first kit. This is especially true for outdoor plants and gardens. I found the raindrip kit to have plenty of length but only came with 20 heads, so if you have more than 20 plants, then you’ll just need more connectors and heads. Since I’m using this while going on vacation, I put all of my plants together next to the biggest window. This made it easy to set everything up without wasting tubing length.
Just keep in mind that adding more tubing and heads requires more water pressure. You can adjust the water pressure by adjusting the tap. If you cannot get sufficient water pressure with additional tubing and heads, then you could attach a faucet splitter to your faucet and run two different irrigation kits at separate times. That way, you water all of your plants throughout the day without requiring too much water at a single time.
More about watering plants
- How Often To Water Dracaena (Including Snake Plants)
- How to Use Leca for Plants: Step-by-Step Guide with Pictures
- How To Save An Overwatered Snake Plant
- How Often To Water Pothos Plants (And When To Cut Back)
- How Often To Water Monstera Plants
- 11 Plants That Don’t Need Drainage And How To Care For Them
- Save Your Overwatered Monstera In 4 Steps (And How Not To Do It Again)

Marquis *wants* to know how to keep happy and healthy plants, but had a hard time finding information that wasn't written by just another copywriter. After nearly losing one too many plants, it was time to take matters into her own hands. A team of plant scientists and nursery hands was brought together and The Indoor Nursery was born.